• Skip to main content
  • Skip to footer

I can make metal stamped jewelry

DIY Atlas Pendants

August 21, 2024 by decey Leave a Comment

DIY Atlas Pendants

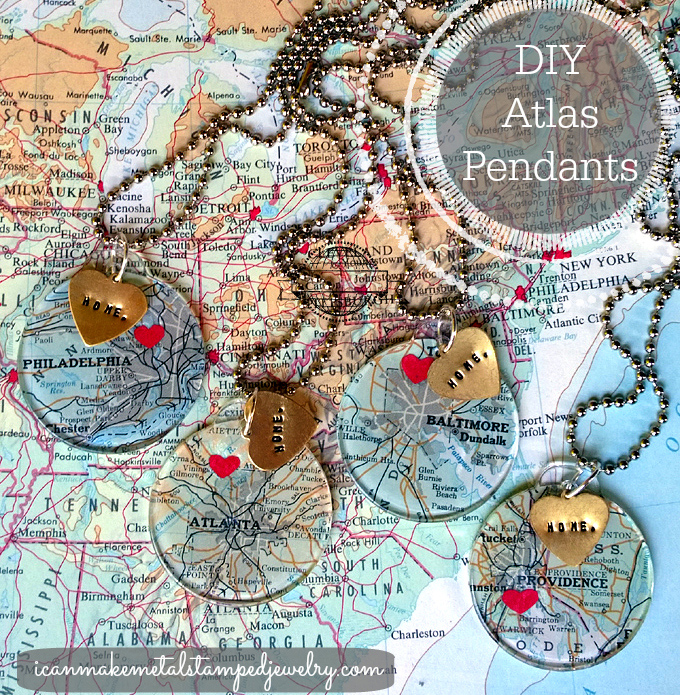
No matter where you roam, home is where your heart is. Show your love for the place you call home with these DIY Atlas Pendants. We used vintage atlas pages, you can find these at thrift stores, flea markets or yard sales. Or you could print out an image of the place you call home on a map to size. Add a stamped metal charm, tiny paper heart and some decoupage medium and you can wear your heart around your neck any time you feel a little homesick.  (Want to get started metal stamping? We’re GIVING AWAY a kit with everything you need to get started this week!)

Materials:

1.5″ acrylic circle pendant
1/5″ punched atlas page circle
Red card stock
Collage Pauge Instant Decoupage Glossy
Folk Art Enamel Acrylic Paint, Licorice
Brass Heart Stamping Blank
Beacon Zip Dry Paper Glue
Large Circle Punch
10mm Silver Tone Jump Ring
Ball Chain with Connector
1/16″ Metal Stamp Uppercase Letters
Awl
ImpressArt Brass Stamping Hammer
ImpressArt Steel Stamping Block
Impress Art Stamp Straight Tape
Toothpick
Cotton swab
Paper towel

Amazon.com Widgets

Amazon.com Widgets
Atlas Steps

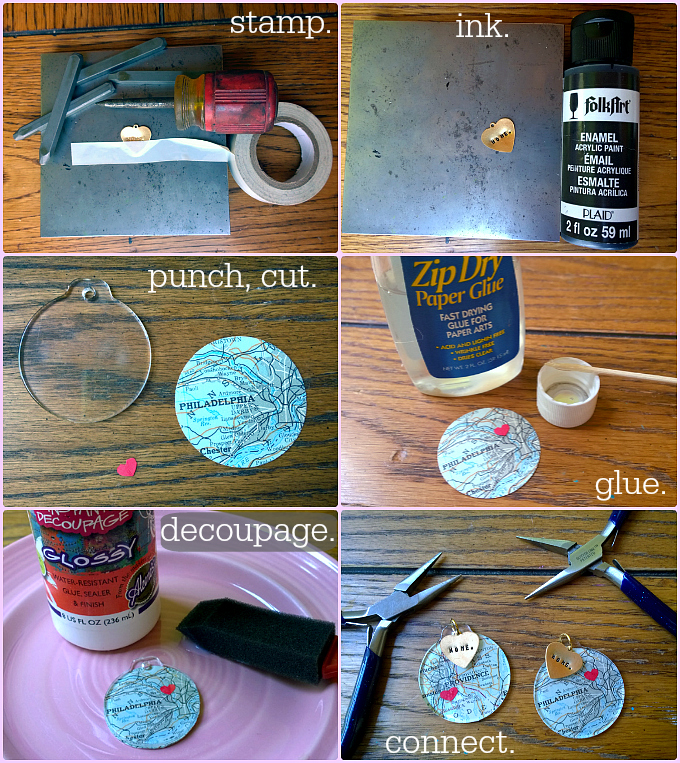
Step one: Tape your blank to your bench block. Slide stamps down to top of tape, start in center and stamp to edges. The letter ‘m’ should be in the center because you’re adding a period. Use an awl or punctuation stamp to add the period. Step two: Dab paint into letters. Let paint set for 30-40 seconds. Wipe off excess on surface. Step three: Punch or cut the atlas circle to fit pendant. Fold red card stock and use small scissors to hand cut tiny heart. Step four: Use a toothpick to apply a small dab of paper glue to back of heart. Press heart on to the area of atlas you want to highlight. Allow to dry. Step five: Add a thin layer of decoupage medium to back of pendant and front of atlas paper. Press together, gently pressing out any bubbles with fingertips. Allow to dry, paint a second coat of decoupage medium. Allow this to dry overnight. Step six: Use chain nose pliers to connect stamped pendant to acrylic pendant. Attach to your ball chain.
Atlas Model Closer Text

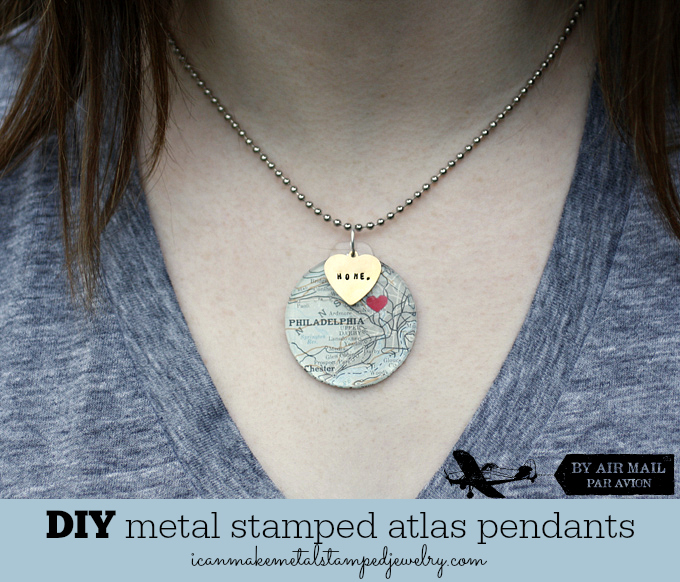
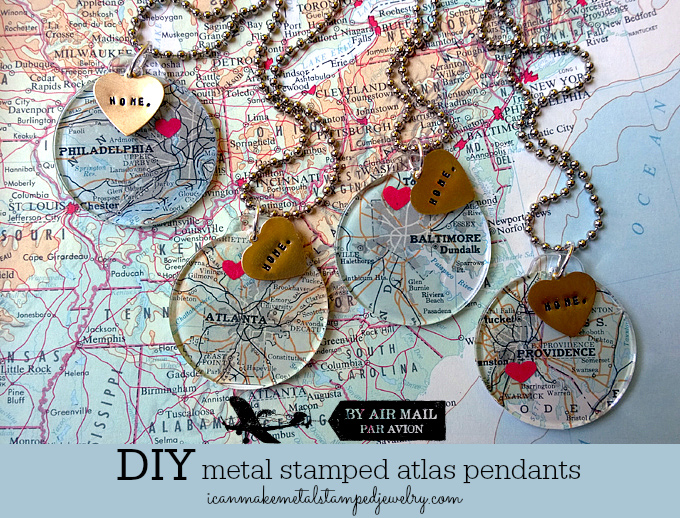
These are simple to make and fun to wear. They make fabulous gifts for students heading off to college! Make a map full of DIY Atlas Pendants for family and friends. We’d love to know where you hang your heart, tell us in the comments.
Atlas Pendants Take Two

Cheers,
Margot and Avalon
Filed Under: Diy Tagged With: atlas pendants, DIY atlas pendants, DIY hand stamped jewelry, DIY jewelry, DIY metal stamped jewelry, easy metal stamping projects, metal stamped jewelry, metal stamping basics

Introducing SoftStrike Stamping Blanks

July 25, 2024 by decey Leave a Comment

alkeme

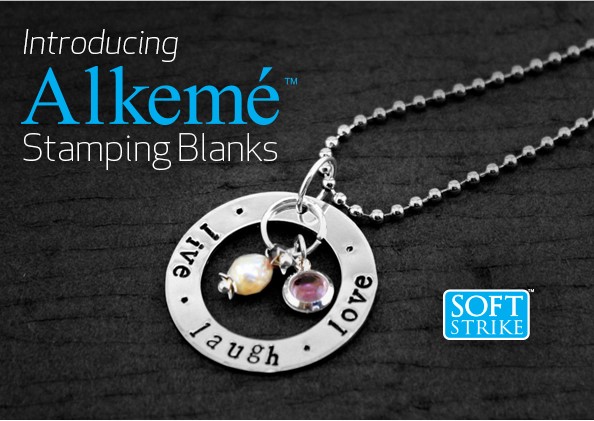
New Product Alert!  Big news for metal stampers! ImpressArt recently debuted a new metal alloy called Alkemé™ along with their fabulous cast pewter and aluminum SoftStrike™ stamping blanks at the CHA Show and the Tucson Gem Show.  People were freaking out, as well they should be, because this is a big deal.  Up until now, the affordable options for metal stamping  fell under the base metal category.  Base metal can be difficult to stamp consistently.  People become easily frustrated when they don’t have consistently great results.  If people are frustrated, it’s unlikely they’ll continue doing something.  Plus, making a mistake on a sterling silver blank is an expensive proposition.  The focus at ImpressArt is coming up with tools and materials that help make it easier for the novice and the metal stamping enthusiast to have consistently great results.

The pendant above is a simple stamped Alkemé washer.  I polished it with jeweler’s rouge and a flexible shaft tool.  Alkemé doesn’t tarnish, polishes to a mirror finish shine, is very affordable and stamps like buttah!  The pewter blanks have a more antique, brushed metal appearance.  They’re soft and easy to stamp, you get really deep impressions with a single tap of the hammer.  I love them both for different reasons.  If you’re just starting out, I recommend aluminum, the most affordable option.  It’s perfect for practice and can be hammered, dapped and formed with ease, plus it comes in over 100 different shapes!

Look for the new ImpressArt SoftStrike stamping blanks online and in retail stores!

Cheers,
Madge

(DISCLOSURE: I am the Public Relations and Creative Director for ImpressArt metal stamps, that said, if I don’t like it, I don’t blog it.  Period.  This post contains an affiliate link, if you click on the link and buy something I get a small percentage of the sale.)

Filed Under: Diy Tagged With: alkemé, DIY metal stamped jewelry, ImpressArt, metal stamping blanks, silver alternative metal, softstrike stamping blanks

10 Minute Craft: Queen Bee Earrings

March 22, 2024 by decey Leave a Comment

Queen Bee Earrings One

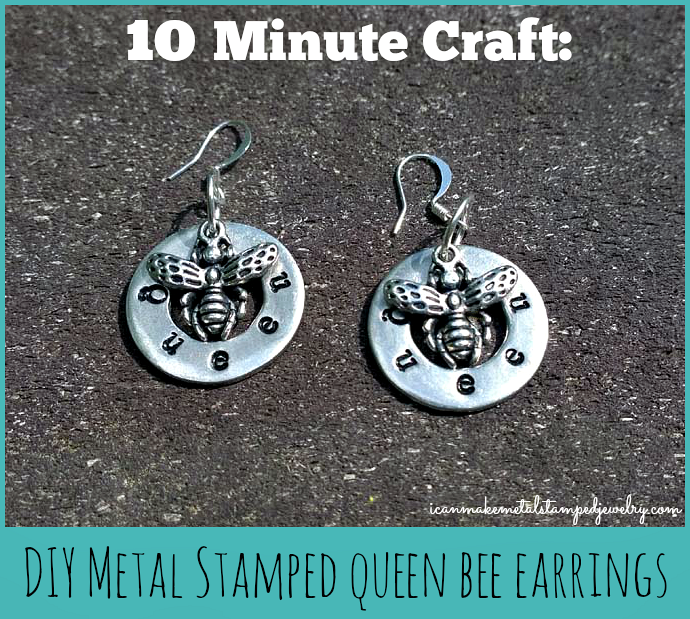
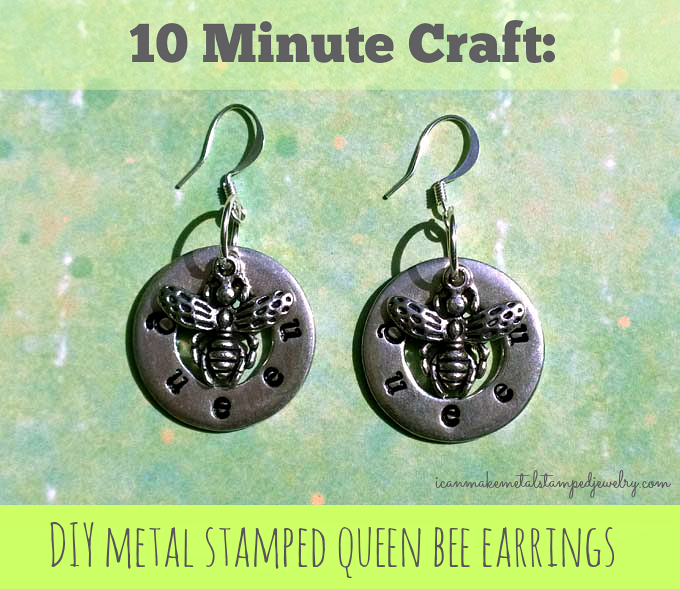
Got ten minutes? Then you’ve got enough time to make these punny earrings and show ’em who’s Queen Bee. Heck, you can make up a whole hive’s worth! In fact, you can make these Queen Bee Earrings in just three easy steps, just stamp, ink, connect and wear! Even the busiest gal has time for that. And don’t be afraid, the new Soft Strike pewter stamping blanks from ImpressArt make it easy to make a great first impression. You got this!

What you need:

2 ImpressArt Stamping Blank Washer, 15/16-Inch, Pewter
2 Fine Silver Plated Pewter Small Honey Bee Charms
2 Beadalon 10-MM Jump Ring, Silver Plated
2 Beadalon Dapped and Spring Ear Wire, Silver Plated
ImpressArt Newsprint Stamps in Lowercase and Uppercase
ImpressArt 2 by 2-Inch Steel Block
Ergo-Angle Metal Stamping Hammer
ImpressArt Stamp Straight Tape
ImpressArt Bent Nose Pliers
ImpressArt Chain Nose Pliers
Cotton swab
Paper towel

Steps 1-4

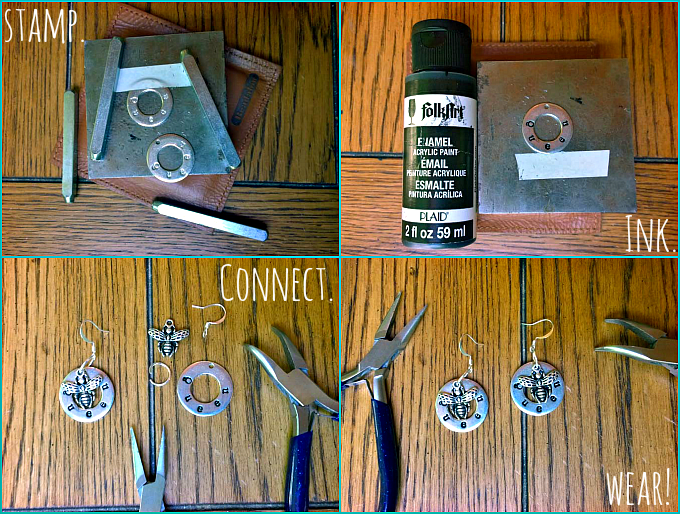
Step one: Stamp ‘Q u e e n’ on each blank. Start at the bottom center with the letter ‘e’ and work up each side, spacing your letters evenly as in photo. Step two: Use cotton swab to dab ink into letters. Wipe excess off of surface with paper towel, leaving ink in the stamped areas. Step three: Connect the washer, charm and ear wire in that order to a 10mm jump ring using the bent and chain nose pliers. You may need to gently turn the loop at the bottom of your ear wire so they hang forward. Step four: Wear them with pride because you made them!

“You can call me Queen Bee,
and baby I’ll rule, I’ll rule,
let me live that fantasy.”
Lorde

Queen Bee Earrings Three

These Queen Bee Earrings would make a lovely Mother’s Day gift too, I’m just sayin’.

Cheers,
Madge

*DIY Project Policy: Our tutorials are meant for your creative inspiration. Feel free to make and gift or wear these designs. Please make sure that you give credit to us as the designer if you make and share these designs on your blog or social sites. Please do not make and sell copies of our designs or sell them as kits. Please do not teach these designs as classes for profit. This is how we make our living and we ask that you respect our creativity and the time it takes to design, photograph and write these free tutorials. You may use a single photograph from each project online in blog round-ups or blog posts ONLY if you include a direct link back to our tutorial. Any use of these designs for retail sale for profit online in places like Etsy or eBay or in retail bricks and mortar, flea markets or outdoor fairs is not permitted. Thank you!

(FTC DISCLOSURE: *This post contains affiliate links, if you click on a link and make a purchase we get a small percentage of the sale. The blogger is employed by ImpressArt, but this is her personal blog. All opinions are 100% her own!)

Filed Under: Diy Tagged With: 10 minute craft, 10 minute crafts, DIY hand stamped earrings, DIY hand stamped jewelry, DIY jewelry, DIY metal stamped jewelry, easy metal stamping projects, get started metal stamping, how to make metal stamped jewelry, metal stamped jewelry, metal stamping 101, metal stamping basics, ten minute craft

Metal Stamped Cupcake Necklace

February 27, 2024 by decey Leave a Comment

Cupcake two

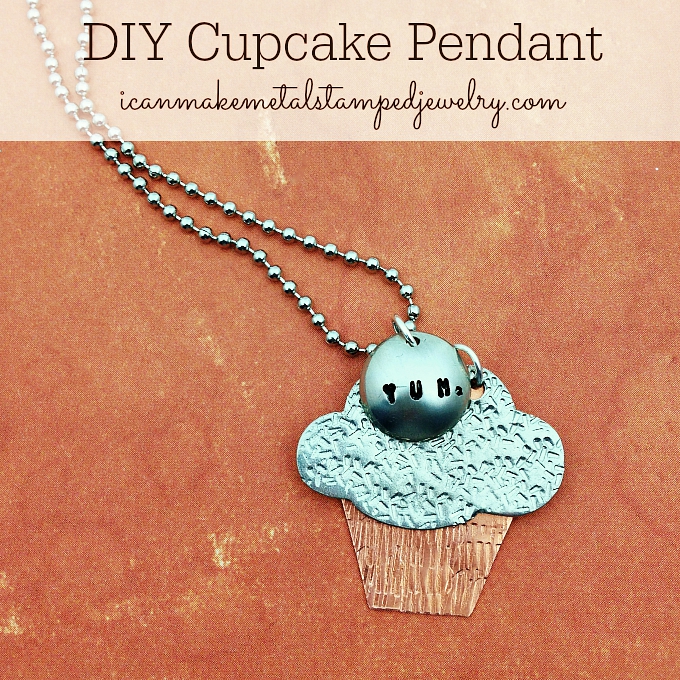
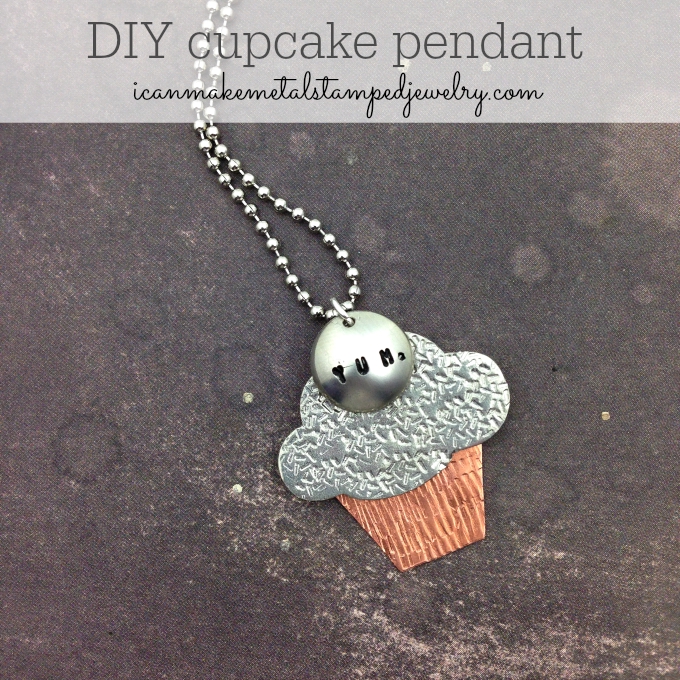
We’re big fans of cupcakes, because, well, cupcakes. Need we explain further? This cloud blank from ImpressArt has a lot of potential beyond being a cloud! It makes the perfect frosting for a metal stamped cupcake or the ice cream topper on a waffle cone or maybe a fun hairdo! Some of our best designs come from ‘seeing’ things differently. You could rivet these components together, but we love the kinetic movement achieved by layering them. Try making the sprinkles different colors with enamel paints or color the icing with patinas. we like it just as it is, simply striking. Pardon the pun. If you’d like to make a Metal Stamped Cupcake Necklace of your own, grab the instructions!

You will need (These are affiliate links, if you click on a link and make a purchase, we get a small percentage of the sale):
ImpressArt, Circle, 1/2″, Aluminum Stamping Blanks- 24 pc.
ImpressArt- Pewter Stamping Blanks, Cloud
Copper 24 Gauge Sheet – 6″ x 6″
4 Beadalon Jump Ring 6mm Silver, Plated, 50-Piece
Ball Chain with Connector
Folk Art Enamel Acrylic Paint, Licorice
ImpressArt- 6mm Sprinkle Pattern Metal Stamp
ImpressArt 6mm, Vertical Lines Metal Stamp
ImpressArt Basic Metal Stamp Set, Uppercase, 1.5mm
ImpressArt Stamping Hammer, 1-Pound, Brass Metal
ImpressArt 4 by 4-Inch Steel Block, Large
Beadalon Leather Pad For Block and Anvil
2 pairs ImpressArt Jewelry Making Tools – Pliers and Stamping Hammers – Perfect for custom designed metal and bead jewelry
Metal Cutting Shears
Beadsmith Metal Hole Punch Pliers for Sheet Metal, 1.5mm
Eurotool Metalwork Deluxe Dapping Set Block With 24 Punches
Stanley 69-122 6-1/16-Inch Wood Handle Scratch Awl
ImpressArt Stamp Straight Tape
Non-permanent marker
Cotton swab
Paper towel or soft cloth

Cupcake 1-4

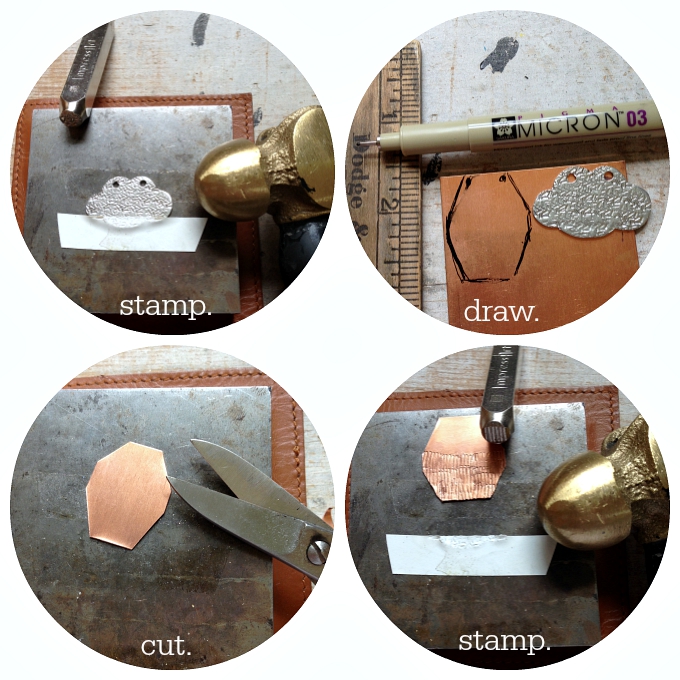
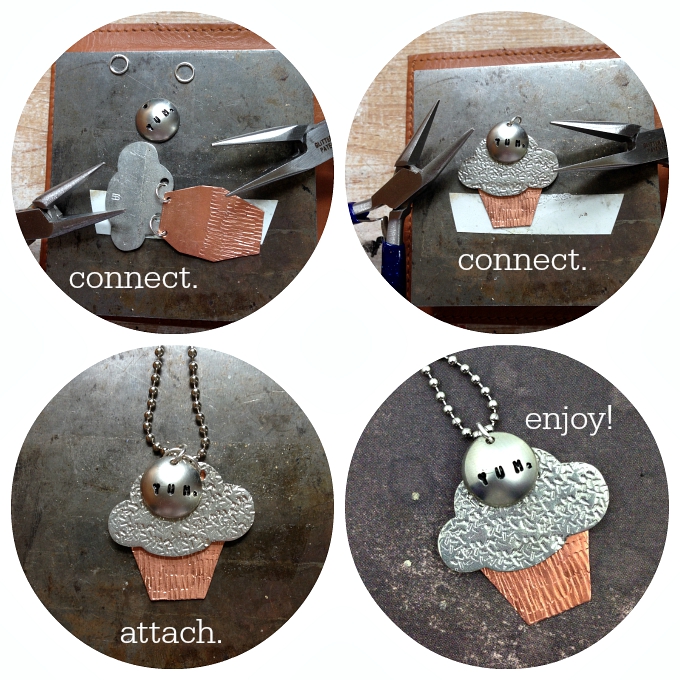
Step one: Tape blank to bench block. Use sprinkles stamp to add texture to surface of blank. Step two: The bottom part of your cupcake is layered behind the cloud blank. Use the blank as a guide and draw the cupcake liner form. Step three: Cut the sheet metal with your sheers. You need it to hide behind the front blank, so after you cut the sheet metal, you may need to cut it a little more to fit. Step four: Use the line stamp to create the liner texture, this will overlap a bit and that’s okay! You’ll need to hit this pretty hard to make even impressions so don’t be shy!

cupcake 5-8

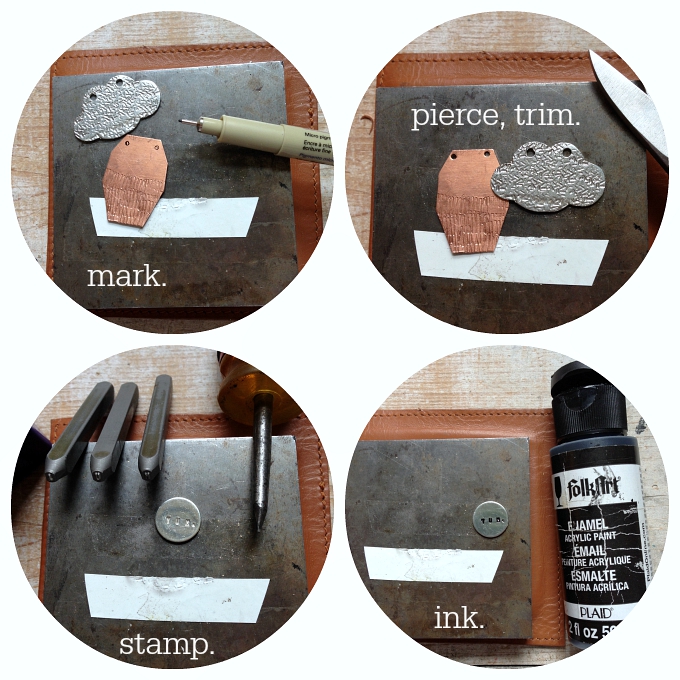
Step five: Layer the cloud blank over the cut metal, mark the hole placement. Step six: Use the hole punch pliers to punch the holes. Step seven: stamp YUM into the blank, add a period with the awl. Step eight: Use a cotton swab to apply the paint to the stamped areas on the small blank, wipe off excess with a paper towel or soft cloth.

cupcake 9-12

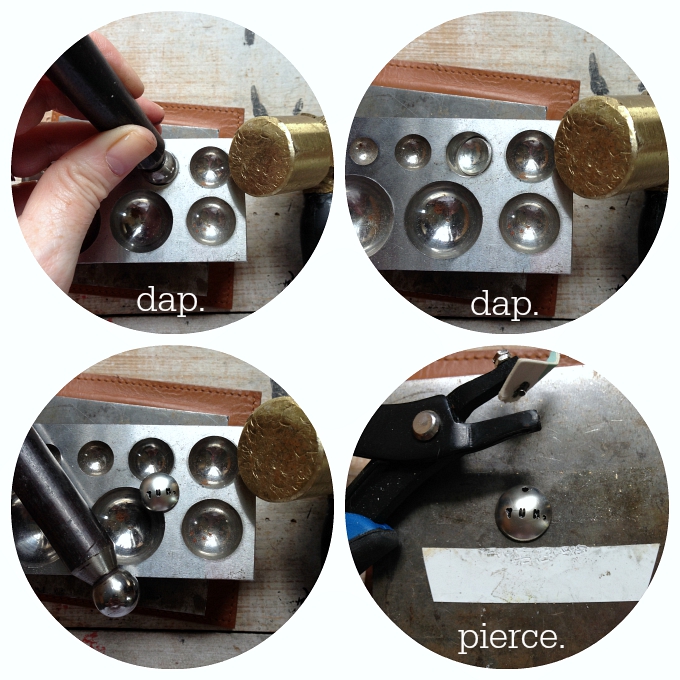
Step nine: Place the stamped small blank into the dapping block, it should just fit inside of the cup. Strike tool with hammer, moving tool around as you strike to create a domed shape.  Step ten: When you the blank is evenly dapped, remove it from the dapping block. Step eleven: It should be nicely domed like in the photo. Step twelve: Use the hole punch pliers to pierce a hole in the top of the blank.

cupcake 13-16

Step thirteen: Connect the blanks as shown. Attach a third jump ring to bring the first two rings together. Step fourteen: Attach a fourth jump ring to the stamped blank and through the third jump ring on the bottom two blanks. Step fifteen: Attach the pendant to the ball chain. Step sixteen: Enjoy you calorie free Metal Stamped Cupcake Necklace whenever you like!

DIY Cupcake Pendant One

If you like our tutorials, we’d love it if you help support us by shopping our links above! That’s how we are able to keep sharing these DIY projects with you!

Cheers,
Margot and Avalon
Filed Under: Diy Tagged With: DIY hand stamped jewelry, DIY jewelry, easy DIY metal stamped jewelry, how to make metal stamped jewelry, icanmake metal stamped jewelry, margot potter, metal stamped cupcake pendant, metal stamped jewelry, metal stamped necklace, metal stamped pendant

16 Stunning Hand Stamped Jewelry Projects

February 26, 2024 by decey Leave a Comment

Hand Stamped Jewelry Projects Round Up

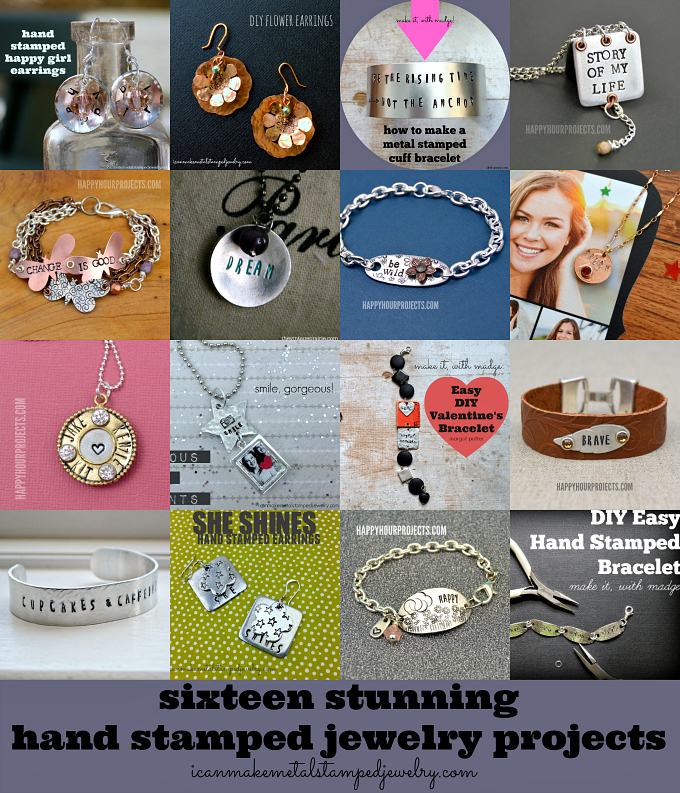
Do you love metal stamping? We do too! We’ve gathered up 16 Stunning Hand Stamped Jewelry Projects from some of our favorite DIY Bloggers for your creative inspiration. Get the tutorials on their blogs and while you’re there check out the rest of their divine DIY ideas. It’s amazing how many beautiful things you can make once you master a few basic techniques. There’s a little bit of everything here from earrings to bracelets to pendants, so there’s surely a few projects here that will jump start your imagination.

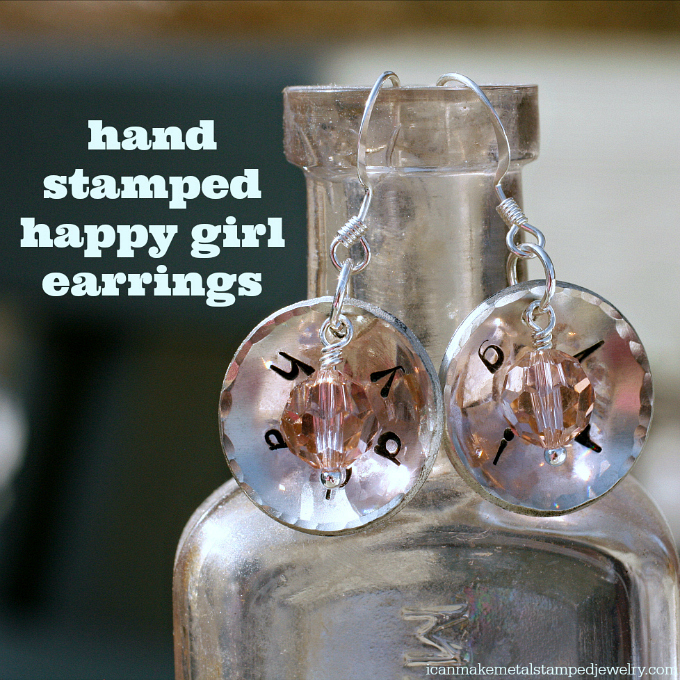
Hand Stamped Happy Girl Earrings 2

Feel like a happy girl in these earrings from icanmakemetalstampedjewelry.

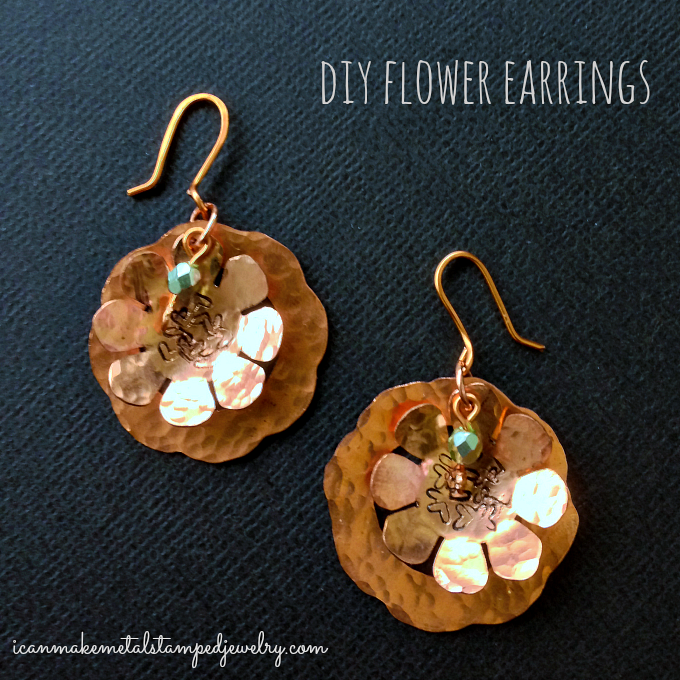
Flower Earrings Black

Layer up some fun with these floral earrings from icanmakemetalstampedjewelry.

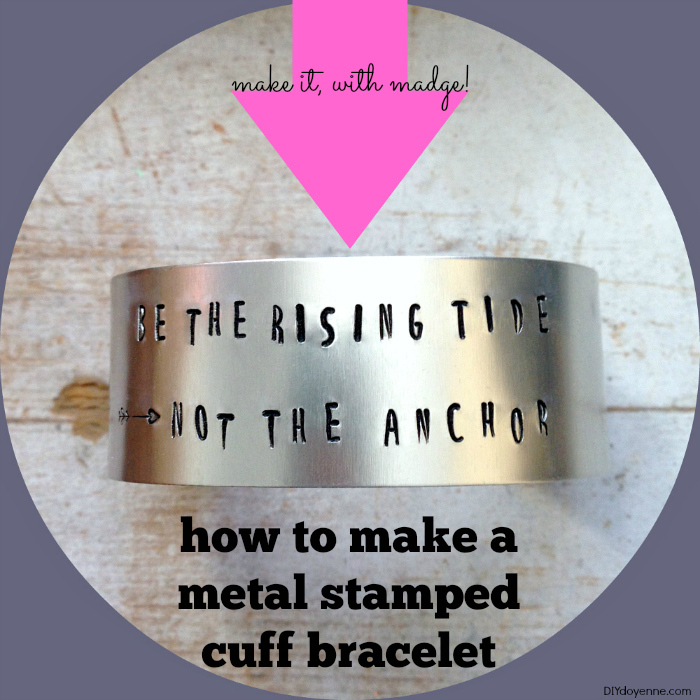
Rising-Tide-Text-DD

Learn how to make a cuff bracelet with this video tutorial from DIY Doyenne.

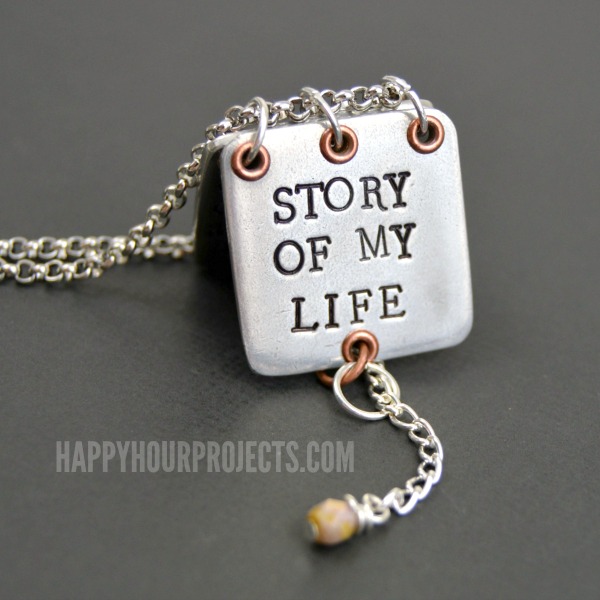
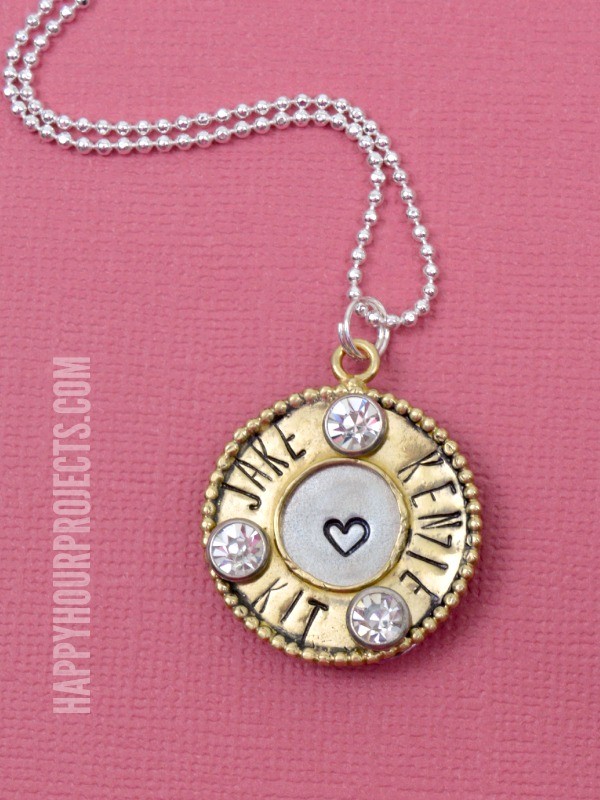
Faux-Locket-Story-Book-Necklace-2

Stamp your story in this clever pendant from Happy Hour Projects.

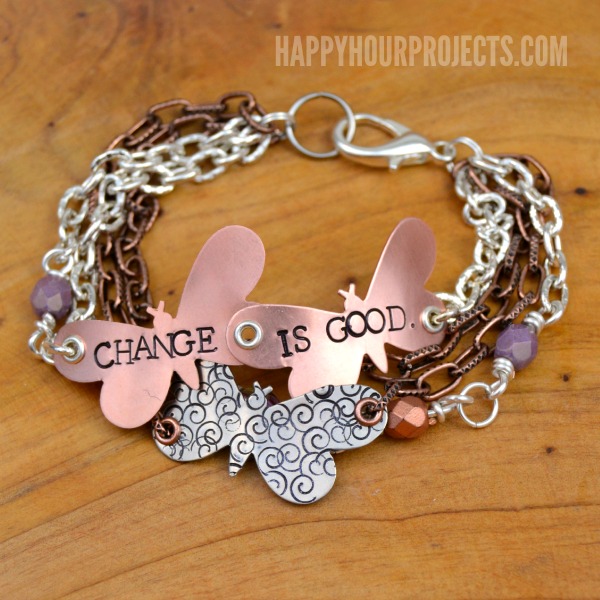
Change-is-Good-Butterfly-Stamped-Bracelet-1

Remind yourself that change is good with this riveted bracelet from Happy Hour Projects.

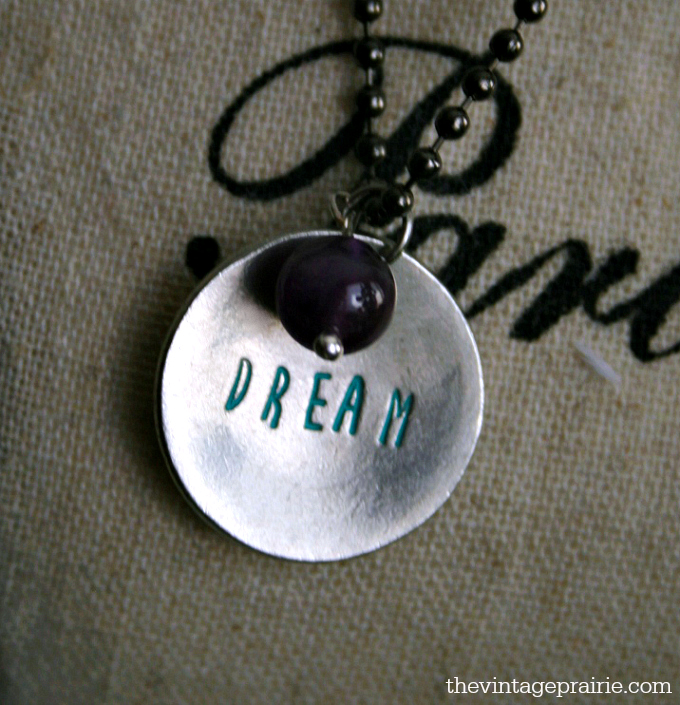
the vintage prairie dream pendant

Dream a little dream with The Vintage Prairie.

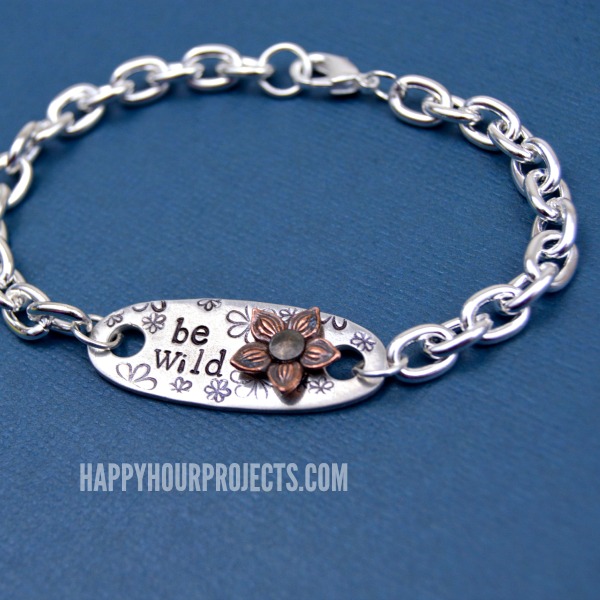
Be-Wild-Stamped-Bracelet-2.1

Be wild with Happy Hour Projects.

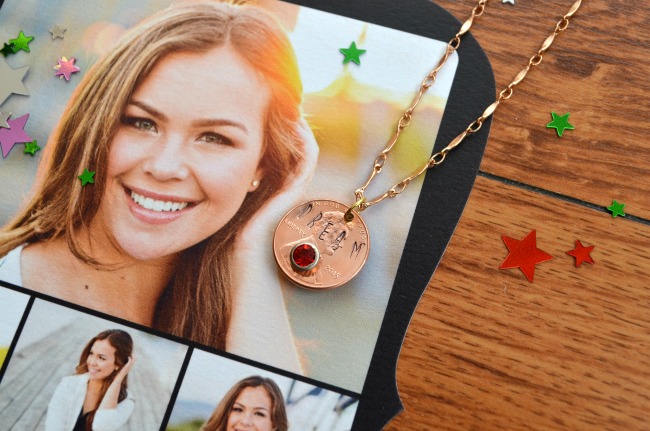
gradgift3

Make a pretty keepsake for a graduate with One Artsy Mama.

Necklace-1-600x800

Make mom a sparkling stamped pendant with Happy Hour Projects.

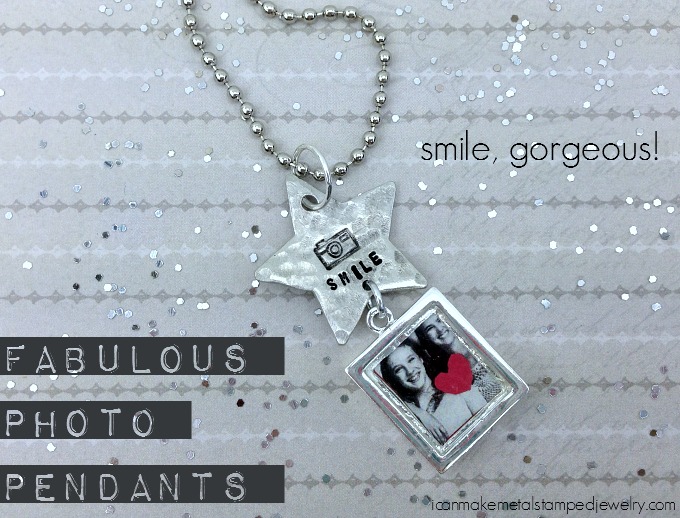
Fab Photo 3

Smile for the camera with icanmakemetalstampedjewelry.

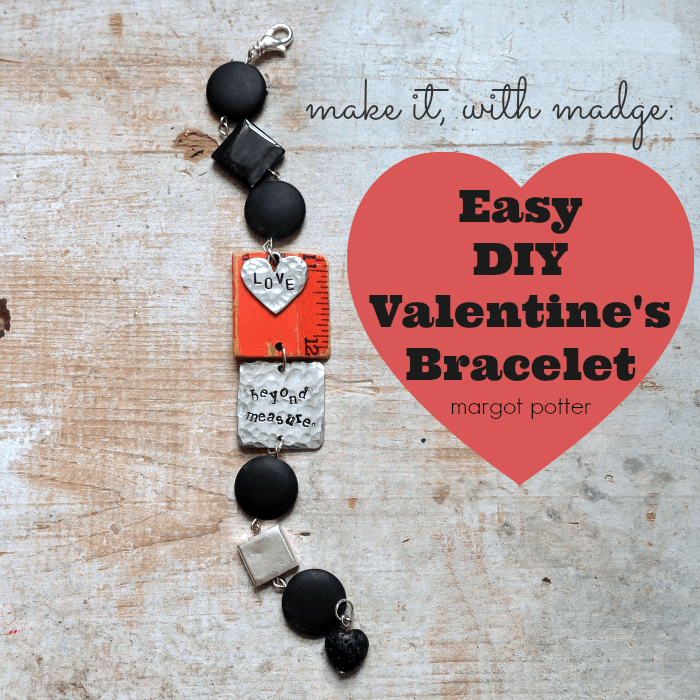
Easy-DIY-Valentines-Bracelet2

Show someone you love them beyond measure with this mixed media bracelet from DIY Doyenne.

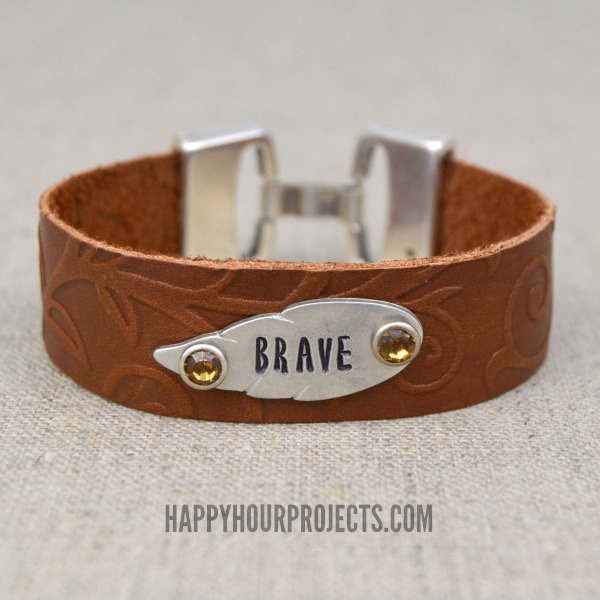
Embossed-and-Stamped-Leather-Bracelet-1

Feel brave with Happy Hour Projects.

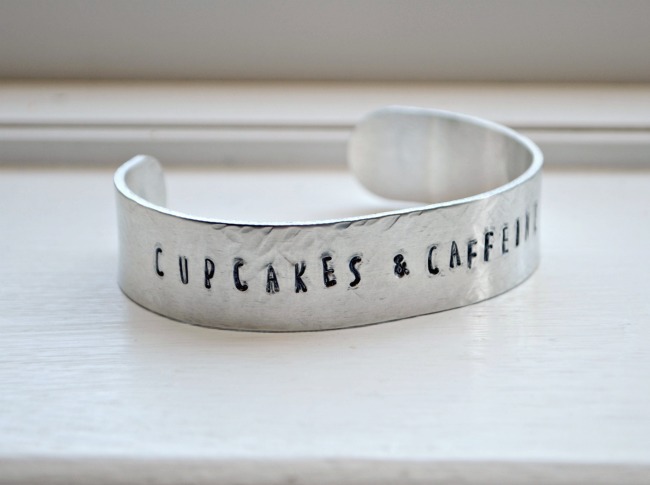
cupcakes9

One Artsy Mama had us at Cupcakes and Caffeine.

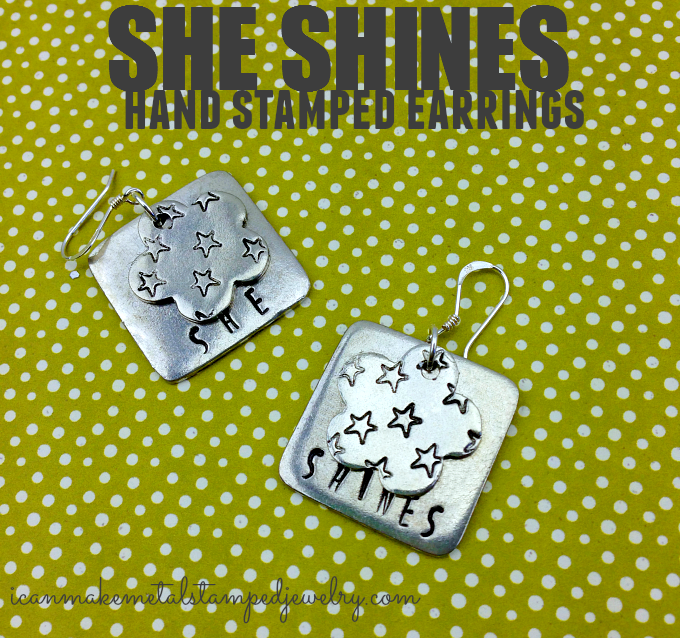
She Shines

She shines in layered earrings from icanmakemetalstampedjewelry.

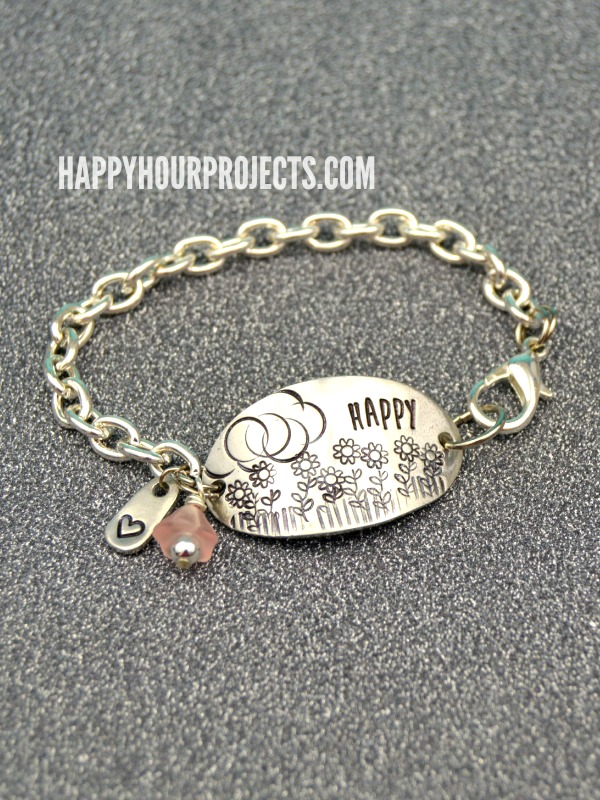
Floral-Scene-Stamped-Bracelet-1

Stamp happy with Happy Hour Projects.

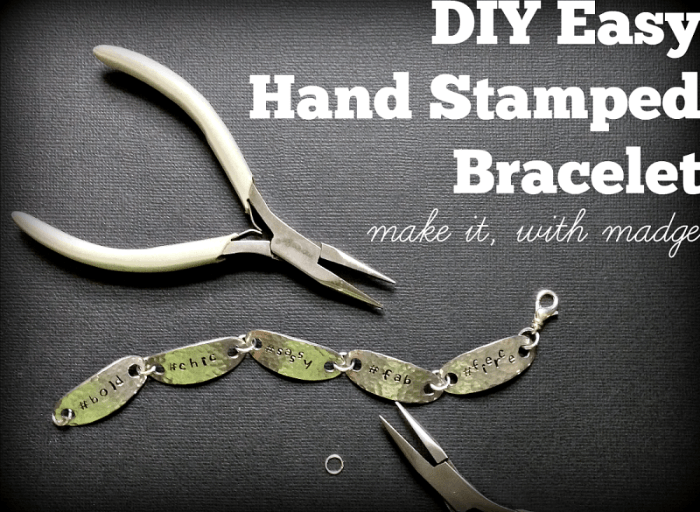
DIY-Easy-Hand-Stamped-Bracelet-e1421765720848

Stamp up something fabulous with DIY Doyenne.

Want to get started making metal stamped jewelry? Here’s a post with everything you need to make hand stamped jewelry projects of your own!

Cheers,
Margot and Avalon
2015 July 4 Sitewide Sale LeisureArts.com

Filed Under: Diy Tagged With: DIY hand stamped jewelry, DIY jewelry, DIY metal stamped earrings, DIY metal stamped jewelry, easy DIY jewelry, easy metal stamped jewelry, easy metal stamping projects, hand stamped jewelry, how to make metal stamped jewelry, metal stamping 101

  • « Go to Previous Page
  • Page 1
  • Interim pages omitted …
  • Page 4
  • Page 5
  • Page 6
  • Page 7
  • Page 8
  • Interim pages omitted …
  • Page 15
  • Go to Next Page »

Pages

  • About Us
  • Contact Us
  • Privacy Policy

Copyright © 2026 · Aspire Theme on Genesis Framework · WordPress · Log in