(This post contains affiliate links, if you click on a link and make a purchase we get a small percentage of the sale.)
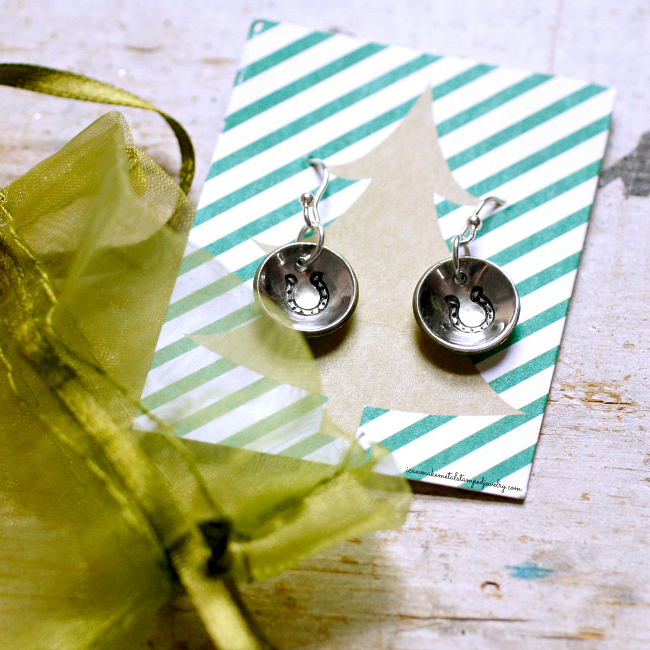
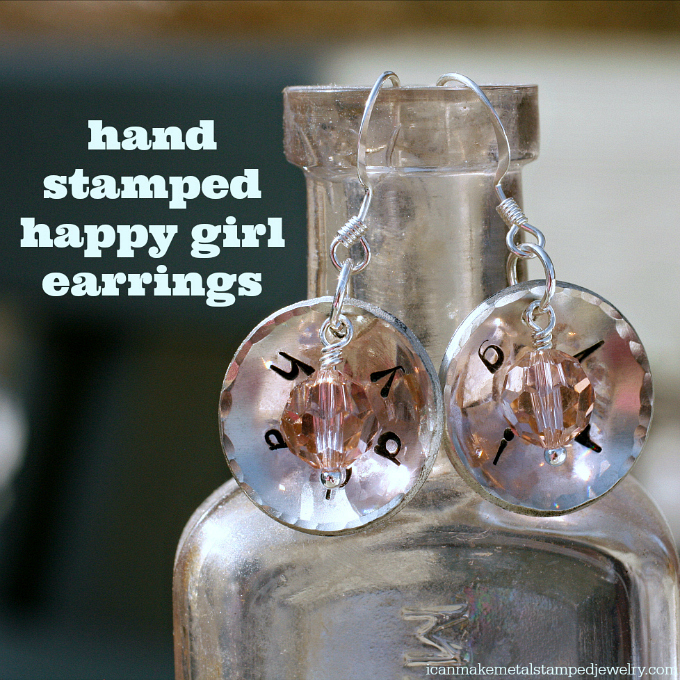
Happy Girl Hand Stamped Earrings
It’s easy to be happy in these DIY earrings that are stamped, hammered, dapped, and embellished with sparkling SWAROVSKI ELEMENTS crystals. These are the perfect little pick me up on a cloudy day and a sweet little statement that you’re staying on the sunny side regardless of the weather!
Materials
2 ImpressArt 0.75-Inch with Hole Alkeme Blanks
2 Swarovski Crystal 5000 8mm Light Rose Beads
Folk Art Acrylic Enamel Paint, Licorice
2 Beadalon Dapped and Spring Ear Wires, Nickel Free Silver Plate
2 Beadalon Ball Pin Small Head Pins Silver Plated, 24-Piece
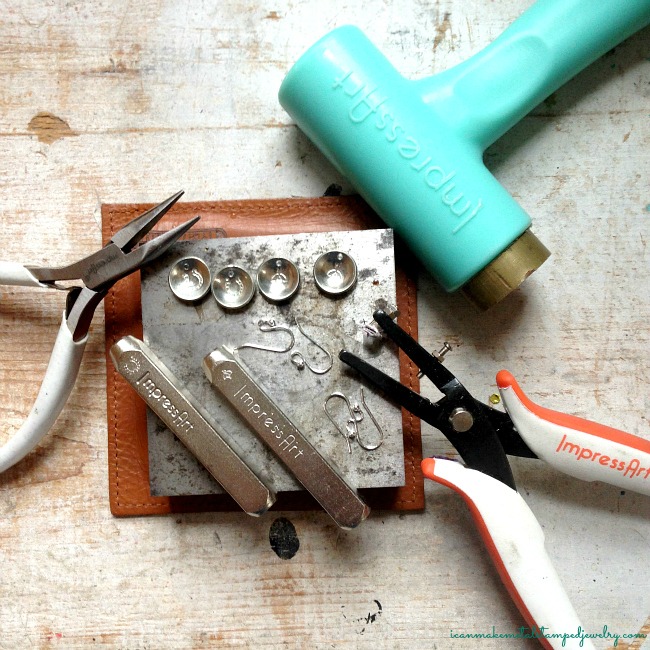
Tools
ImpressArt Lowercase Juniper
ImpressArt 4 by 4-Inch Steel Block
Beadalon Leather Pad For Block
ImpressArt Stamping Hammer, 1-Pound, Brass Metal
ImpressArt Face Chasing Hammer
8 Punch Dapping Block Set
7/8” size
Round Nose Pliers
2 pairs Chain Nose Pliers W/White Sparkle Handles-
Beadalon Flush Cutters
Marker
Cotton Swab
Paper towel
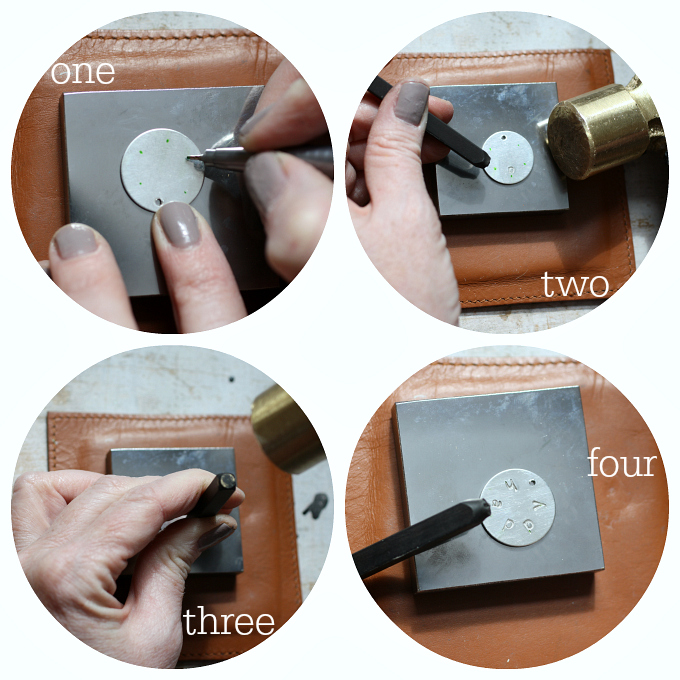
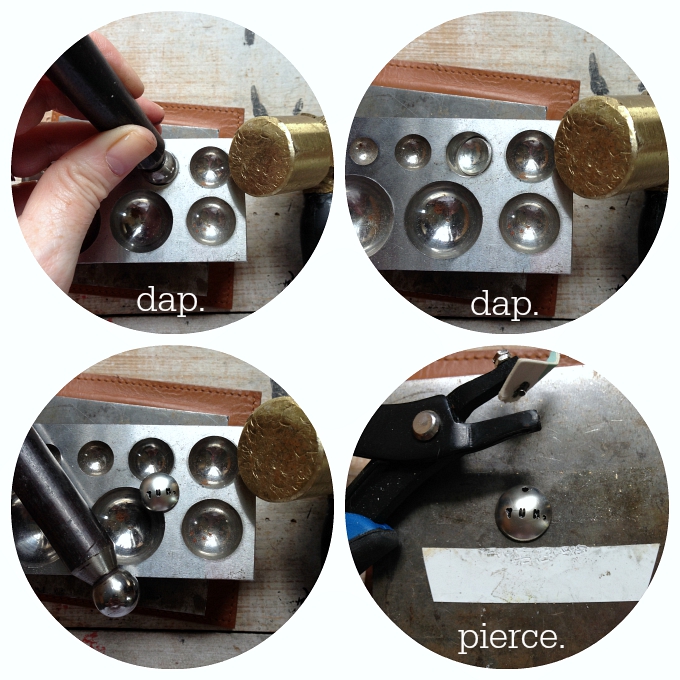
Step one
Mark placement of letters evenly spacing around edge of blank about ¼” from edge with marker (don’t use a permanent marker so you can wipe them off.)
Step two
Begin stamping in the center with the letter “p.” Rock stamp on blank, hit firmly one time, lift and move to the next letter.
Step three
Continue stamping the letters as marked until you have stamped the word “happy” around the edge.
Step four
Wipe off marker
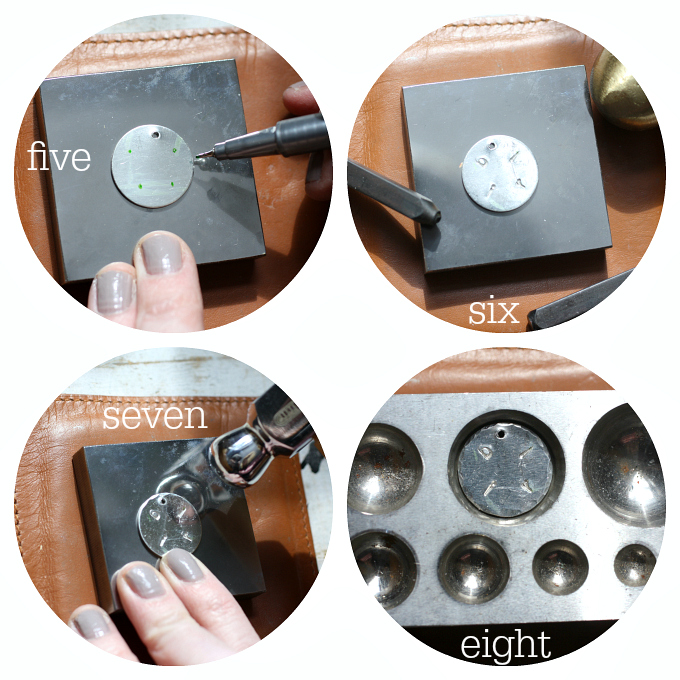
Step five
Mark the second blank as shown.
Step six
Stamp the word “girl.”
Step seven
Use the round end of the chasing hammer to add texture around the edges of the blank.
Step eight
Insert blank into 7/8″ dapping block impression as shown, stamped text facing up.
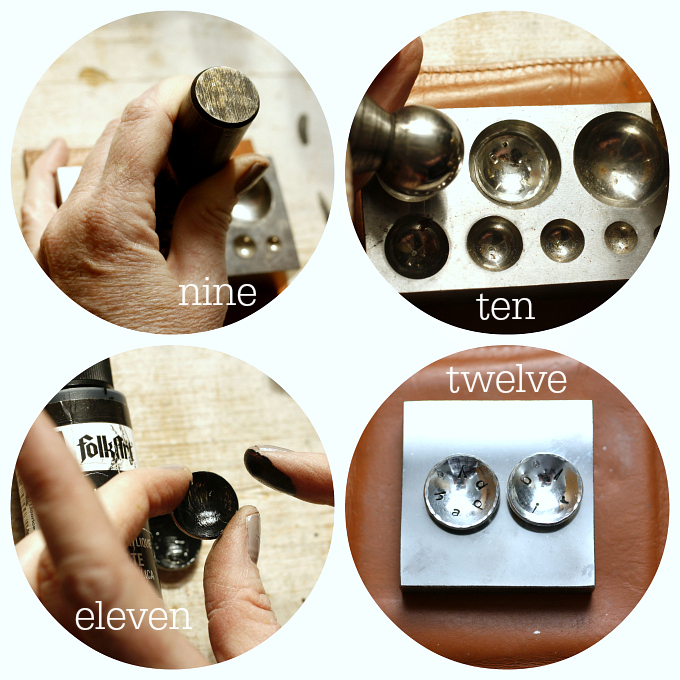
Step nine
Strike the top of the corresponding dapping tool with the flat end of your brass hammer while moving the round end around in the cup to form the blank into a concave shape.
Step ten
Repeat for second blank.
Step eleven
Use your finger tip or a cotton swab to apply paint to stamped areas.
Step twelve
Let sit for 30 seconds, wipe off excess with a soft cloth.
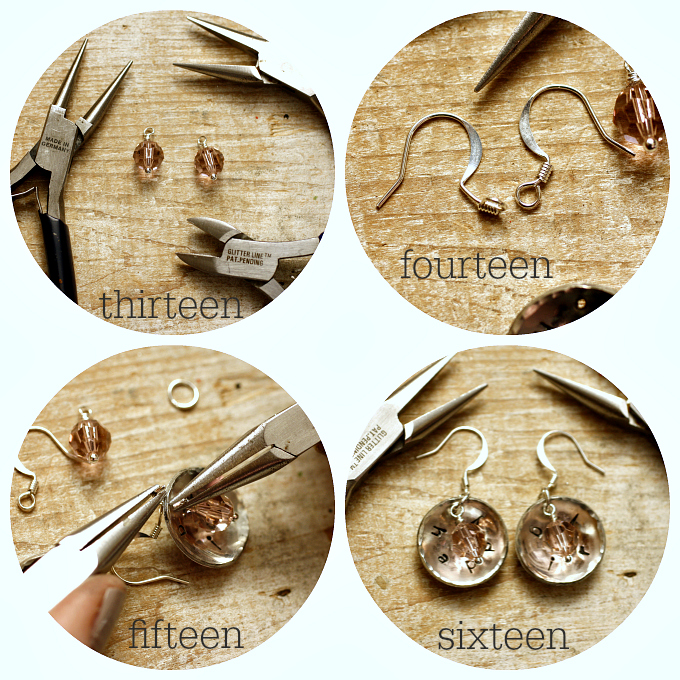
Step thirteen
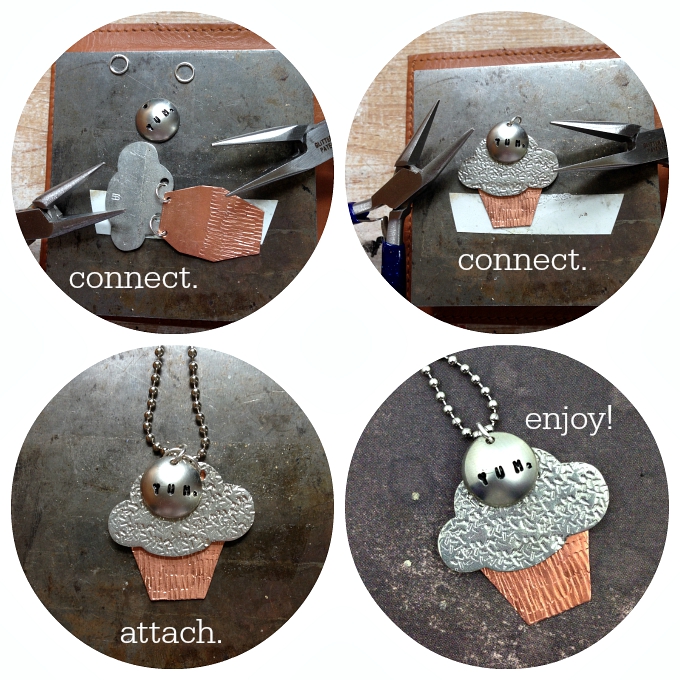
Create coiled top dangles with head pins and beads.
Step fourteen
Turn ear wire loops sideways using chain nose pliers, this will allow your blanks to hang forward.
Step fifteen
Slide jump ring into stamped blank, looped dangle and loop at bottom of earring wire. Secure closed with chain nose pliers.
Step sixteen
Make second earring.
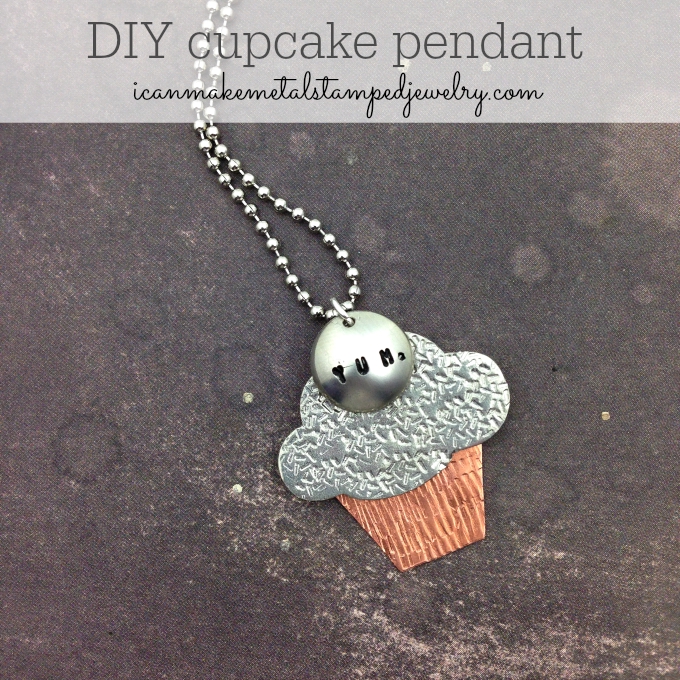
Wear your Hand Stamped Earrings with pride because you made them yourself! Go you!
Design Tips: Stack dapped and flat blanks together to make lovely dimensional jewelry. Create texture around the edges with pattern stamps.