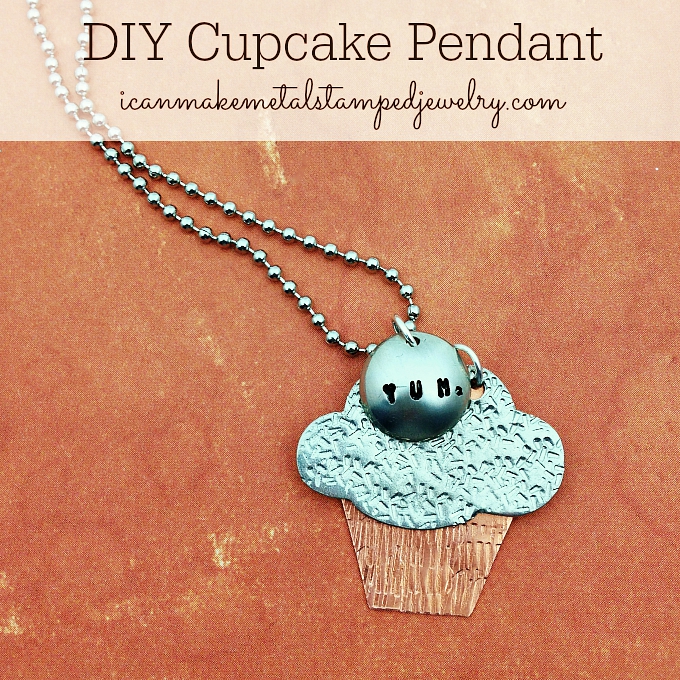
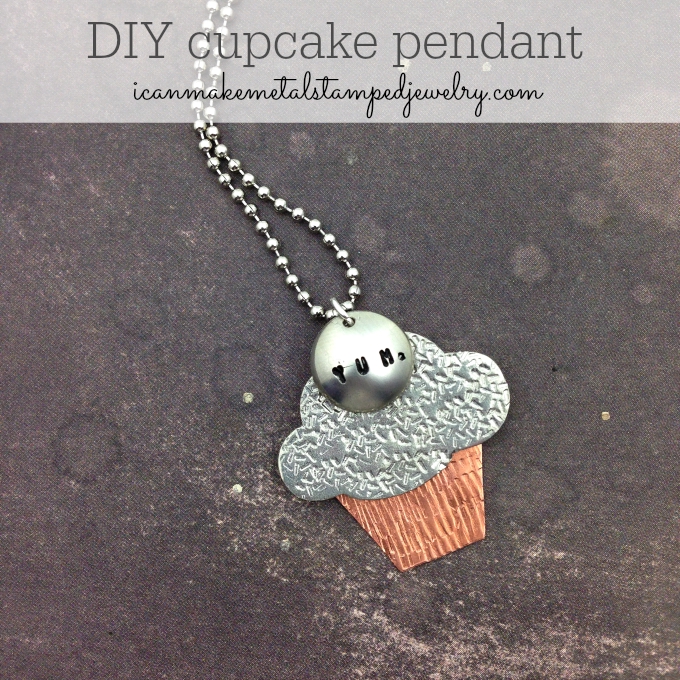
We’re big fans of cupcakes, because, well, cupcakes. Need we explain further? This cloud blank from ImpressArt has a lot of potential beyond being a cloud! It makes the perfect frosting for a metal stamped cupcake or the ice cream topper on a waffle cone or maybe a fun hairdo! Some of our best designs come from ‘seeing’ things differently. You could rivet these components together, but we love the kinetic movement achieved by layering them. Try making the sprinkles different colors with enamel paints or color the icing with patinas. we like it just as it is, simply striking. Pardon the pun. If you’d like to make a Metal Stamped Cupcake Necklace of your own, grab the instructions!
You will need (These are affiliate links, if you click on a link and make a purchase, we get a small percentage of the sale):
ImpressArt, Circle, 1/2″, Aluminum Stamping Blanks- 24 pc.
ImpressArt- Pewter Stamping Blanks, Cloud
Copper 24 Gauge Sheet – 6″ x 6″
4 Beadalon Jump Ring 6mm Silver, Plated, 50-Piece
Ball Chain with Connector
Folk Art Enamel Acrylic Paint, Licorice
ImpressArt- 6mm Sprinkle Pattern Metal Stamp
ImpressArt 6mm, Vertical Lines Metal Stamp
ImpressArt Basic Metal Stamp Set, Uppercase, 1.5mm
ImpressArt Stamping Hammer, 1-Pound, Brass Metal
ImpressArt 4 by 4-Inch Steel Block, Large
Beadalon Leather Pad For Block and Anvil
2 pairs ImpressArt Jewelry Making Tools – Pliers and Stamping Hammers – Perfect for custom designed metal and bead jewelry
Metal Cutting Shears
Beadsmith Metal Hole Punch Pliers for Sheet Metal, 1.5mm
Eurotool Metalwork Deluxe Dapping Set Block With 24 Punches
Stanley 69-122 6-1/16-Inch Wood Handle Scratch Awl
ImpressArt Stamp Straight Tape
Non-permanent marker
Cotton swab
Paper towel or soft cloth
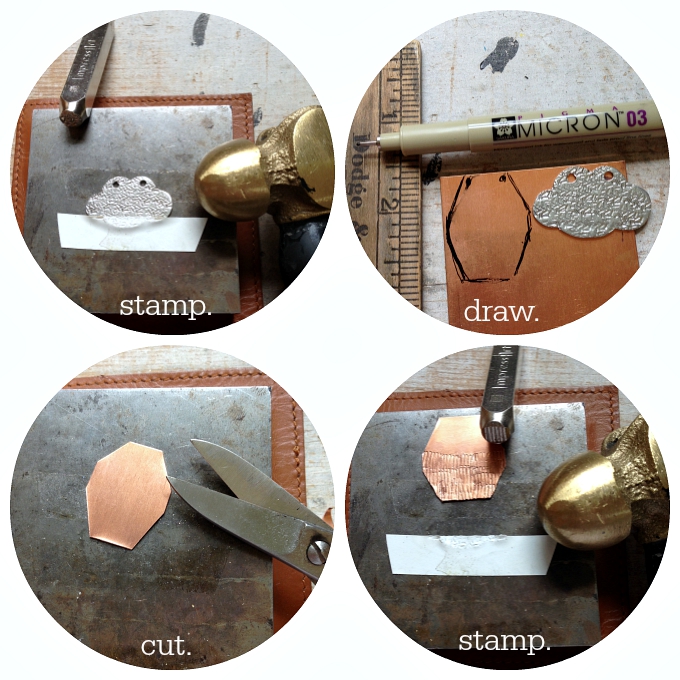
Step one: Tape blank to bench block. Use sprinkles stamp to add texture to surface of blank. Step two: The bottom part of your cupcake is layered behind the cloud blank. Use the blank as a guide and draw the cupcake liner form. Step three: Cut the sheet metal with your sheers. You need it to hide behind the front blank, so after you cut the sheet metal, you may need to cut it a little more to fit. Step four: Use the line stamp to create the liner texture, this will overlap a bit and that’s okay! You’ll need to hit this pretty hard to make even impressions so don’t be shy!
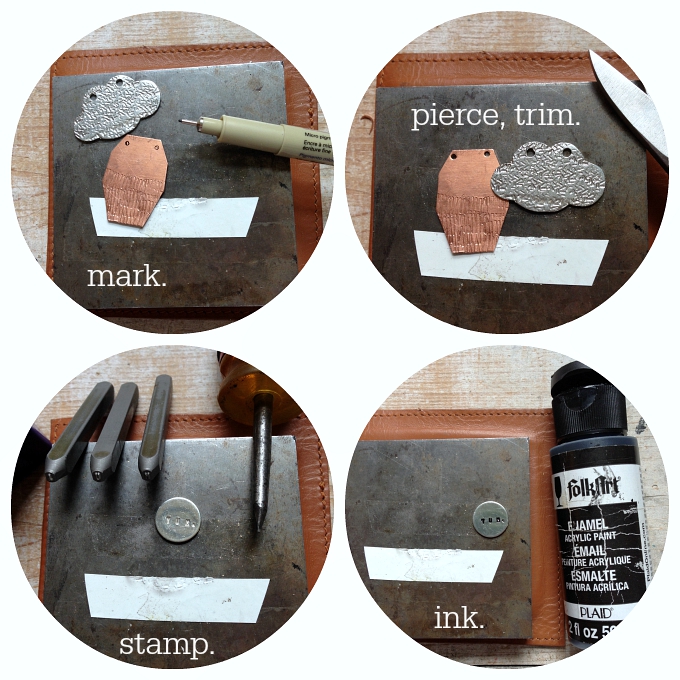
Step five: Layer the cloud blank over the cut metal, mark the hole placement. Step six: Use the hole punch pliers to punch the holes. Step seven: stamp YUM into the blank, add a period with the awl. Step eight: Use a cotton swab to apply the paint to the stamped areas on the small blank, wipe off excess with a paper towel or soft cloth.
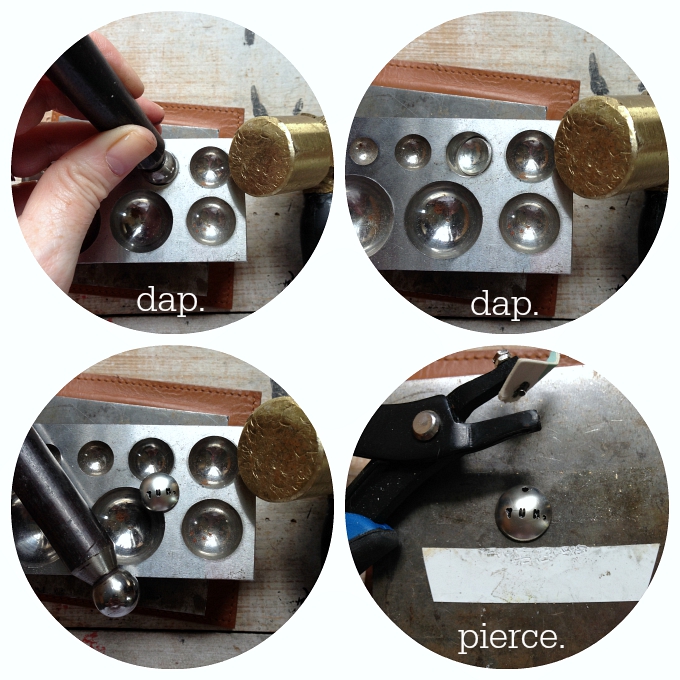
Step nine: Place the stamped small blank into the dapping block, it should just fit inside of the cup. Strike tool with hammer, moving tool around as you strike to create a domed shape. Step ten: When you the blank is evenly dapped, remove it from the dapping block. Step eleven: It should be nicely domed like in the photo. Step twelve: Use the hole punch pliers to pierce a hole in the top of the blank.
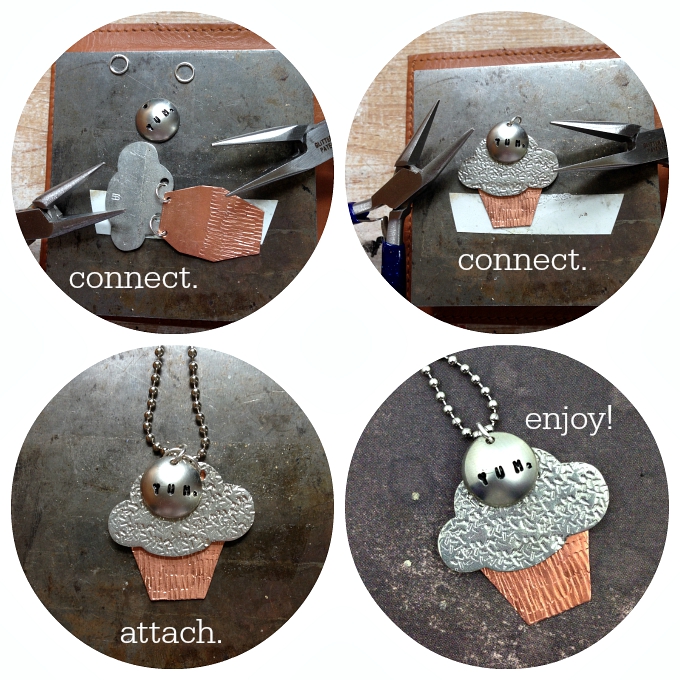
Step thirteen: Connect the blanks as shown. Attach a third jump ring to bring the first two rings together. Step fourteen: Attach a fourth jump ring to the stamped blank and through the third jump ring on the bottom two blanks. Step fifteen: Attach the pendant to the ball chain. Step sixteen: Enjoy you calorie free Metal Stamped Cupcake Necklace whenever you like!
If you like our tutorials, we’d love it if you help support us by shopping our links above! That’s how we are able to keep sharing these DIY projects with you!
Cheers,
Margot and Avalon