• Skip to main content

I can make metal stamped jewelry

12 Creative Metal Stamped DIY Jewelry Ideas

December 17, 2025 by decey Leave a Comment

12 creative metal stamped jewelry ideas

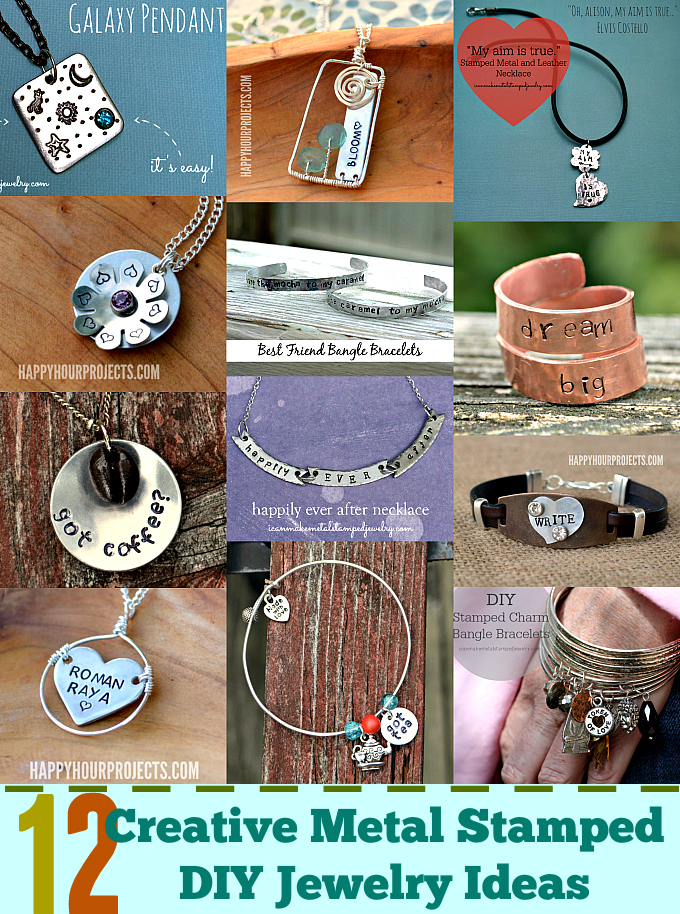
We’ve rounded up 12 Creative Metal Stamped DIY Jewelry Ideas from some of our favorite bloggers. These are ideas that move beyond the basics and offer some creative ways to integrate metal stamping into your DIY jewelry repertoire. Whether you’re feeling the love for mixed media, wire wrapping, trendy style or story telling, you’re sure to find some inspiration here!
DIY-Galaxy-Pendant-Closeup

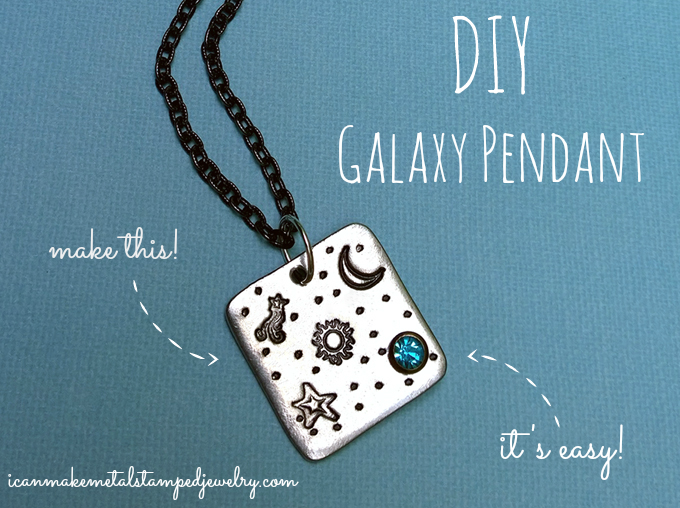
Stamp and rivet a galaxy on a metal blank for a universe of style!
Bloom-Wire-Wrapped-Floral-Scene-Pendant-1.2

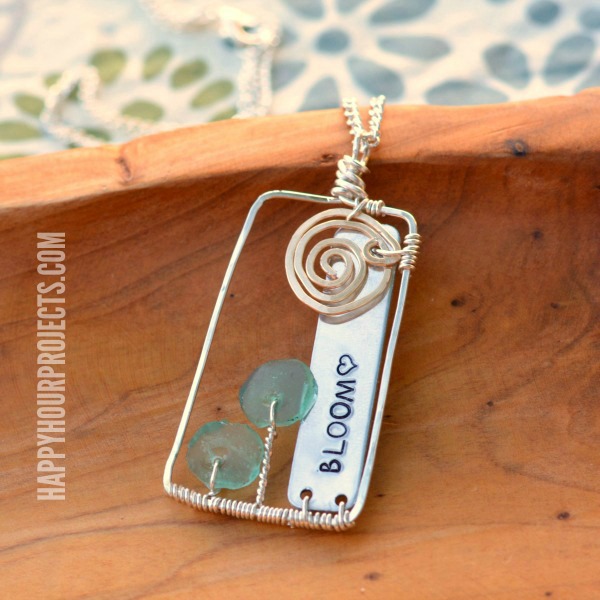
Plant a garden of pretty with Happy Hour Projects!
Stamped Metal and Leather Necklace One

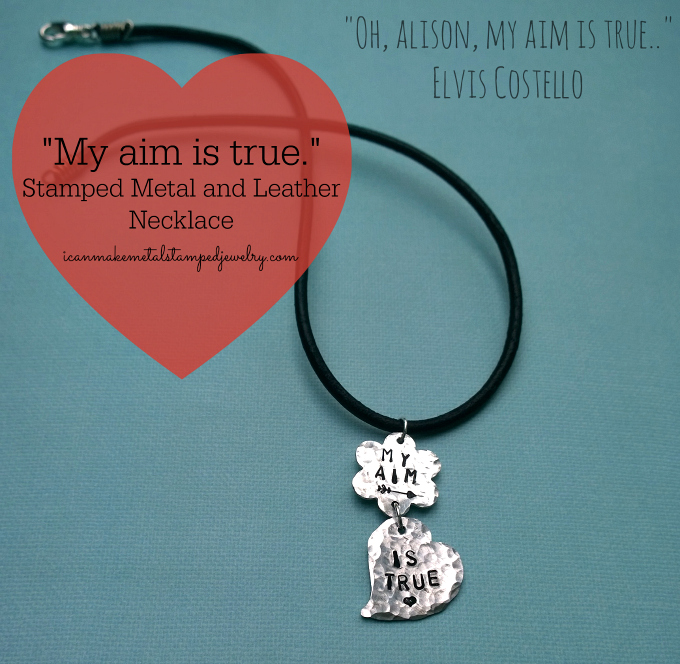
Play an edgy homage to Elvis Costello.
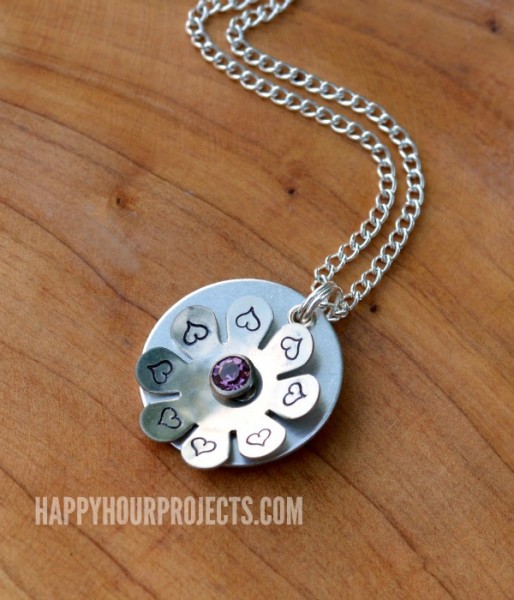
Stamped-and-Riveted-Necklace-with-Flower-10-514x600

Layer a dimensional delight with Happy Hour Projects.
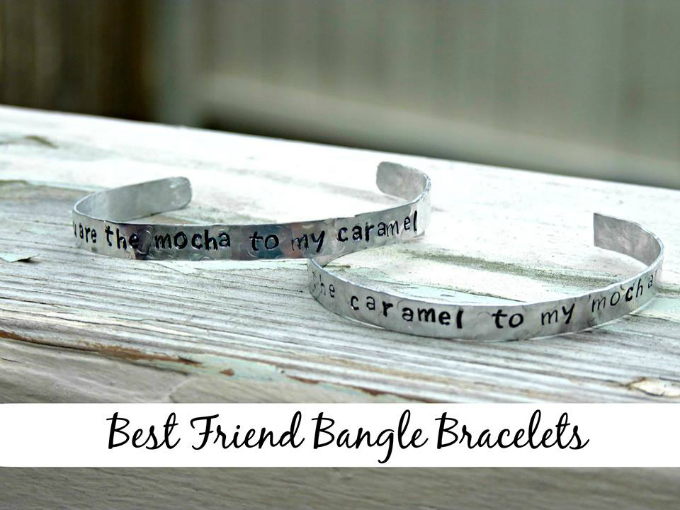
bestiebraceletpin2

Whip up a bangle for your bestie with One Artsy Mama.
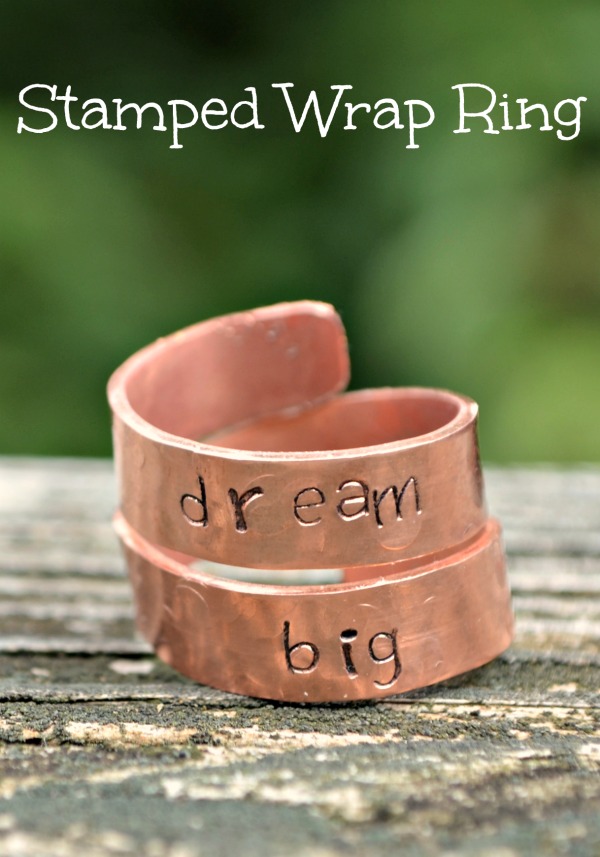
dremelpin

Dream Big with One Artsy Mama.

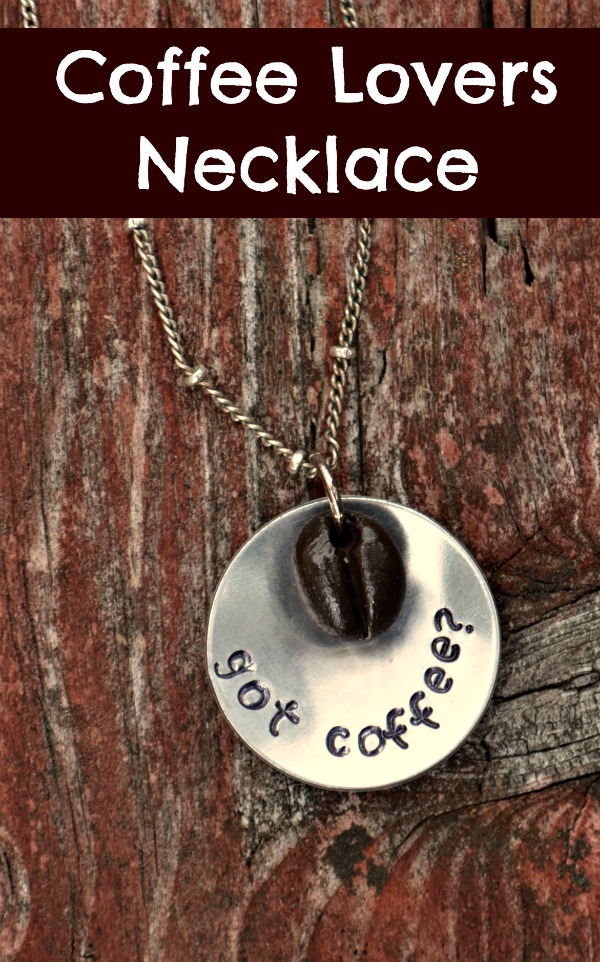
coffeebeanpin

Pour a cuppa inspiration with One Artsy Mama.
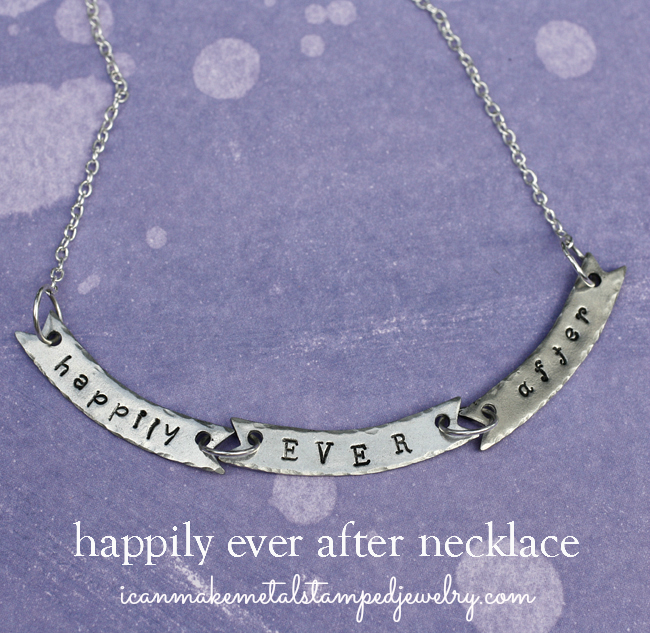
Happily Text Good

Write your happy ending with this happily ever after necklace!
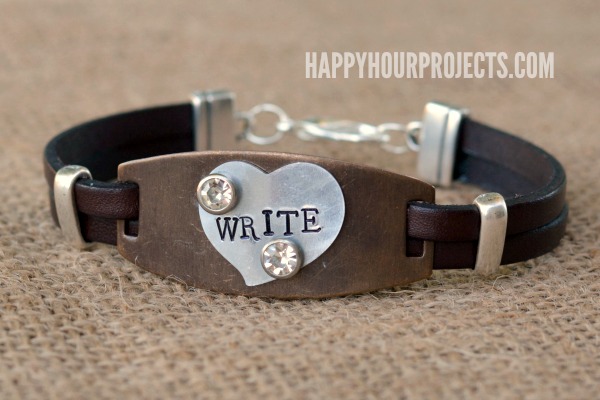
Stamped-and-Riveted-Leather-Bracelet-9

Add a little sparkle to a tough and tender bracelet with Happy Hour Projects.
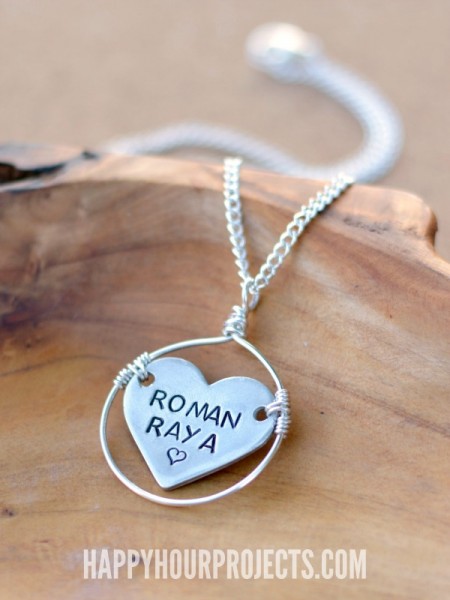
Wire-Wrapped-Heart-Stamped-Pendant-9-450x600

Frame it with Happy Hour Projects.

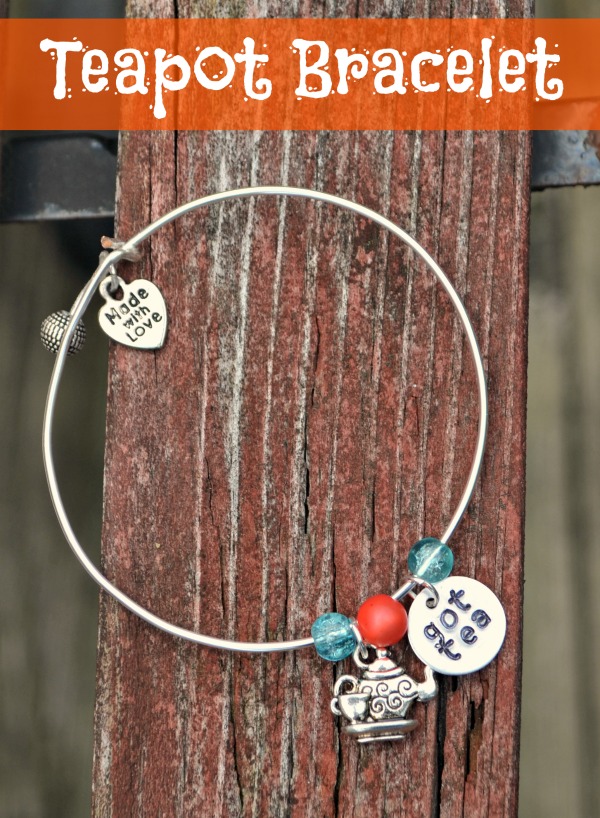
teabraceletpin

Serve up some style with One Artsy Mama.
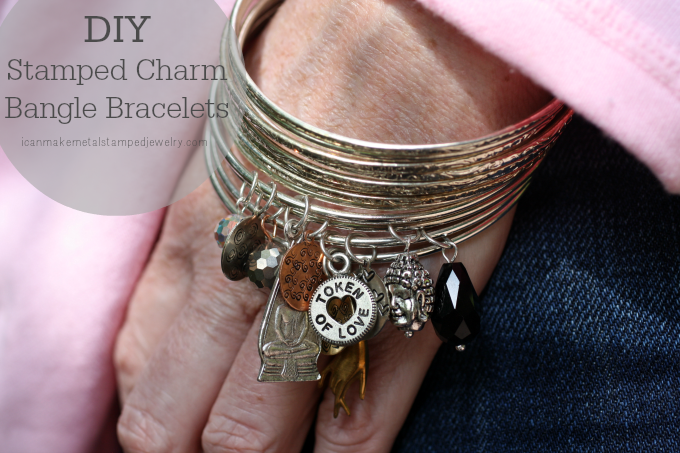
DIY Stamped Charm Bangle Bracelets Three

Stamp up a wrist full of beautiful bangles!

Lots to love in this round up of 12 Creative Metal Stamped DIY Jewelry Ideas, do you have any favorites? Let us know in the comments!  Tune in next week for a new tutorial!

Happy Stamping,
Margot and Avalon

Amazon.com Widgets
Filed Under: Uncategorized Tagged With: DIY hand stamped jewelry, DIY jewelry, DIY metal stamped jewelry, hand stamped jewelry, metal stamped jewelry

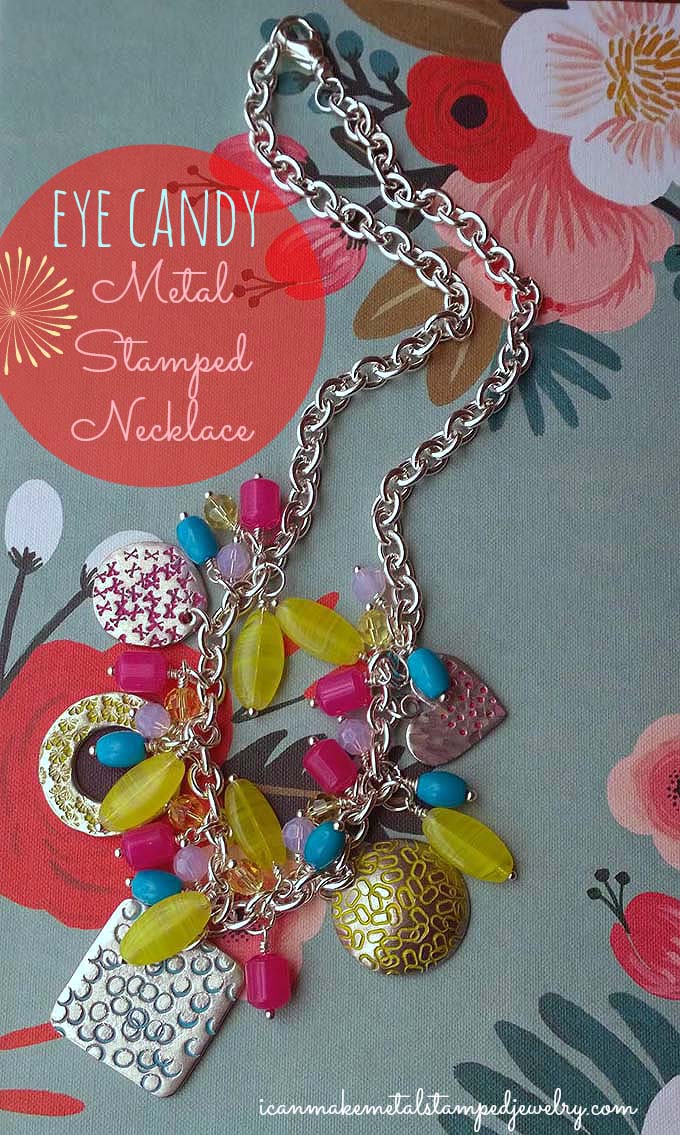
Eye Candy Metal Stamped Necklace

December 9, 2025 by decey Leave a Comment

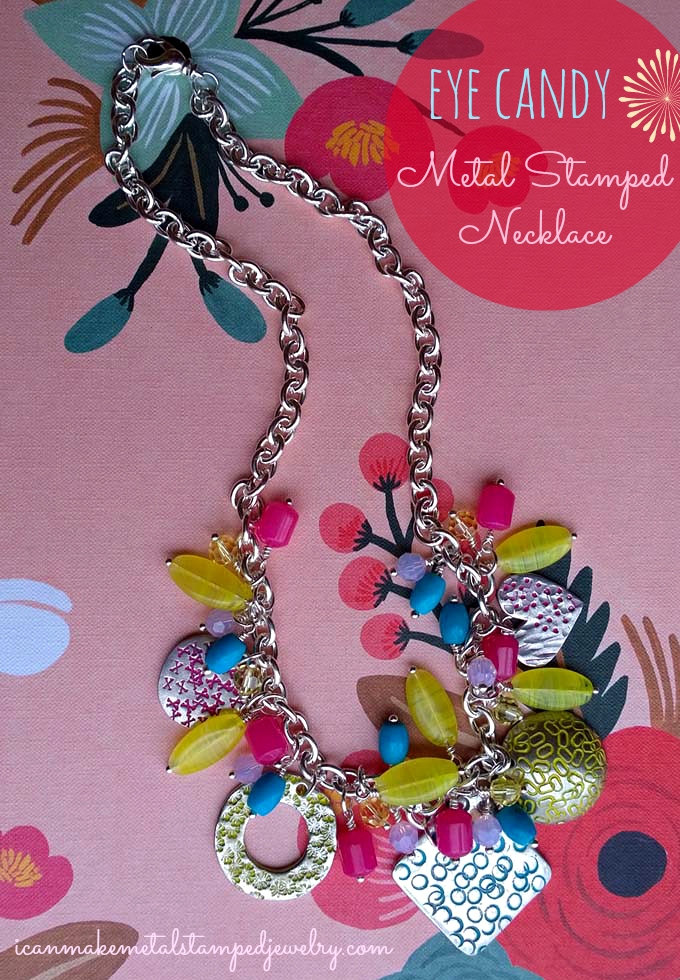
Eye Candy Necklace Final

We want to show you all sorts of fun ways to play with your metal stamps, this project is perfect for beginners because it lets you play without having to worry about getting it “right.” Plus, we’re adding texture, dimension and color!  Did you know you can use multi-surface paints to add color to your metal stamped designs?  That’s what we did here with this Eye Candy Metal Stamped Necklace.  Add some coordinating beads and SWAROVSKI ELEMENTS crystals and hang it all from a bright silver chain.  Flirty, fun and like the maker, so ready for spring.

Here’s What You Need:
ImpressArt Stamping Blank Square
ImpressArt Stamping Blank Circle
ImpressArt Stamping Blank River Stone
ImpressArt, Pewter Stamping Blanks, Washer, 15/16″
ImpressArt Pewter Hearts
18 5-6mm 5-6mm Gemstone and Glass Beads in Coordinating Colors (I used vintage Czech glass, dyed jade, faux turquoise)
6 6mm Swarovski Crystal 5000 Round Faceted Bead Pink Rose Water Opal
6 Swarovski Crystal 5000 Round Beads 6mm Sunflower
18″ Beadalon Chain Rolo Large Silver Plated
24 6mm Jump Rings
Beadalon Lobster Clasp Swivel 13mm
30 Beadalon Ball Tipped Head Pin
ImpressArt- Basic Newsprint Lowercase Letter Metal Stamp Set Letter x
ImpressArt- Basic Newsprint Uppercase Letter Metal Stamp Set Letter O
ImpressArt- 3mm, Dandelion (Small) Design Stamp
ImpressArt- Basic Metal Stamp Set, Lowercase, 3mm Letter O
Wood Handle Scratch Awl
8 Punch Dapping Block Set
Texturing Hammer
Ergo-Angle Metal Stamping Hammer
ImpressArt 2 by 2-Inch Steel Block
Folk Art Multi Surface Paints in Coordinating Colors (fuchsia, yellow, blue)
Paper Towels or Cloth
Beadalon Round Nose Pliers
2 Pairs ImpressArt Chain Nose Pliers
ImpressArt Flush Cutters

Eye Candy 1 to 4

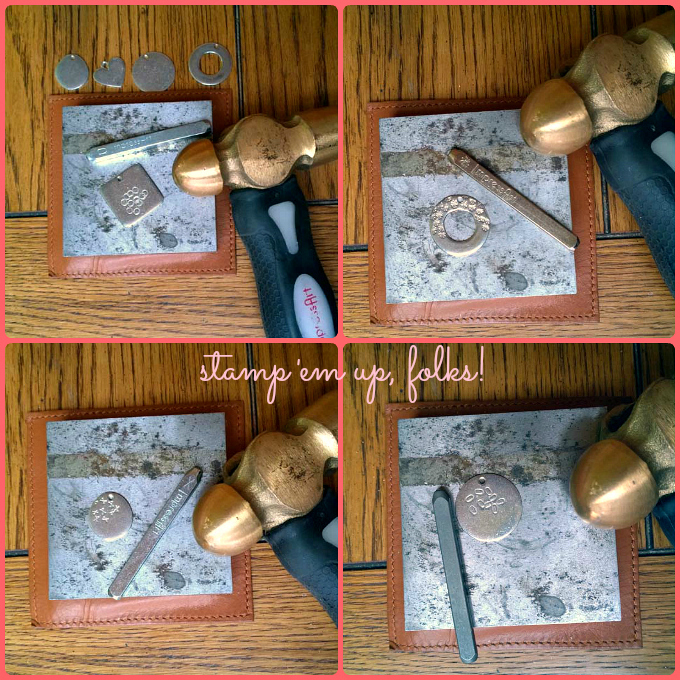
We’re adding texture to the blanks, so don’t be worried about making a consistent pattern. Hit stamps randomly across surfaces of your square, pebble, circle and washer. Overlap them. Change the alignment. Have fun and do not think about this too much!

Eye Candy 5 to 8

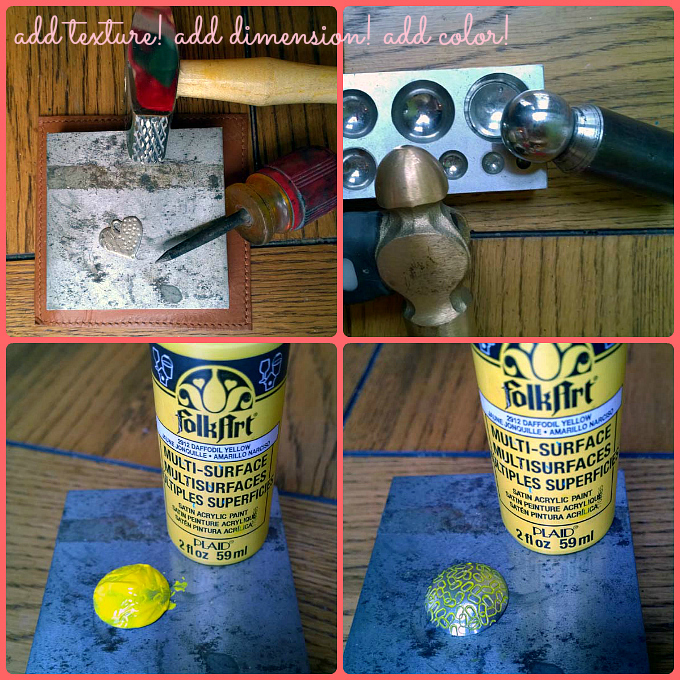
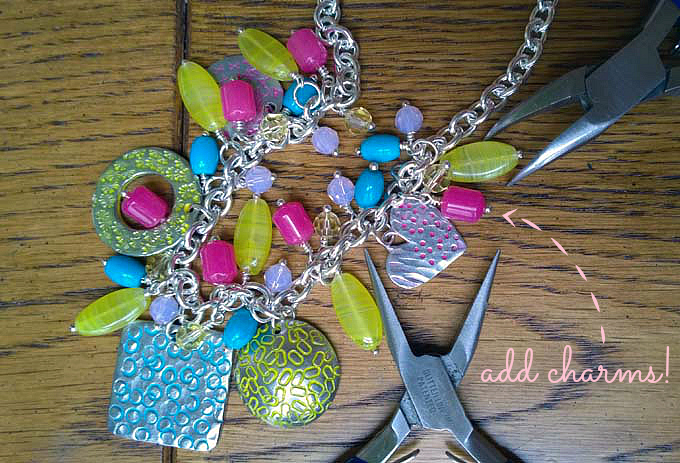
For the heart, hammer one edge with your texture hammer and use the awl to add dots to the other side. Again, don’t over think this, it’s intuitive and fun! Place your circle into a dapping block, strike the top of the dapping tool several times with your brass hammer. When the shape is curved fully, remove. Add a little color to your blanks by saturating them with paint and wiping the surface paint off with a clean, dry paper towel or cloth. Let them sit for a few seconds before you wipe so the paint can settle into the recessed areas. Let the paint cure, it is designed for use with metals and other slick surfaces so it is going to last.

Attach Charms

Make coiled dangles for all of your beads using the head pins. If you need a refresher, check out this video tutorial. Attach the charms to the necklace, starting with the largest square in the center and working your way up the sides. I added charms to the spaces between the stamped pieces. Use jump rings to attach and if you need to learn how to do this, here’s my video tutorial to show you how.

Eye Candy Three

Try using different colors.  Add more than one color paint to each blank.  Use multiple stamps on each blank.  Have fun making your own Eye Candy Metal Stamped Necklace and remember, it doesn’t have to be perfect!

Cheers,
Margot and Avalon

(*FTC DISCLOSURE: Post contains affiliate links, if you click on a link and make a purchase we get a small percentage of the sale.  That’s how we keep the lights on, folks!)

*DIY Project Policy: Our tutorials are meant for your creative inspiration. Feel free to make and gift or wear these designs. Please make sure that you give credit to us as the designer if you make and share these designs on your blog or social sites. Please do not make and sell copies of our designs or sell them as kits. Please do not teach these designs as classes for profit. This is how we make our living and we ask that you respect our creativity and the time it takes to design, photograph and write these free tutorials. You may use a single photograph from each project online if you include a direct link back to our tutorial. Any use of these designs for retail sale for profit online in places like Etsy or eBay or in retail bricks and mortar, flea markets or outdoor fairs is not permitted. Thank you!

Joss & Main Exclusive online private sales for the home

Filed Under: Uncategorized Tagged With: adding color to metal jewelry, coloring metal, DIY jewelry, DIY metal stamped jewelry, how to make metal stamped jewelry, metal stamped jewelry

Stamped Christmas Charm Necklace DIY

November 26, 2025 by decey Leave a Comment

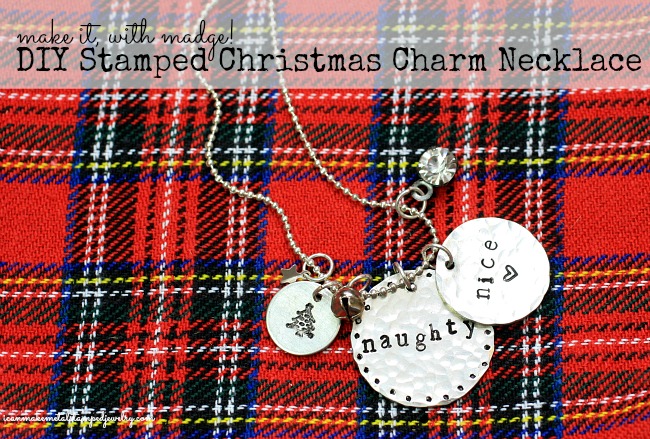
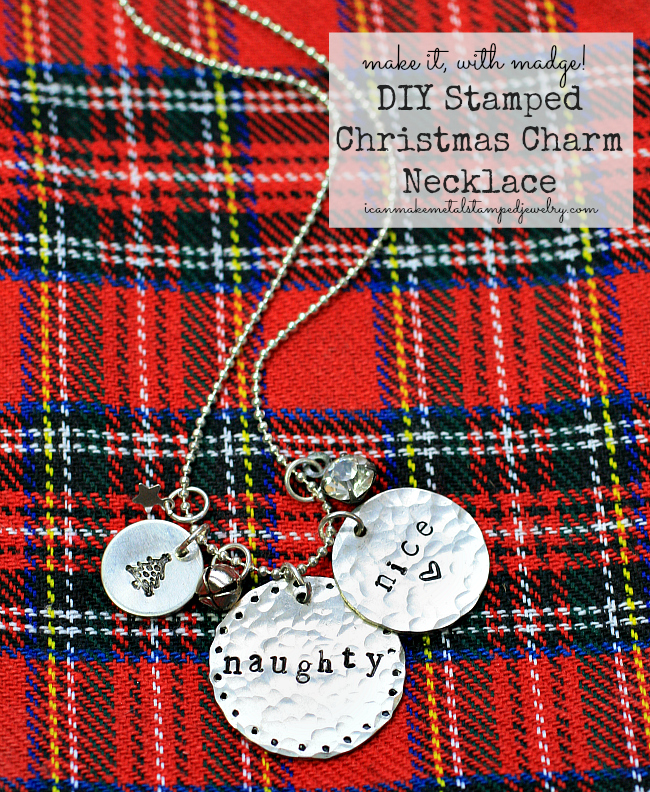
DIY Stamped Christmas Charm Necklace

He’s making a list, he’s checking it twice, he’s gonna find out who’s naughty or nice. Santa Claus is coming to town.” John Frederick Coots and Haven Gillespie

Make merry in our DIY Stamped Christmas Charm Necklace! Naughty or nice, we’ve got you covered for every holiday gathering. Take basic metal stamping and add a little something extra with design stamps and small details. Layer it all up with some tiny charms and just a touch of sparkle, and you’ll be ready to take on the holidays in style!

You Will Need Website

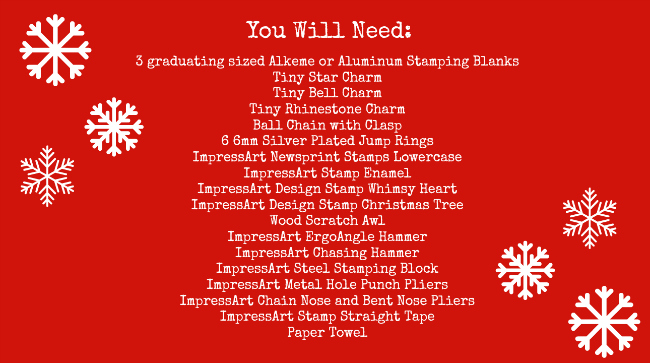
You will Need: (The links below are affiliate based, if you click on a link and make a purchase we get a small percentage of the sale, which is how we can afford to create these tutorials for your craftertainment)

ImpressArt, Circle, 1″, Aluminum Stamping Blank
ImpressArt, Circle, 3/4″, Aluminum Stamping Blanks- 24 pc.
ImpressArt, Circle, 1/2″, Aluminum Stamping Blanks- 24 pc.
Tiny Star Charm
Tiny Jingle Bell
\n’]);” rel=”nofollow”>Tiny Rhinestone Charm/a>
Ball Chain Necklace with Lobster Clasp, 18-Inch, Bright Silver
6 Beadalon Jump Rings 6mm Silver, Plated
ImpressArt- Basic Newsprint Lowercase Letter Metal Stamp Set
ImpressArt Stamp Enamel or Folk Art Enamel 2-Ounce Acrylic Paint, Licorice
ImpressArt Design Stamps, 3mm, Whimsy Heart, 1-Pack
ImpressArt- 6mm, Christmas Tree Design Stamp
Wood Handle Scratch Awl
ImpressArt Ergo-Angle Metal Stamping Hammer
ImpressArt Chasing Hammer
ImpressArt 4 by 4-Inch Steel Block
ImpressArt Metal Hole Punch Pliers
ImpressArt Chain Nose Pliers
ImpressArt Bent Nose Pliers
ImpressArt Stamp Straight Tape
Beadalon Leather Pad For Block and Anvil
Paper Towel

Watch the video to learn how to make the project:

Step one: Stamp Christmas Tree in center of smallest blank. Use the tilt and tap method, it’s in the video.
Step two: Tape your medium sized blank to the bench block. Stamp ‘nice.’
Step three: Stamp whimsy heart in center of blank under the word nice.
Step four: Tape your largest blank to the bench block. Stamp ‘naughty.’
Step five: Use the ball end of the chasing hammer to add texture to the medium and large sized blanks.
Step six: Use hole punch pliers to pierce a hole in the top center of each blank.
Step seven: Use the awl to add dots around edge of the largest blank.
Step eight: Apply Stamp Enamel, rub in, let sit for 10 seconds, wipe off excess.
Step nine: Attach charms using pliers, securing them closed with tension.
Step ten: Pour yourself some eggnog, you did it!

DIY Stamped Christmas Charm Necklace Two

You can customize your DIY Stamped Christmas Charm Necklace using different design stamps and charms. That’s the best thing about metal stamping, you get to make your personal style statement.

Happy Stamping,
Margot and Avalon

Filed Under: Uncategorized Tagged With: Christmas Crafts, Christmas jewelry, christmas necklace, DIY jewelry, DIY Necklace, DIY stamped christmas charm necklace, Hand Stamped Holidays, how to stamp a holiday necklace, metal stamped charmed necklace, naughty and nice necklace, naughty nice necklace

Happy Girl Hand Stamped Earrings

October 19, 2025 by decey Leave a Comment

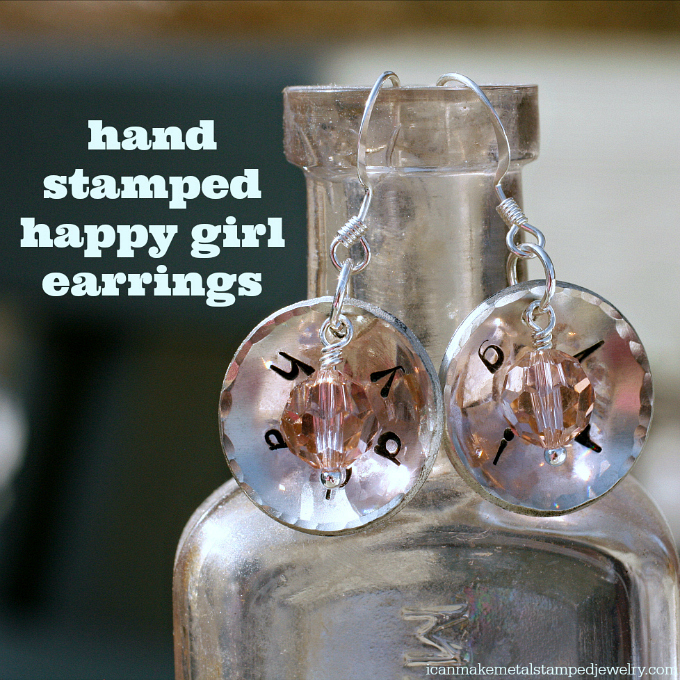
Happy Girl Hand Stamped Earrings

(This post contains affiliate links, if you click on a link and make a purchase we get a small percentage of the sale.)

Happy Girl Hand Stamped Earrings

It’s easy to be happy in these DIY earrings that are stamped, hammered, dapped, and embellished with sparkling SWAROVSKI ELEMENTS crystals. These are the perfect little pick me up on a cloudy day and a sweet little statement that you’re staying on the sunny side regardless of the weather!

Materials
2 ImpressArt 0.75-Inch with Hole Alkeme Blanks
2 Swarovski Crystal 5000 8mm Light Rose Beads
Folk Art Acrylic Enamel Paint, Licorice
2 Beadalon Dapped and Spring Ear Wires, Nickel Free Silver Plate
2 Beadalon Ball Pin Small Head Pins Silver Plated, 24-Piece

Tools
ImpressArt Lowercase Juniper
ImpressArt 4 by 4-Inch Steel Block
Beadalon Leather Pad For Block
ImpressArt Stamping Hammer, 1-Pound, Brass Metal
ImpressArt Face Chasing Hammer
8 Punch Dapping Block Set
7/8” size
Round Nose Pliers
2 pairs Chain Nose Pliers W/White Sparkle Handles-
Beadalon Flush Cutters
Marker
Cotton Swab
Paper towel

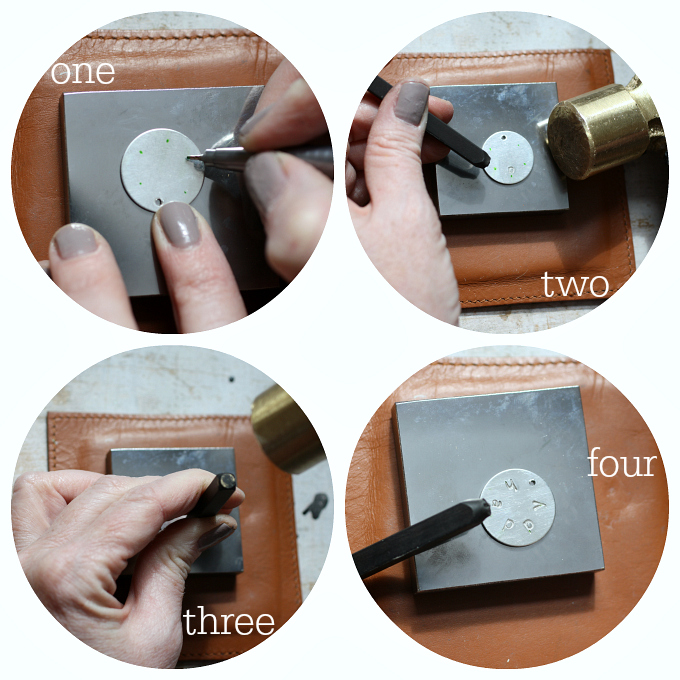
Happy Girl Earrings Steps 1-4

Step one
Mark placement of letters evenly spacing around edge of blank about ¼” from edge with marker (don’t use a permanent marker so you can wipe them off.)

Step two
Begin stamping in the center with the letter “p.” Rock stamp on blank, hit firmly one time, lift and move to the next letter.

Step three
Continue stamping the letters as marked until you have stamped the word “happy” around the edge.

Step four
Wipe off marker

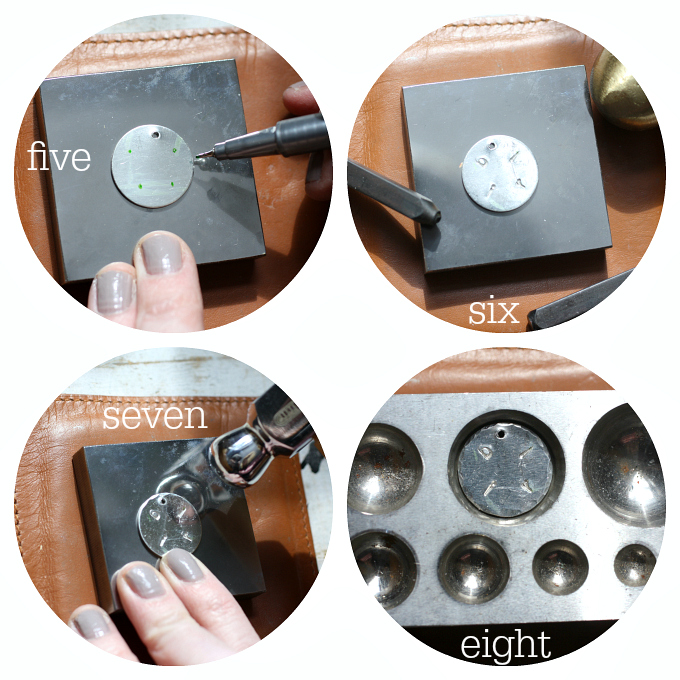
Happy Girl Earrings Steps 5-8

Step five
Mark the second blank as shown.

Step six
Stamp the word “girl.”

Step seven
Use the round end of the chasing hammer to add texture around the edges of the blank.

Step eight
Insert blank into 7/8″ dapping block impression as shown, stamped text facing up.

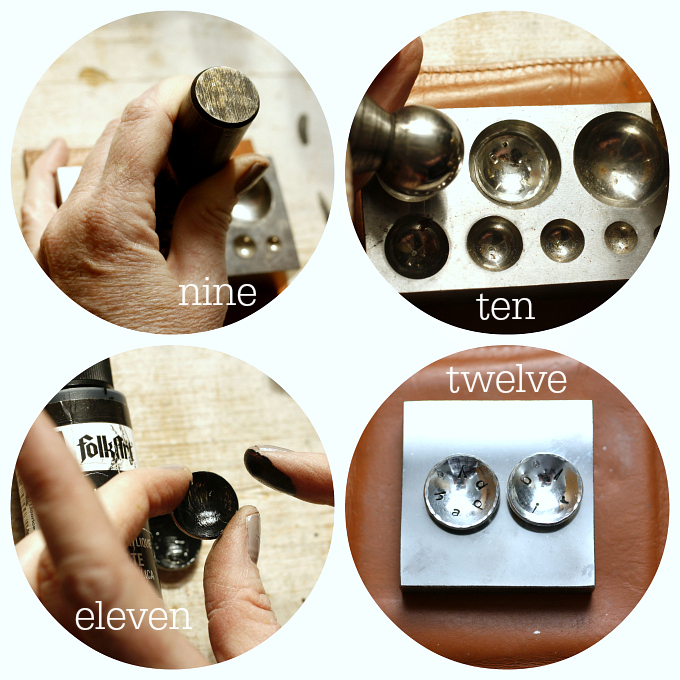
Happy GIrl Earrings Nine to Twelve

Step nine
Strike the top of the corresponding dapping tool with the flat end of your brass hammer while moving the round end around in the cup to form the blank into a concave shape.

Step ten
Repeat for second blank.

Step eleven
Use your finger tip or a cotton swab to apply paint to stamped areas.

Step twelve
Let sit for 30 seconds, wipe off excess with a soft cloth.

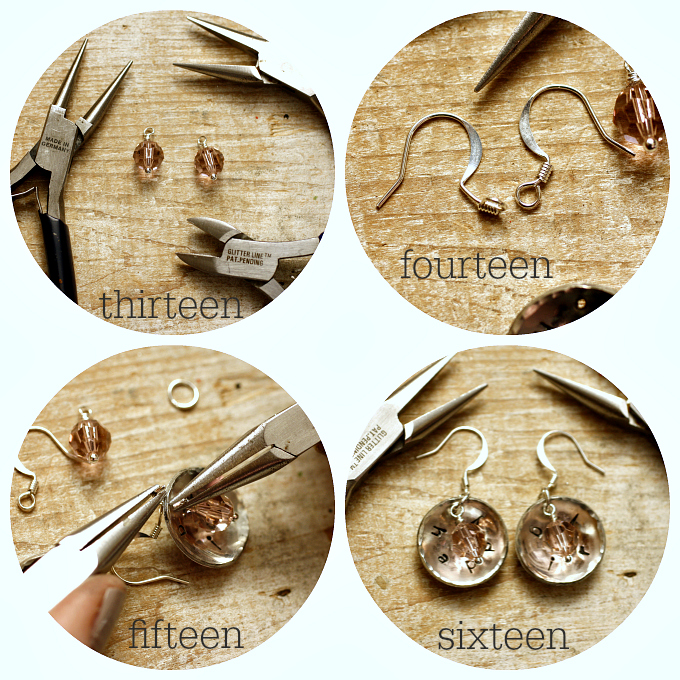
Happy Girl Earrings 13 to 16

Step thirteen
Create coiled top dangles with head pins and beads.

Step fourteen
Turn ear wire loops sideways using chain nose pliers, this will allow your blanks to hang forward.

Step fifteen
Slide jump ring into stamped blank, looped dangle and loop at bottom of earring wire. Secure closed with chain nose pliers.

Step sixteen
Make second earring.

Wear your Hand Stamped Earrings with pride because you made them yourself! Go you!

Design Tips: Stack dapped and flat blanks together to make lovely dimensional jewelry. Create texture around the edges with pattern stamps.

Filed Under: Uncategorized Tagged With: DIY hand stamped jewelry, Easy Metal Stamped Earrings, easy metal stamped jewelry, hand stamped jewelry, i can make hand stamped jewelry, i can make metal stamped jewelry, ImpressArt, margot potter

DIY Christmas Countdown Box

October 9, 2025 by decey Leave a Comment

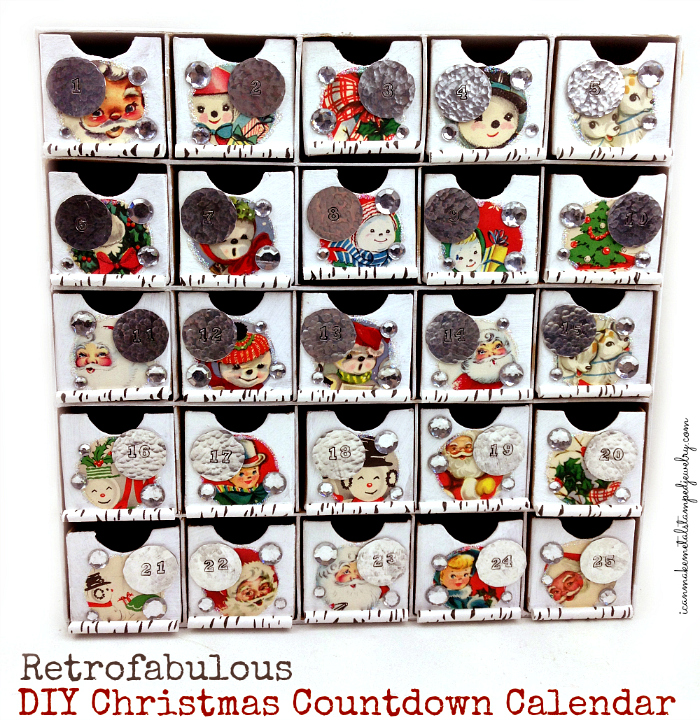
Christmas Countdown Calendar

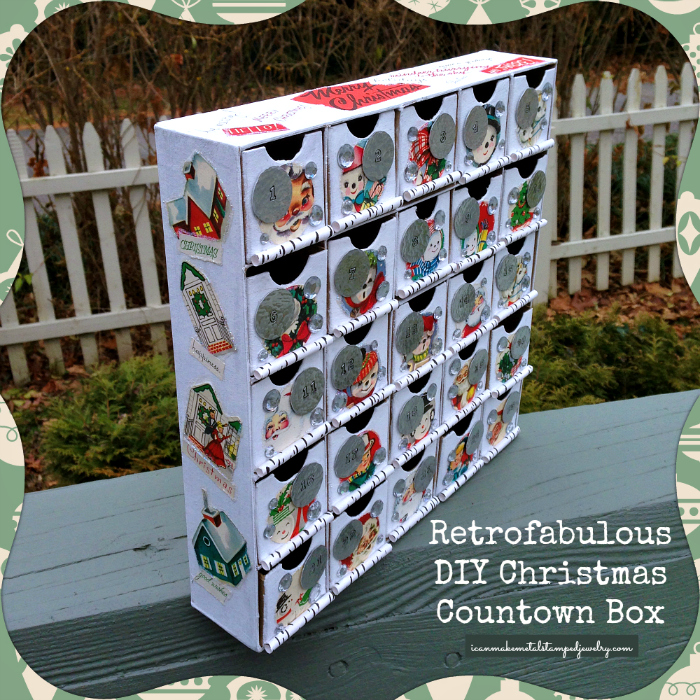
I LOVE crafting during the holidays, give me a theme and I am all over it! I broke out my stacks of vintage Christmas cards, metal stamps and a few simple craft supplies and got to work. Any excuse to eat chocolate every day and we are all in here at Casa de potter. Get the tutorial for our Retrofabulous DIY Christmas Countdown Calendar below!

You will need:

Karen Foster 3D Countdown Calendar, 25 Drawers
Upcycled Vintage or New Christmas Cards (you can score vintage ones on eBay)
25 ImpressArt, Circle, 7/8″, Aluminum Stamping Blanks- 24 pc.
Clear Faux Crystal Round Rhinestones Flatback Mixed Sizes
Kikkerland Biodegradable Paper Straws, Birch, Box of 144
Deco Art Americana Chalky Finish Paint, 8-Ounce, Everlasting
Ranger Ink Stickles Glitter Glue – Star Dust
I Love To Create Aleene’s Always Ready Turbo “Tacky” Glue, 4-Ounce
Aleene’s Tacky Sticker Sheets, 12-Pack
Folk Art Enamel Acrylic Paint, Licorice
Fiskars Round’n Round Squeeze Punch, Medium
Jeweler’s Files or Sand Paper
ImpressArt 2 by 2-Inch Steel Block
Ergo-Angle Metal Stamping Hammer
ImpressArt- Varsity Number Metal Stamps
Fiskars Crafts Duck Edition Scissors
Cotton Swab
Paper Towel

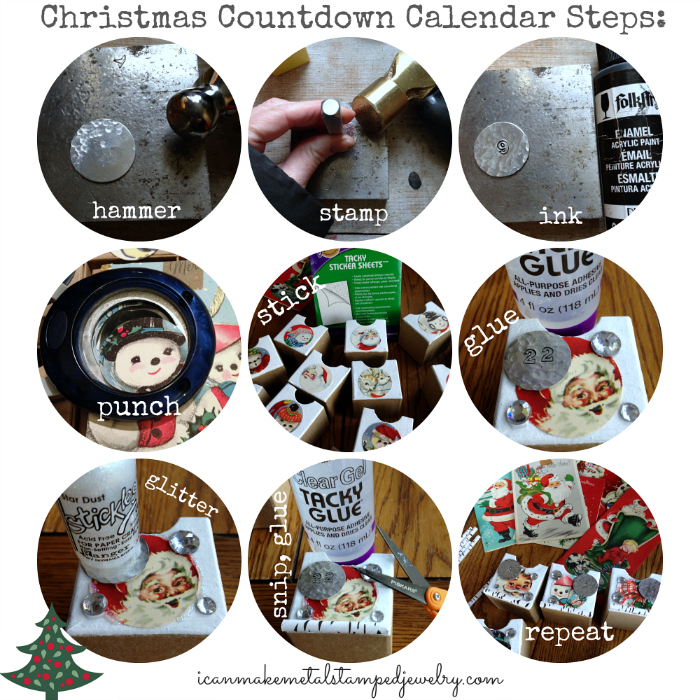
Christmas-Countdown-Calendar-Steps

Before you start, paint the entire box and every drawer with a layer of Chalky Finish Paint in everlasting. This gives the perfect vintage finish, like the old Putz houses. Trust me, it’s worth the effort!

Step One: Make your stamped blanks first. Begin by using the round end of a ball peen hammer to texture the blanks. Don’t be afraid, just go at it like one of Santa’s elves.

Step Two: Hold the stamp firmly between your thumb and forefinger as in picture with your hand slid down and resting on the bench block. Give it one firm hit with the brass hammer. Don’t move your hand or you may end up with a funky number.

Step Three: Remove stamp, use a cotton swab to apply paint. Let paint sit for 30 seconds, wipe clean with a paper towel. Make numbers 1-25.

Step Four: Cut the cards to make it easy to reach the images you need. Insert and punch. You will need 25 images.

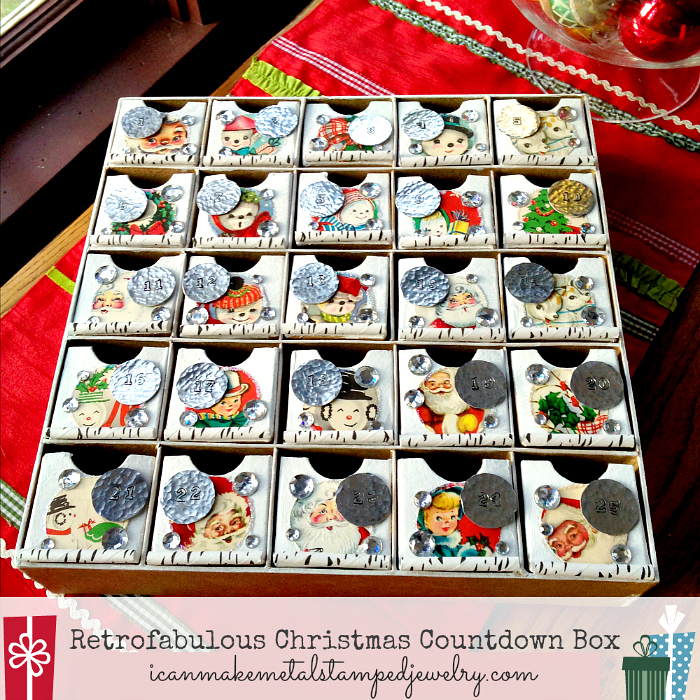
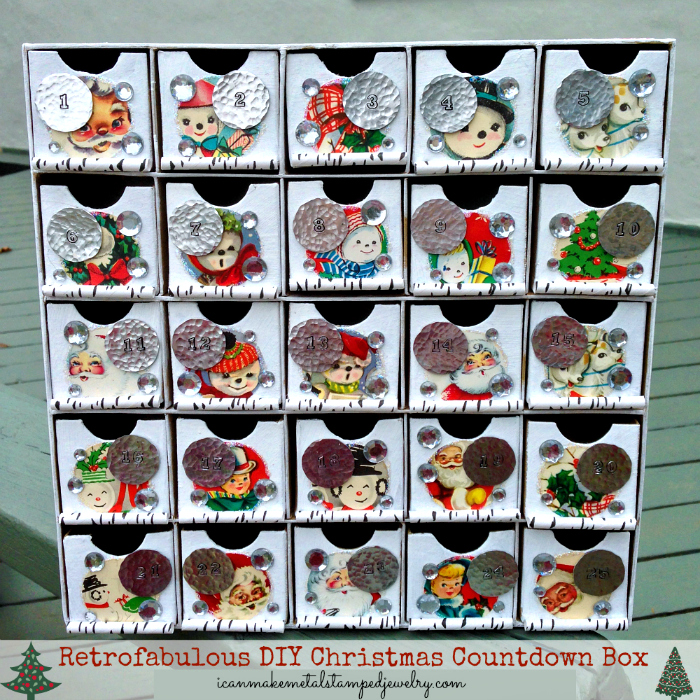
Step Five: Use sticker sheets to apply the punched images to the front of each box. (NOTE: You can opt to decoupage, but I am impatient and this makes quick work of attaching the images. I LOVE sticker sheets. LOVE. THEM. You can seal them if you like with a spray sealer, or not. Entirely up to you, my dear.)

Step Six: Rough up the back of your stamped blanks with a jeweler’s file or sand paper to help them adhere better. Glue numbers and rhinestones around images, varying shapes and placement.

Step Seven: Carefully squeeze a thin bead of Stickles around edges of images. Snip the straws to fit the bottom front of the boxes and CAREFULLY glue to box so you don’t smear your glitter. You could let the glitter dry if you’re patient, I am not. Have I mentioned that?

Step Eight: Repeat for all 25 of your boxes.

But wait…there’s more!

Christmas-Countdown-Calendar-2Sides

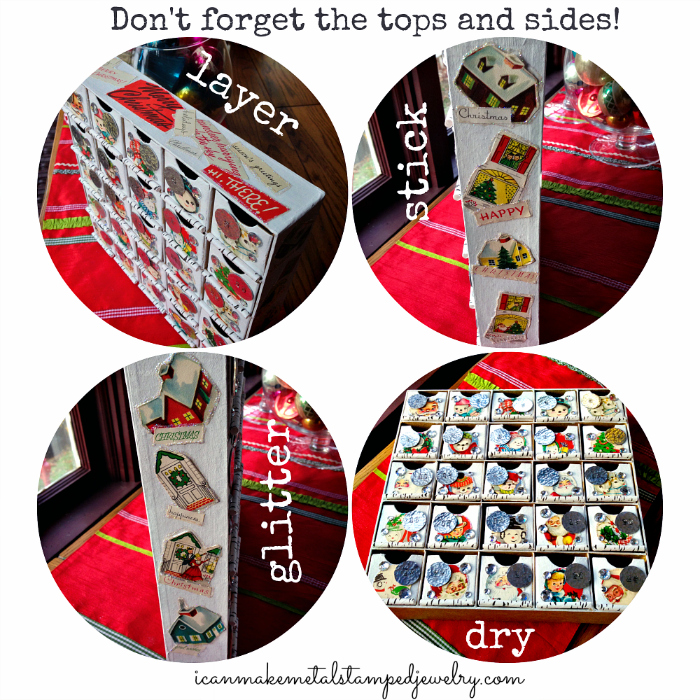
Step Nine: After I finished the boxes and had decimated carefully cut up a small pile of vintage greeting cards, I realized the top and sides looked a little…meh. So I cut up some fun words and images from the cards and attached them with the sticker sheets.

Step Ten: Then I edged everything with more Stickles, because there is never enough sparkle, people. Never. Enough. Sparkle.

Step Eleven: Then I stepped away and let the whole thing DRY OVERNIGHT.

DIY-Christmas-Countdown-Box-Side

How cute is this? These vintage images are just so much fun!

Retrofabulous-Christmas-Countdown-Box-Three

Christmas Countdown Box

Make it uniquely yours using whatever images you like. Try wrapping paper, new cards, magazine images…whatever rings your bell. It’s a great way to use up those Christmas cards you may have saved from last year. If you make one, we would LOVE to see it, so be sure to share in the comments.

Happy Stamping!
Margot and Avalon

Filed Under: Uncategorized Tagged With: DIY Advent Calendar, DIY Christmas Countdown Calendar, DIY Holiday Crafts, Hand Stamped Holidays, metal stamped holidays, vintage christmas, vintage inspired christmas

  • Page 1
  • Page 2
  • Page 3
  • Interim pages omitted …
  • Page 15
  • Go to Next Page »

Copyright © 2026 · Aspire Theme on Genesis Framework · WordPress · Log in