• Skip to main content

I can make metal stamped jewelry

She Shines DIY Hand Stamped Earrings

January 17, 2022 by decey Leave a Comment

She Shines

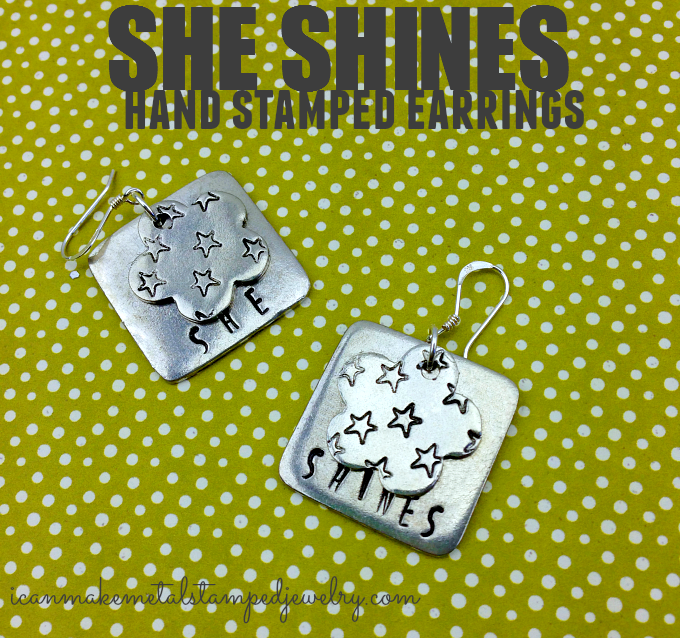
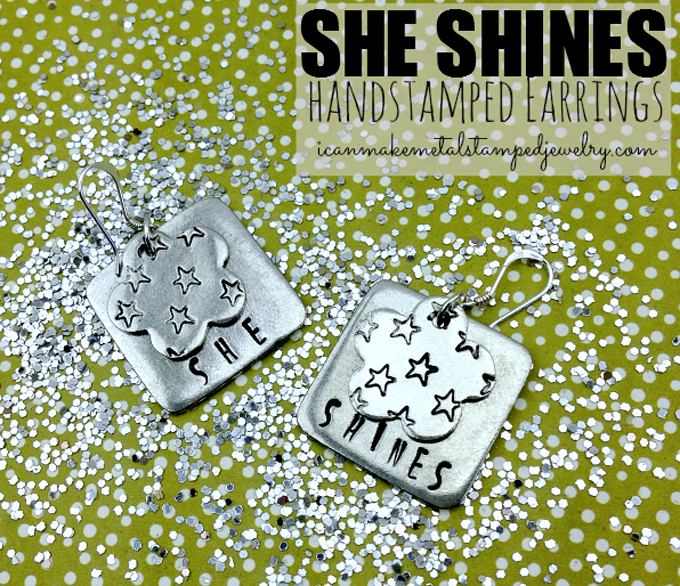
She sparkles, she dazzles, she glimmers, she shines. She’s a multi-faceted wonder. Some people are just a little sparklier than the rest. Stamp up some lovely earrings to celebrate her. Or perhaps she is you? Either way, we’ve got you covered with a fun, fast and fabulous pair of She Shines DIY Hand Stamped Earrings featuring the adorable new Lollipop Font from ImpressArt.

You will need:

2 ImpressArt Pewter Stamping Blanks Square
2 ImpressArt, 6 Petal Flower Aluminum Stamping Blanks
2 Beadalon Dapped and Spring Ear Wire
2 Beadalon 6mm Jump Rings
ImpressArt Lollipop Font
ImpressArt Brass Stamping Hammer
ImpressArt Steel Stamping Block Small
2 Pairs ImpressArt Chain Nose Pliers
Folk Art Enamel Acrylic Paint in Licorice
Cotton Swab
Paper Towel

Amazon.com Widgets
She Shines Steps

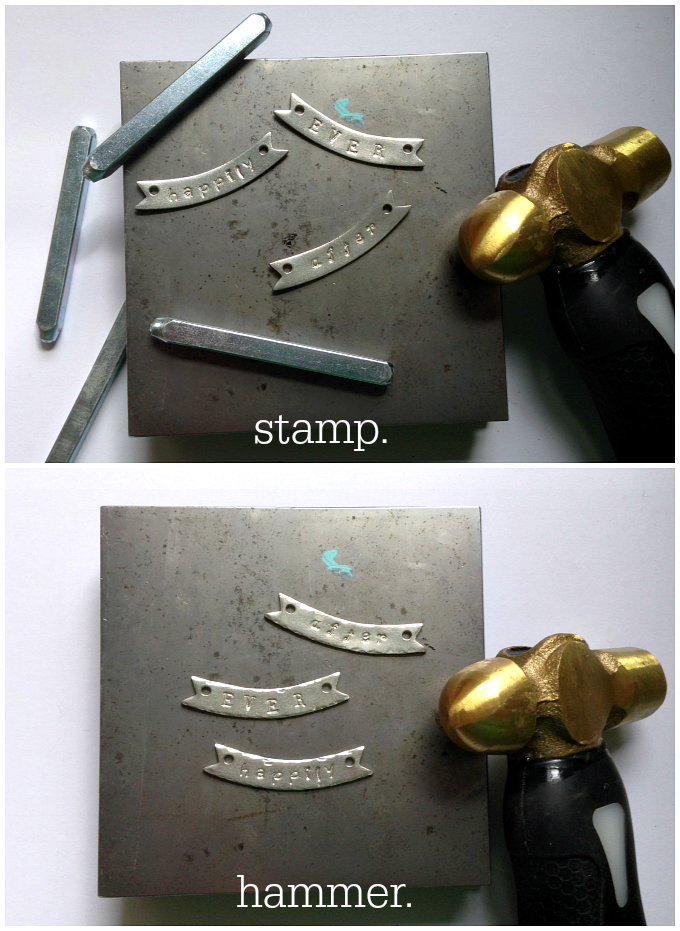
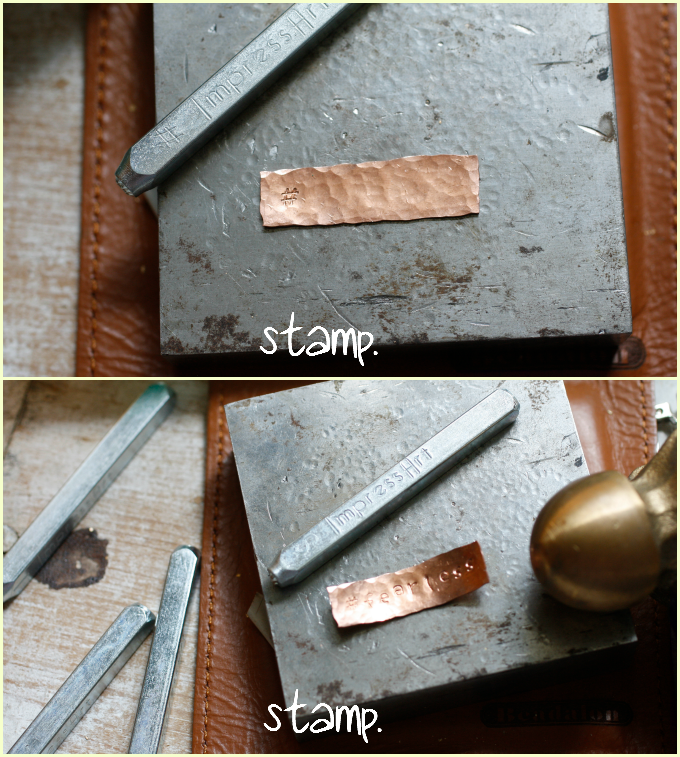
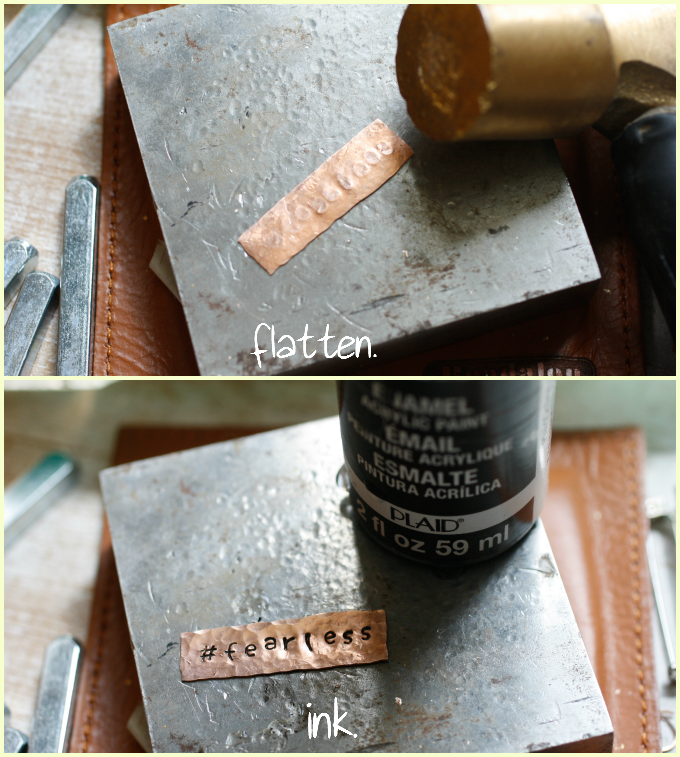
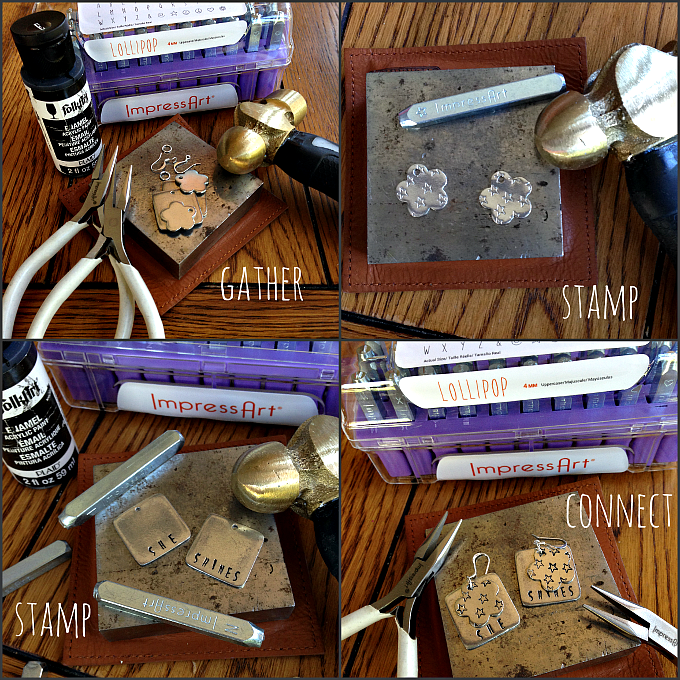
Step one: Gather your supplies. Step two: Stamp a pattern of stars on your flower blanks using the bonus star stamp from the Lollipop font set. Step three: Stamp “SHE” and “SHINES” on the bottom edge of your square blanks. Use the enamel paint on a cotton swab to ink the stamped areas on all blanks. Let set for 30 seconds and wipe off with a paper towel. Step four: Use chain nose pliers and jump rings to connect the ear wires and blanks.
She Shines Earrings

Shine on in your new DIY Hand Stamped Earrings, super star!

Cheers,
Margot and Avalon

*DIY Project Policy: Our tutorials are meant for your creative inspiration. Feel free to make and gift or wear these designs. Please make sure that you give credit to us as the designer if you make and share these designs on your blog or social sites. Please do not make and sell copies of our designs or sell them as kits. Please do not teach these designs as classes for profit. This is how we make our living and we ask that you respect our creativity and the time it takes to design, photograph and write these free tutorials. You may use a single photograph from each project online in blog round-ups or blog posts ONLY if you include a direct link back to our tutorial. Any use of these designs for retail sale for profit online in places like Etsy or eBay or in retail bricks and mortar, flea markets or outdoor fairs is not permitted. Thank you!

Filed Under: Uncategorized Tagged With: DIY hand stamped earrings, DIY jewelry, DIY metal stamped earrings, Easy Metal Stamped Earrings, hand stamped jewelry, metal stamped jewelry

Artist Spotlight: Amy Latta

December 9, 2021 by decey Leave a Comment

Amy Latta

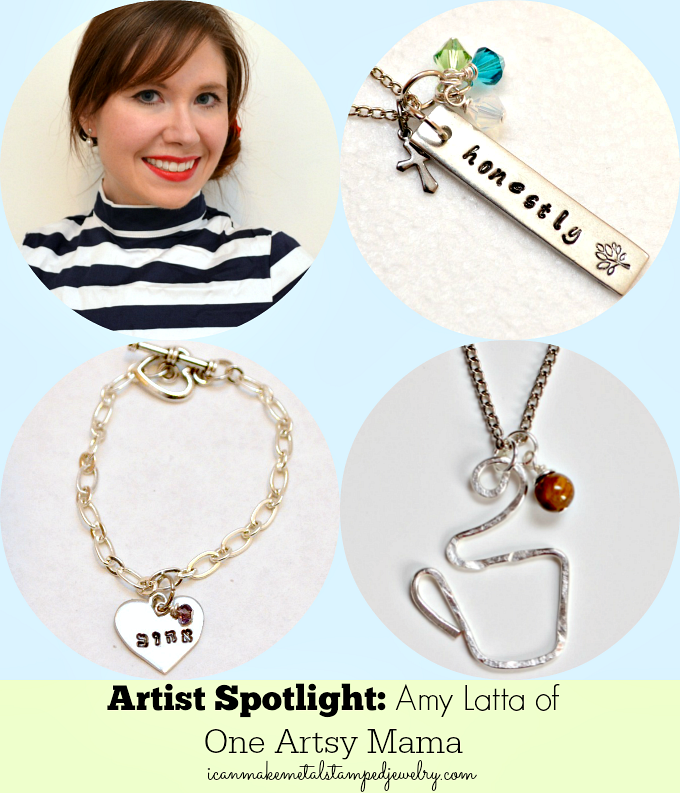
It’s time to shine our spotlight on another talented metal stamping artist! This week we’re thrilled to introduce you to Amy Latta of One Artsy Mama. This powerhouse of creativity dishes up a cornucopia of tempting DIY on her blog One Artsy Mama every week. She’s creative, she’s generous and she keeps it real. We think you’re going to adore her! Amy took some time out of her busy schedule to answer our Five Easy Questions about metal stamping.

  1. When did you start making jewelry and why?

For years, I thought it would be awesome to be able to make my own jewelry, and I had even accumulated a few supplies to give it a try, but it wasn’t until my friend Jess who is a skilled jewelry maker sat down with me in April of 2011 and walked me through the basic steps of making wire loops that I really got started with the hobby. Once I got the hang of it, I wanted to try everything…every technique, every type of jewelry I could. I’d seen all kinds of gorgeous metal stamped jewelry on Pinterest and was really excited to give that a try, so for Christmas that year, I asked for a hammer, a block, some blanks, and some stamps. I started playing around with them on Christmas Day and haven’t stopped ever since! Besides the fact that it’s fun being able to create something that matches any outfit, I love being able to make very personal gifts {and pieces for myself}; things that represent families, favorite quotes, or anything meaningful.

  1. What is your favorite source for jewelry making inspiration?

My go-to sources for inspiration are Pinterest, Craftgawker, and other blogs. There are so many beautiful things out there, and once I see a piece I love, I like to figure out what technique someone used and then take the basic idea and adapt it to be meaningful for me. I almost never just copy another design; instead I take what I like about the inspiration piece and then build my own version.

  1. What advice do you have for folks just starting out?

My best advice would be to try as many techniques as you can because you never know which ones you’ll fall in love with. Also, don’t be put off by the initial investment for the tools you need because once you have them, you will use and reuse them for a very long time. Once they’re part of your stash, you can make new pieces for practically nothing, because you already have what you need. Oh, and don’t judge yourself by a standard of perfection. Those little imperfections are what give handmade pieces a beauty all their own that you won’t find in pieces that are mass-produced by machines.

  1. What tips or tricks can you share for successful metal stamping?

Honestly, my best tip is to use Soft Strike blanks. ImpressArt makes them out of pewter and Alkemé, and they are a real game changer. They are SO much easier to stamp on and get a deep, clean impression. You will feel much more successful using them because when you stamp on harder metals, sometimes you’ll only get one part of your design to stamp clearly, which is a real pain. Trust me. My other top tip is to always tape your blank in place before stamping. You may not think so, but it will move. Just ask Margot…she can tell you how mine went flying right there on the show floor at CHA because I didn’t have tape. True {and embarrassing} story.

  1. Where can our readers find you?

I would love for you to stop by my blog, One Artsy Mama, and visit me anytime! I share Honest Inspiration for Everyday Life, which includes all kinds of craft projects, kids’ projects, DIY jewelry, fashion tips, crochet tutorials, and more. I’m also on just about every social media channel out there, and I share tons of adorable photos of my five year old Little Crafter on Instagram, so you should totally follow along! I’m currently in the exciting process of designing a handbag with Galian Handbags in NYC, and I’m often asking for feedback on my Facebook page, so that would be a fun place to join the discussion too! Hope to see you there!

Website

Facebook

Twitter @oneartmama

Instagram: @oneartsymama

Pinterest

Thank you to Amy Latta for answering our five easy questions! Take a moment to visit her on the web, she’s a powerhouse. Thank you for visiting, make sure you come back Friday for a 10 Minute DIY project that is absolutely perfect for Mother’s Day!

Cheers,
Margot and Avalon

Filed Under: Uncategorized Tagged With: amy latta, artist spotlight, designer spotlight, metal stamping artist, metal stamping tips, one artsy mama

10 Minute Craft: Bottle Cap Necklaces

November 27, 2021 by decey Leave a Comment

Bottle Cap Necklaces Two

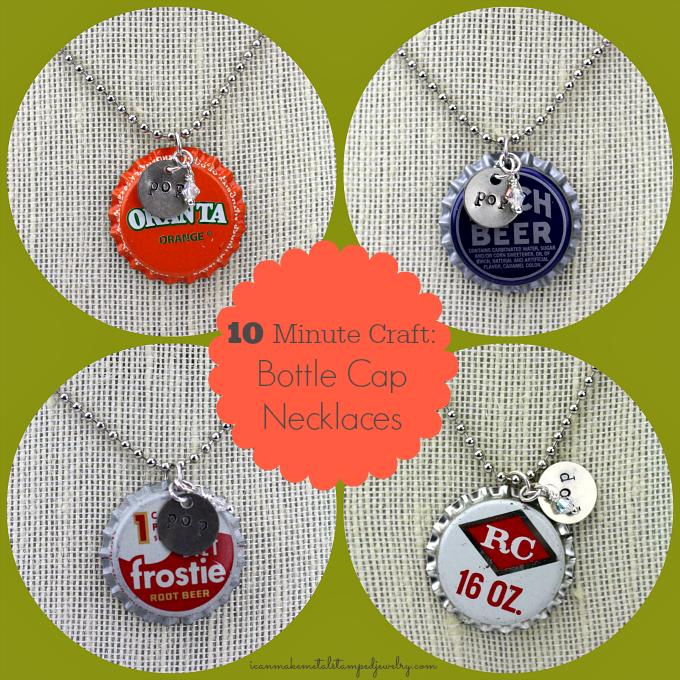
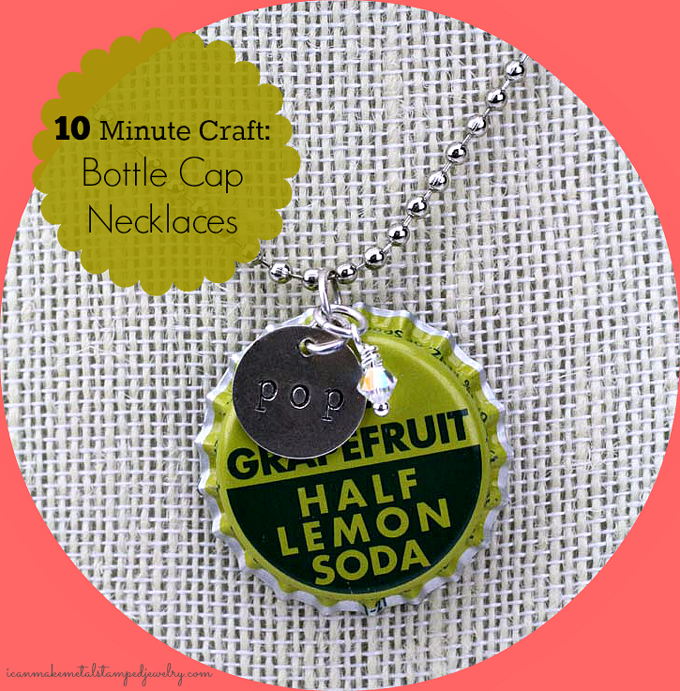
These adorable little Bottle Cap Necklaces can be made in under 10 minutes so they’re perfect for the short attention span crafter! They make a fun project for teen parties, ‘girl’s night in’ gatherings or even summer camp art projects. You can find the pre-crimped bottle caps at craft stores and online. Just add a stamped metal blank and a sparkling SWAROVSKI crystal and you’re ready to rock and roll, baby. Good times!

You will need:

Vintage Bottle Caps
ImpressArt Circle 1/2″ Stamping Blanks
10-MM Jump Rings
Ball Chain with Connector
Beadalon Ball Pin Medium Head Pin
Folk Art Enamel Acrylic Paint, Licorice
ImpressArt Stamp Straight Tape
ImpressArt- Basic Metal Stamp Set, Lowercase, 3mm
Ergo-Angle Metal Stamping Hammer
ImpressArt 2 by 2-Inch Steel Block
ImpressArt 2-Hole Punch Kit
Round Nose Pliers for Jewelry Making
2 pairs ImpressArt Chain Nose Pliers
ImpressArt Flush Cutters
Cotton swab
Paper towel

Bottlecap Necklace Steps

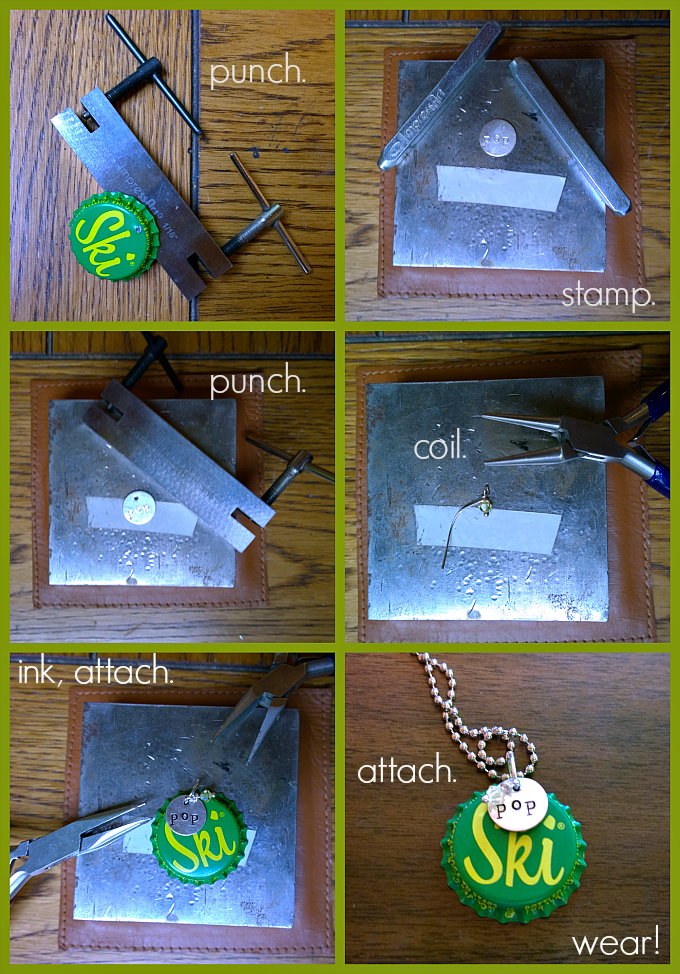
Step one: Use 2-hole punch to make a hole in the top center of bottle cap. Step two: Stamp “p o p” into blank. (You could also stamp ‘s o d a’ or ‘c o l a’.) Step three: Punch hole in top of blank. Step four: Slide crystal on head pin and coil top. Cut off excess wire, tuck under. Step five: Swipe ink across surface of blank with cotton swab, wipe off excess with paper towel. Attach bottle cap, blank and crystal together with jump ring. Step six: Slide pendant on ball chain.

Bottle Cap Necklace Two

Watch me share this project on our local NBC Affiliate here:

That’s it! Fun fast and fabulous Bottle Cap Necklaces! Stamp up a six pack to go!

Cheers,
Margot and Avalon

*DIY Project Policy: Our tutorials are meant for your creative inspiration. Feel free to make and gift or wear these designs. Please make sure that you give credit to us as the designer if you make and share these designs on your blog or social sites. Please do not make and sell copies of our designs or sell them as kits. Please do not teach these designs as classes for profit. This is how we make our living and we ask that you respect our creativity and the time it takes to design, photograph and write these free tutorials. You may use a single photograph from each project online in blog round-ups or blog posts ONLY if you include a direct link back to our tutorial. Any use of these designs for retail sale for profit online in places like Etsy or eBay or in retail bricks and mortar, flea markets or outdoor fairs is not permitted. Thank you!
(FTC DISCLOSURE: *This post contains affiliate links, if you click on a link and make a purchase we get a small percentage of the sale. The blogger is employed by ImpressArt, but this is her personal blog. All opinions are 100% her own!)

Filed Under: Uncategorized Tagged With: bottle cap crafts, bottle cap jewelry, bottle cap necklaces, DIY bottle cap necklace, easy metal stamped jewelry, get started metal stamping, how to make bottle cap necklaces, how to make metal stamped jewelry, ten minute crafts

DIY Galaxy Pendant

September 4, 2021 by decey Leave a Comment

DIY Galaxy Pendant Closeup

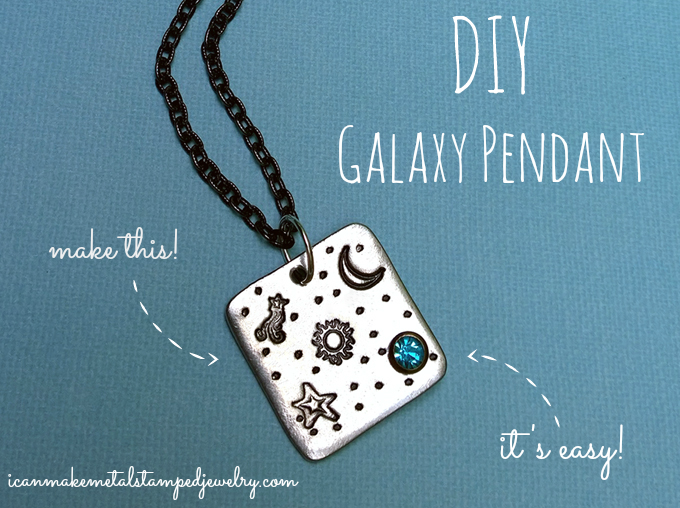
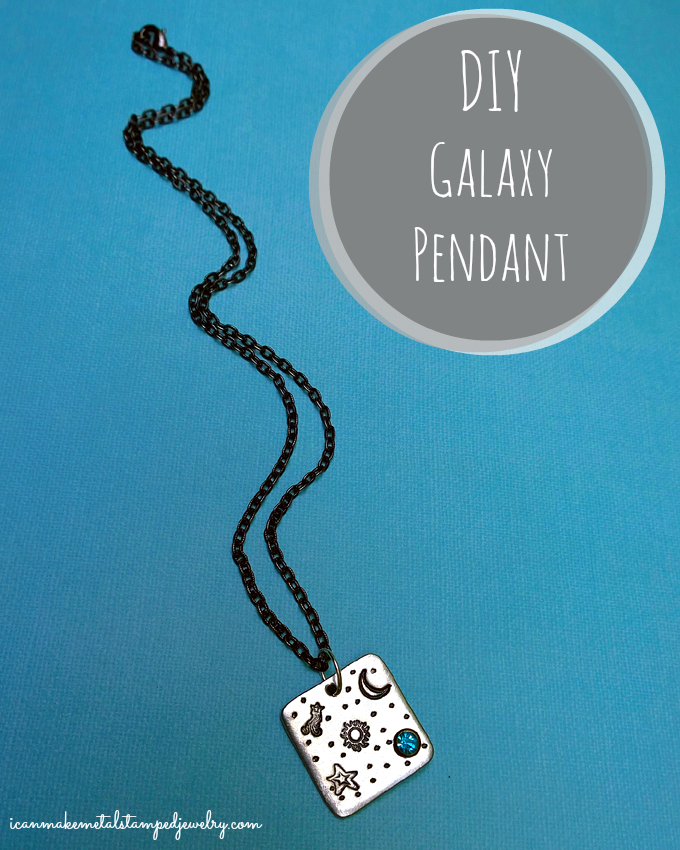
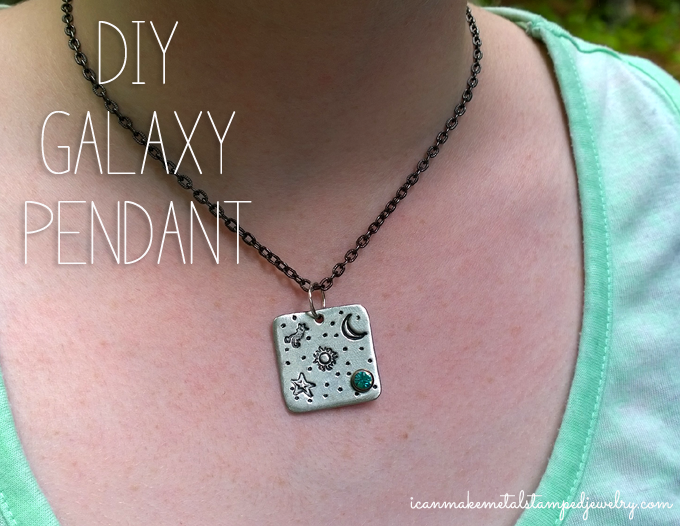
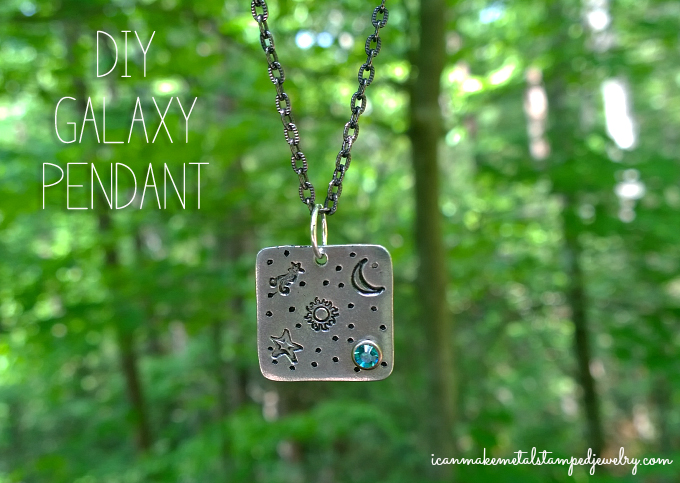
Galaxy crafts are everywhere lately so we decided to design a metal stamped version of the concept. This DIY Galaxy Pendant is perfect for summertime with a peasant blouse or a maxi dress. Add a floral headband and a wrist full of stamped and stacked bracelets and you’ll look like you stepped out of Coachella. Plus, you can say you made it yourself, how cool is that? Oh, and if that’s not enough to tickle your fancy, you can make this necklace in about 15 minutes too. Sweet!

*You will need:

ImpressArt Pewter Stamping Blank Square
Czech Crystal Snap Rivet, Teal
Folk Art Enamel Acrylic Paint, Licorice
10-MM Jump Ring, Silver Plated
Gun Metal Plated Chain Necklace With Clasp
ImpressArt Star , Moon, Shooting Star and Sun Stamps
Wood Handle Scratch Awl
Ergo-Angle Metal Stamping Hammer
ImpressArt 2 by 2-Inch Steel Block
ImpressArt Crystal Rivet Setting Kit
ImpressArt 2-Hole Punch, Large
2 pairs ImpressArt Chain Nose Pliers
ImpressArt Stamp Straight Tape
Cotton Swab
Paper Towel

1-2

Step one: Stamp the middle, top right and left and bottom left corners of your blank with the sun, moon, star and shooting star from ImpressArt’s Space and Beyond pack. Leave the right bottom corner blank. Step two: Use an awl to stamp tiny stars across the open areas of the blank.

3-4

Step three: Use a cotton swab to swipe enamel paint across the surface of your blank, digging it into the recessed areas. Wipe off excess with a paper towel or soft cloth. Step four: Use the smaller (5/8″) side of the ImpressArt large 2-hole punch to pierce a hole in the right bottom corner of the blank.

5-6

Step six: Use ImpressArt’s rivet setting tool, mat and the brass hammer to set the rivet into the pierced corner of the blank. Thread the crystal side into the front and the snap side over the back. Turn pendant over and place tool over back of snap. Strike top of tool with hammer. Don’t overdo this, you don’t want to chip or crack your crystal. Make sure it’s secured, you may have to it it a few times. Step seven: Use chain nose pliers to secure a large jump ring to the pendant and thread it on a chain.

DIY Galaxy Pendant One

Galaxy Final

Galaxy Pendant Outdoors

There you have it folks, a super simple DIY Galaxy Pendant. Not into the cosmic theme? No worries! You can take this idea in so many directions using ImpressArt Design Stamps. Try Zodiac Stamps, Holiday Stamps or Floral Stamps! Whatever you do, metal stamping lets you tell your story with style.

Cheers,
Margot and Avalon

(Post contains affiliate links. If you click on a link and make a purchase, we get a small percentage of the sale.)

*DIY Project Policy: Our tutorials are meant for your creative inspiration. Feel free to make and gift or wear these designs. Please make sure that you give credit to us as the designer if you make and share these designs on your blog or social sites. Please do not make and sell copies of our designs or sell them as kits. Please do not teach these designs as classes for profit. This is how we make our living and we ask that you respect our creativity and the time it takes to design, photograph and write these free tutorials. You may use a single photograph from each project online in blog round-ups or blog posts ONLY if you include a direct link back to our tutorial. Any use of these designs for retail sale for profit online in places like Etsy or eBay or in retail bricks and mortar, flea markets or outdoor fairs is not permitted. Thank you!
Filed Under: Uncategorized Tagged With: DIY galaxy jewelry, DIY hand stamped jewelry, DIY jewelry, DIY metal stamped jewelry, easy metal stamping projects, Galaxy Jewelry, get started metal stamping, metal stamped jewelry

DIY Metal Stamped Earrings

June 5, 2021 by decey Leave a Comment

May Flowers Earrings Two Text copy

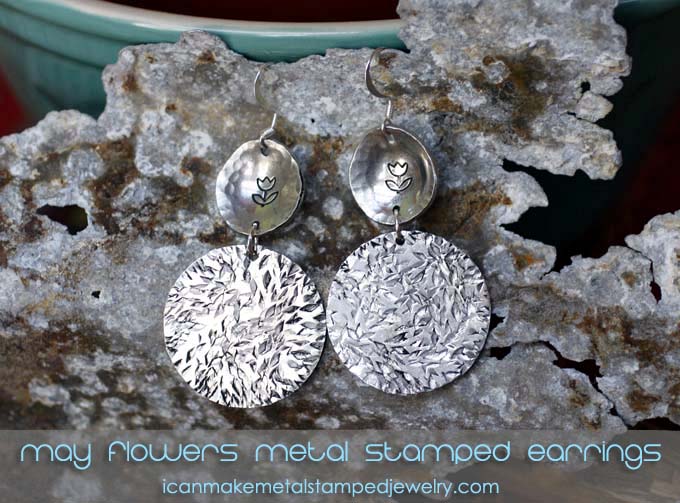
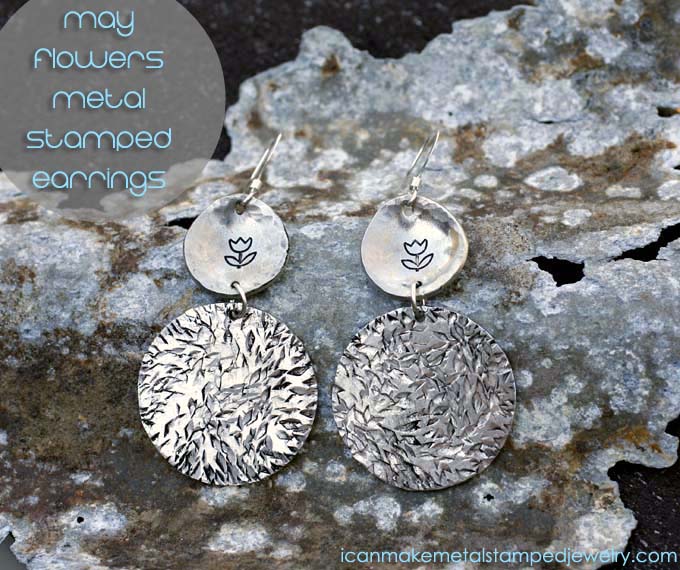
April showers may bring May flowers, but you can bring them even sooner by making these pretty May Flowers DIY Metal Stamped Earrings!  Using a design stamp, texture hammer and ImpressArt‘s new SoftStrike blanks you can make stunning boutique chic jewelry in under 30 minutes.  You’ll be amazed how easy it is to make these earrings and we’re going to show you how!

You will need:
(*DISCLOSURE)

2 ImpressArt, Pewter Stamping Blanks, River Stone
2 ImpressArt Stamping Blank Circle, 1.25-Inch, Alkeme
2 Beadalon Jump Ring 6mm Silver, Plated
2 Dapped and Spring Ear Wire, Nickel Free Silver Plate
Folk Art Enamel Acrylic Paint, Licorice
Ergo-Angle Metal Stamping Hammer
ImpressArt 2 by 2-Inch Steel Block
Texturing Hammer
ImpressArt Face Chasing Hammer
Double Metal Punch, 1.5mm & 2mm
ImpressArt- 6mm, Tulip Design Stamp
8 Punch Dapping Block Set
Paper towels

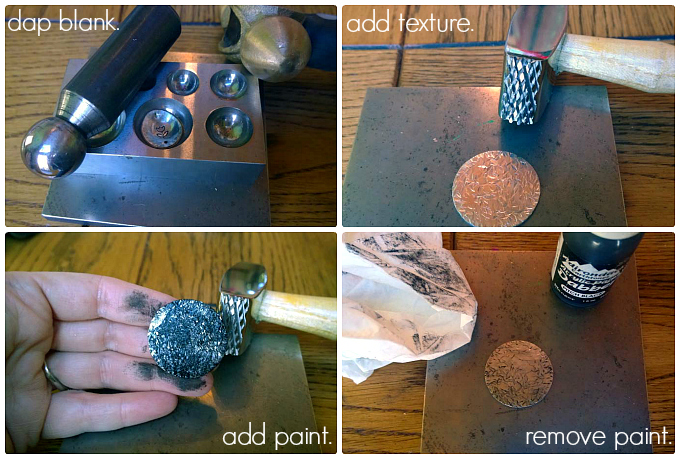
Step one: Center your tulip stamp making sure the entire stamp is in contact with the pewter blank.  Strike top of stamp once with a firm tap.  (Design Tip Don’t hit the stamp more than once to prevent skipped or ghost impressions.)  Step two: Use the round end of a ball pein hammer to create texture around the edge of your blank.  Step three:  add a hole at the center bottom of your blank using the smaller side of the 2-hole punch.  Step four: Swipe black acrylic paint, multi-surface paint or jewelry glaze across surface of blank.  Allow it to set for a minute and then wipe clean with a paper towel.

Steps 5-8

Step five: Place blank in dapping block with stamped side facing up.  Strike top of dapping tool with your brass hammer, moving the tool around in the dapping block to curve or round your blank.  Step six: Strike the blank working from the edges into the center using the texture hammer.  Alternate the placement of the hammer so you get a nice variety of marks.  Step seven: Add paint.  Step eight: Remove paint.

May Flowers 9-12

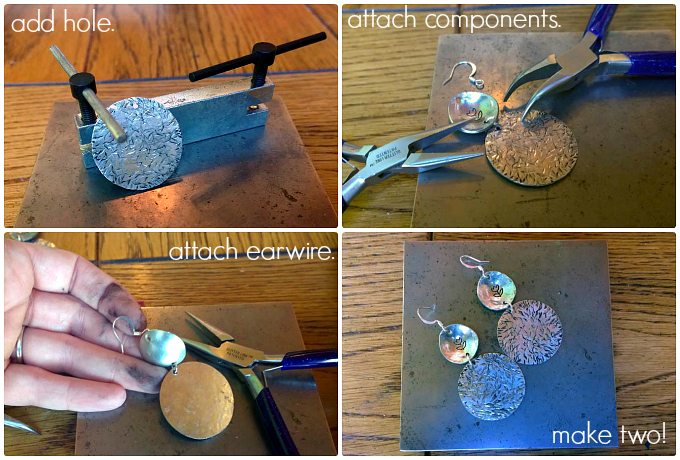
Step Nine: Use smaller side of 2-hole punch to add a hole to the top of each of your textured blanks.  Step Ten: Attach the blanks together as shown using pliers to open and close jump ring securely.  Step Eleven: Attach ear wire to top of each earring.  Step Twelve: Make two!

May Flowers One Banner copy

Would you make and wear these May Flowers DIY Metal Stamped Earrings?  How would you style them?  Let us know in the comments!

Cheers,
Margot and Avalon

(*FTC DISCLOSURE: There are affiliate links in this post, if you click on a link to make a purchase we get a small percentage of the sale. That’s how we keep the lights on, folks!)

*DIY Project Policy: Our tutorials are meant for your creative inspiration. Feel free to make and gift or wear these designs. Please make sure that you give credit to us as the designer if you make and share these designs on your blog or social sites. Please do not make and sell copies of our designs or sell them as kits. Please do not teach these designs as classes for profit. This is how we make our living and we ask that you respect our creativity and the time it takes to design, photograph and write these free tutorials. You may use a single photograph from each project online if you include a direct link back to our tutorial. Any use of these designs for retail sale for profit online in places like Etsy or eBay or in retail bricks and mortar, flea markets or outdoor fairs is not permitted. Thank you!
Design t-shirts online with CustomInk!

Filed Under: Uncategorized Tagged With: DIY hand stamped earrings, DIY hand stamped jewelry, DIY metal stamped earrings, DIY metal stamped jewelry, how to make metal stamped jewelry, metal stamped jewelry, metal stamping 101, metal stamping basics

  • « Go to Previous Page
  • Page 1
  • Interim pages omitted …
  • Page 10
  • Page 11
  • Page 12
  • Page 13
  • Page 14
  • Page 15
  • Go to Next Page »

Copyright © 2026 · Aspire Theme on Genesis Framework · WordPress · Log in