• Skip to main content

I can make metal stamped jewelry

12 Terrific Metal Stamped Projects

November 2, 2020 by decey Leave a Comment

Twelve Terrific Metal Stamped Projects

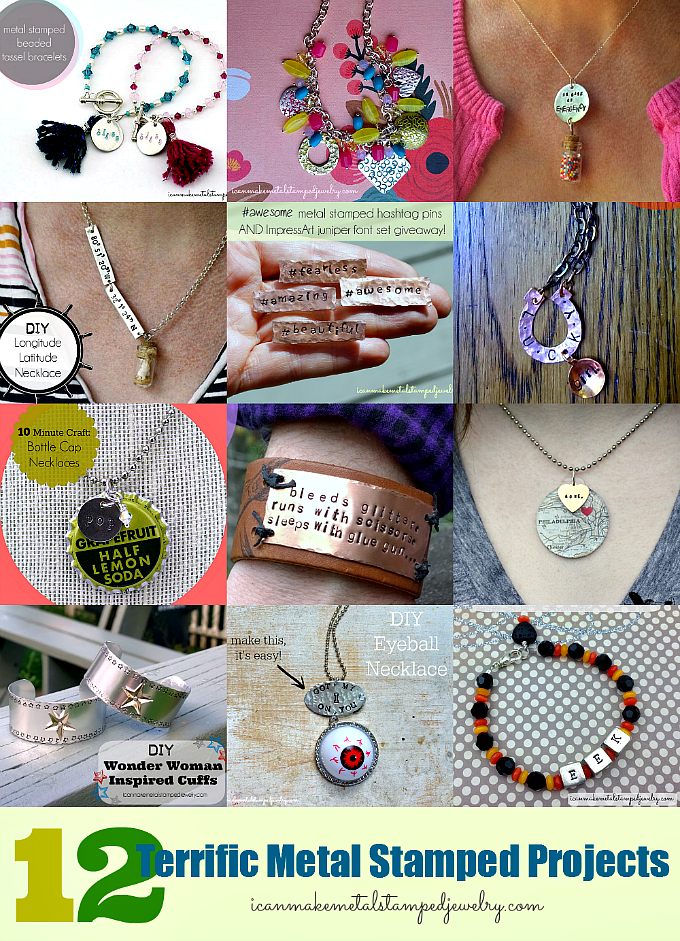
It’s time for another round up of DIY Metal Stamped Projects for your creative inspiration! These mixed media ideas are big on kitsch and full of fun. After all, anyone can figure out how to stamp a word or a letter on a blank, why not take your metal stamped jewelry to another level? Add beads, tassels, charms, vials, rivets and decoupage! Get the scoop on these DIY delights below.
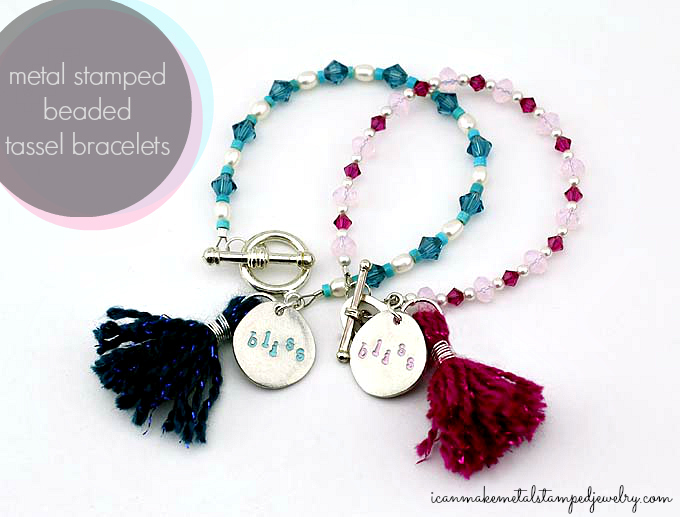
Bliss Metal Stamped Tassel Bracelets Two Text

Feel flirty and fabulous in our DIY Metal Stamped Beaded Tassel Bracelets!
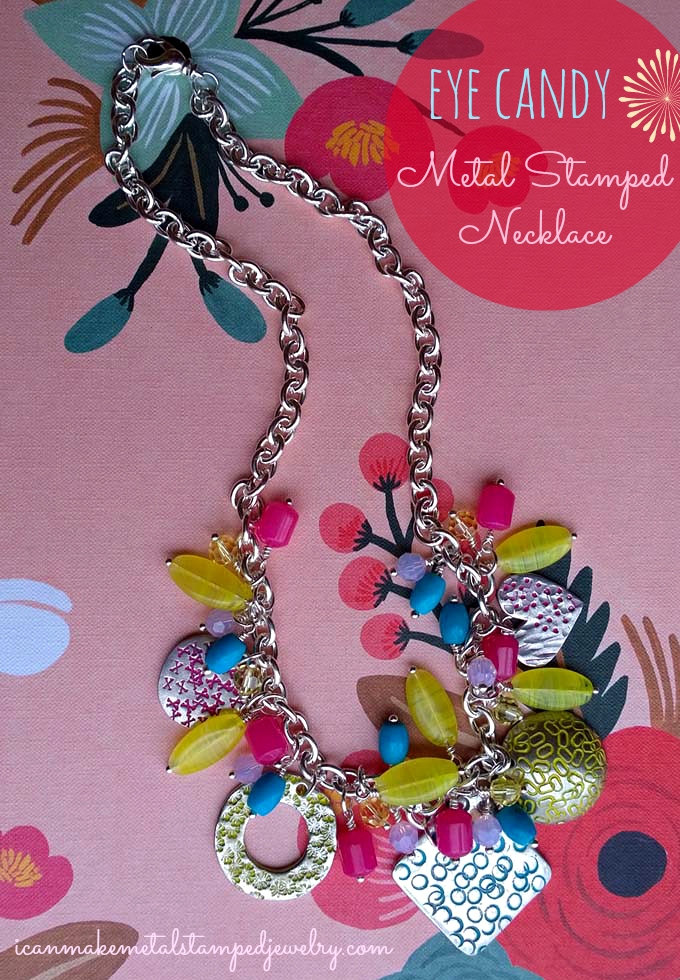
Eye Candy Three

More color? More fun! Our DIY Eye Candy necklace features blanks textured with metal stamps and emblazoned with vibrant colors.
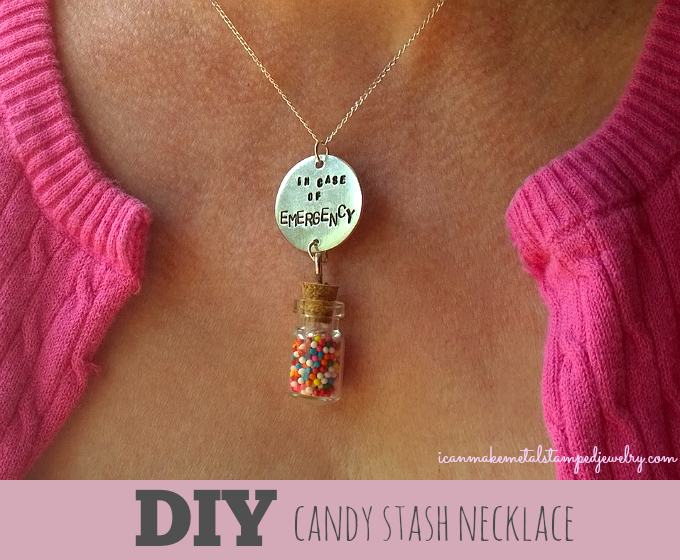
DIY Candy Stash Three

Who says candy can’t be jewelry? We surely don’t! Carry an emergency stash in this playful DIY Candy Stash Necklace. Delish!
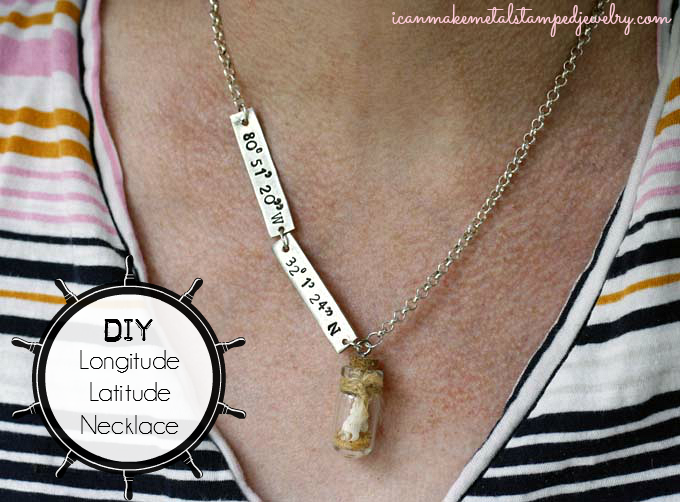
Longitude Latitude Necklace LS Two

Commemorate your vacation with our metal stamped DIY Longitude/Latitude necklace.
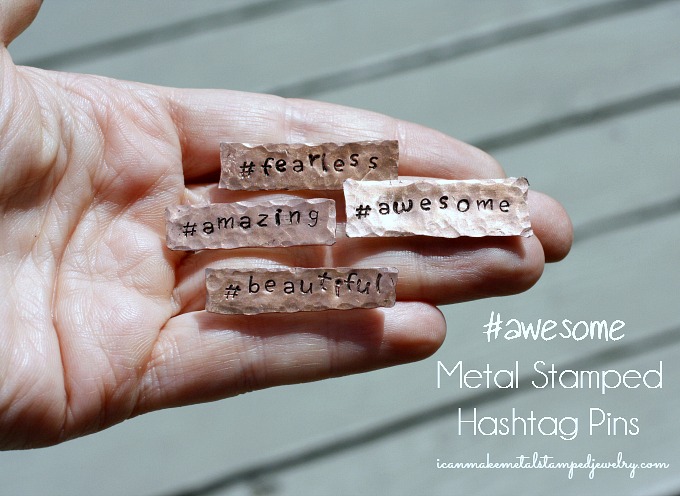
Hashtag Pins 3  Final

Make some #awesome Metal Stamped Hashtag Pins and showcase your social media savvy!
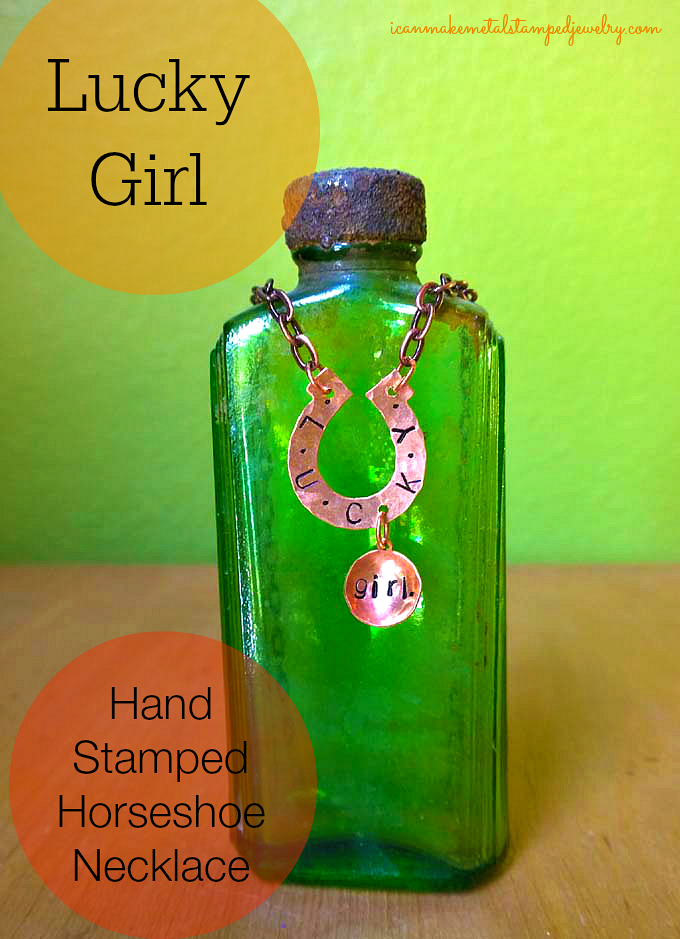
Lucky Girl Hand Stamped Necklace Three Text

Feel lucky in our DIY Lucky Girl Hand Stamped Horseshoe Necklace!
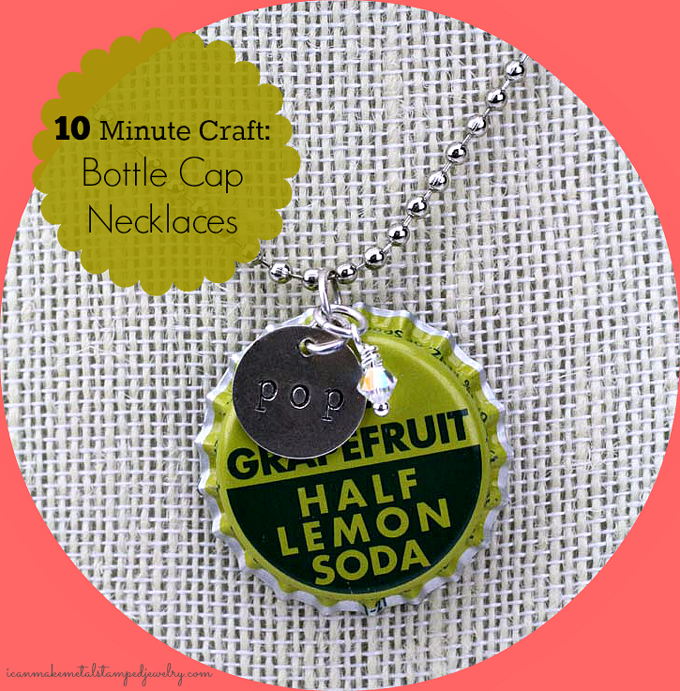
Bottle Cap Necklace Two

Got ten minutes? Stamp up some DIY Bottle Cap Necklaces!
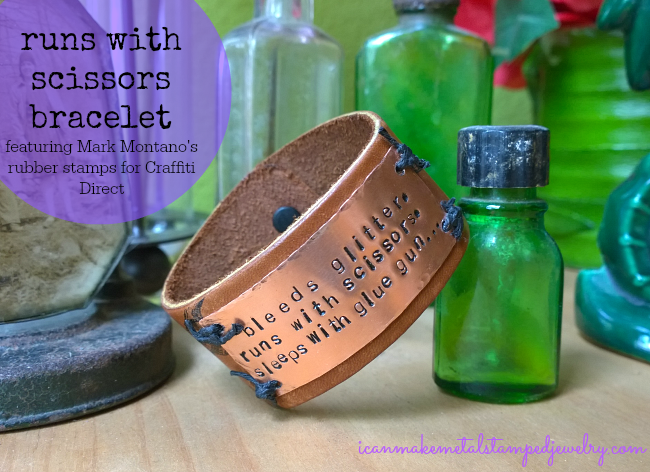
Runs with Scissors

Are you so crafty it hurts? Make our Runs With Scissors Bracelet!
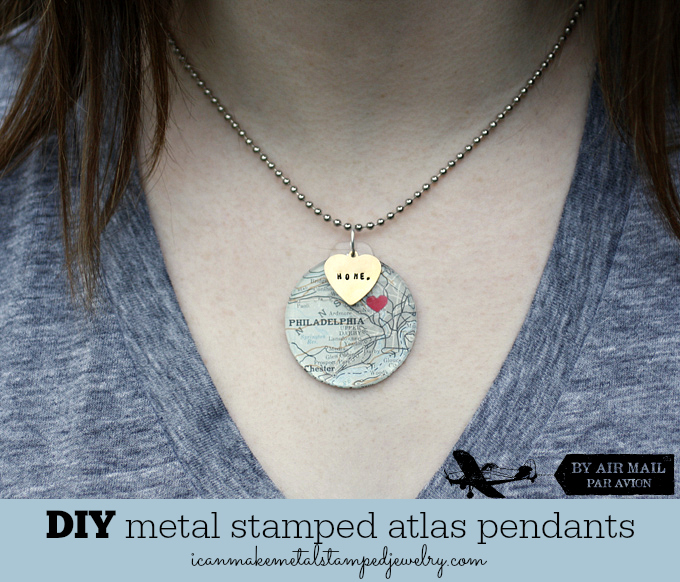
Atlas Model Closer Text

Show the love for the place you call home with our DIY Metal Stamped Atlas Pendants.
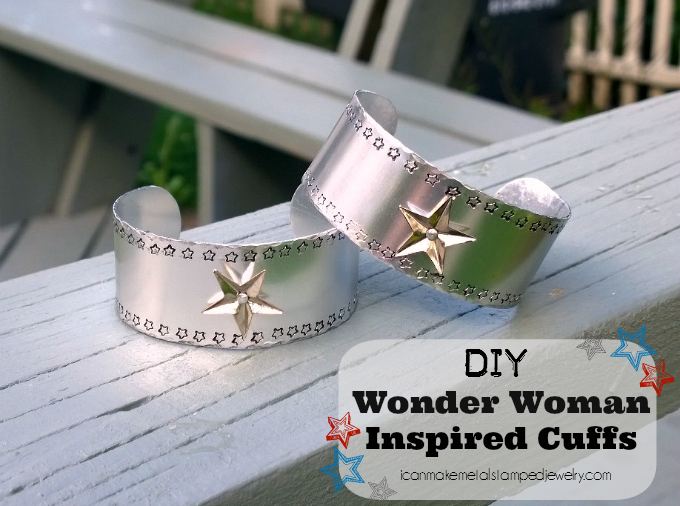
Wonder Woman Cuffs copy

Feel like a super hero in our DIY Wonder Woman Inspired Cuffs.
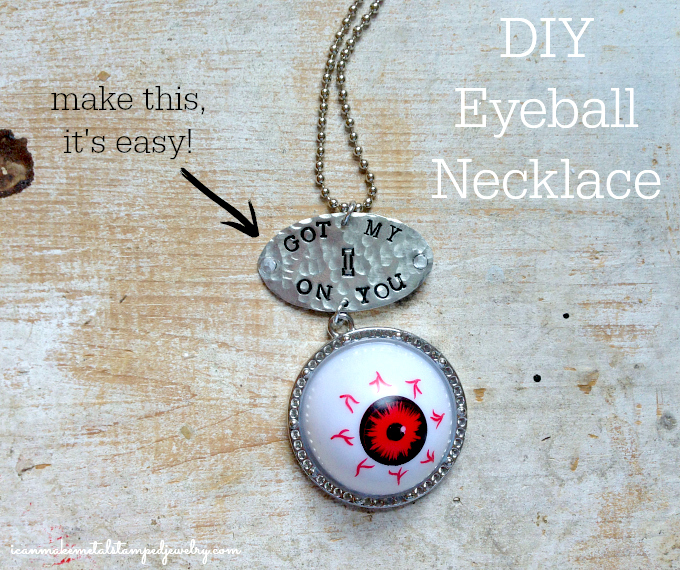
Eyeball Text 2

Scare up some fun with our DIY Eyeball Necklace.
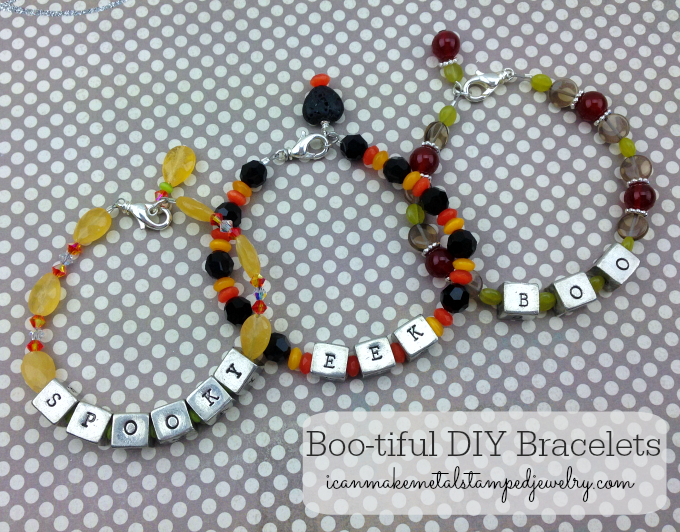
Bootiful DIY Bracelets

And last but surely not least, celebrate Halloween in style with our Boo-tiful DIY Bracelets.

12 Terrific Metal Stamped Projects, folks. Happy Stamping! Oh, and if you want to know what you need to get started, we have a post for that.

Cheers,
Margot

Craftsy

Filed Under: Uncategorized Tagged With: DIY hand stamped jewelry, DIY jewelry, hand stamped jewelry, how to make metal stamped jewelry, metal stamped jewelry, Metal Stamped Jewelry Tutorials

Metal Stamped Positive Affirmations Necklace

September 18, 2020 by decey Leave a Comment

Positive Affirmations Necklace Yellow Text

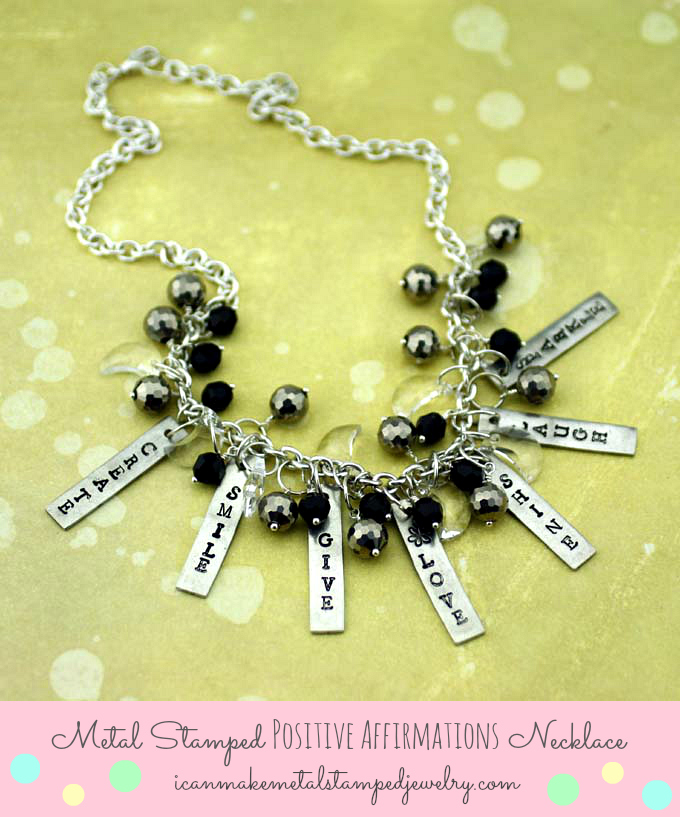
Staying on the sunny side, seeing the glass half full, focusing on the blessings, choosing joy, however you want to frame it, positive affirmations really do work. We get that upon which we focus, so focus on the joy and let the rest fall away. Here’s a lovely metal stamped necklace you can wear to remind yourself of the good stuff. These rectangle blanks make it easy for the beginner to be successful stamping, no worrying about lining the letters up horizontally! Just start in the center and work your way up and down. Just one swift tap of your hammer and you’re good to go. Add some faceted glass and SWAROVSKI ELEMENTS beads to add sparkle and you’re sure to garner tons of compliments. I wore this design to a trade show and everyone loved it. Here’s how you can make a Metal Stamped Positive Affirmations Necklace (and some matching Yes, This earrings) of your own!

You will need:
9 ImpressArt, Pewter Stamping Blanks, Rectangle (7 for necklace, 2 for earrings)
11 Preciosa Czech Fire 8mm Polished Glass Bead, Faceted Round, Half Coating Silver, 100-Pack
12 Swarovski Crystal 5000 6mm Jet Faceted Round Beads
8 SWAROVSKI ELEMENTS Crystal Moon Pendant #6722 20mm Crystal AB
4 SWAROVSKI ELEMENTS Crystal #5000 4mm Round Beads Jet
2 4mm Freshwater Pearl Beads
43 Beadalon 10-MM Jump Rings Silver Plated
18″ Beadalon Chain Rolo Large Silver Plated
Beadalon Lobster Clasp Swivel
2 Beadalon Dapped and Spring Ear Wire
Beadalon Ball Tipped Head Pin
ImpressArt- Basic Newsprint Uppercase Font Set
ImpressArt Design Stamps, 6mm, Daisy
Folk Art Enamel Acrylic Paint, Licorice
Paper towel
Ergo-Angle Metal Stamping Hammer
ImpressArt 2 by 2-Inch Steel Block
Beadalon Leather Pad For Block and Anvil
ImpressArt Stamp Straight Tape
ImpressArt Chain Nose Pliers
ImpressArt Bent Nose Pliers
Beadalon Round Nose Pliers

Positive Affirmations 1-4

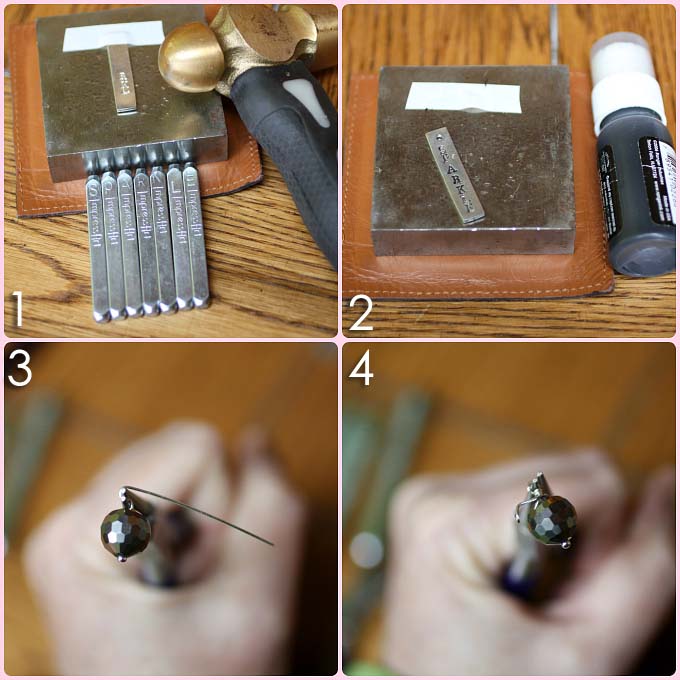
1. Stamp words on blanks. Tape top of blanks to keep them stable and start in center working up and down blank. Stamp necklace blanks: create, sparkle, smile, give, love, create.  I added a daisy to the center ‘love’ blank for fun.  Stamp earring blanks: yes, this. 2. Use black paint or a Sharpie marker to ink letters.  Wipe clean.  3.  Make coiled top dangles with your beads.  Slide bead on wire, grasp top of wire with round nose pliers and bend wire flush to the top of bead as shown. 4. Move pliers 1/2 turn.  Use chain nose pliers or your fingers to coil wire tail tightly around core wire as in photo.  Cut off excess wire with flush cutters and tuck the little extra wire into the bottom of the coil with chain nose pliers.  (Here’s a link to my video that shows you how to make wrapped head pin beads if you’ve never done this before!)

Positive Affirmations 5-7

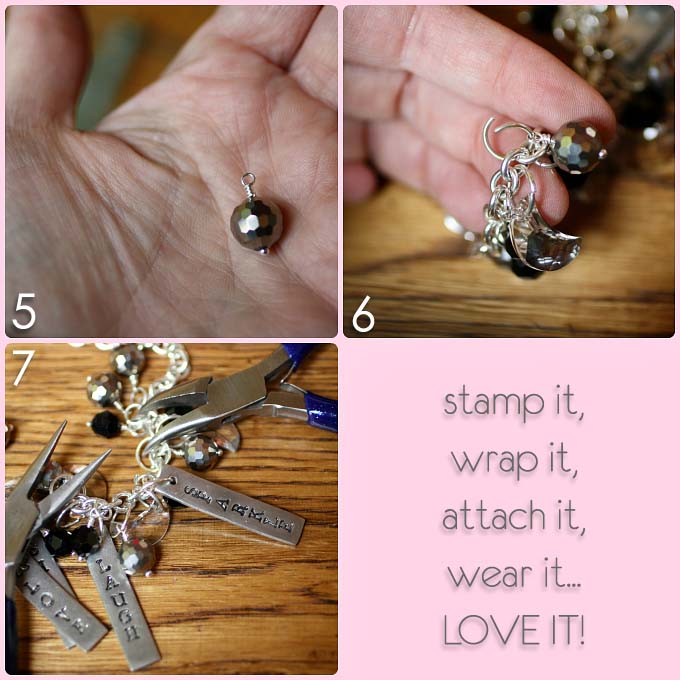
5.  This is how your coiled beads should look when finished! 6. Open jump rings to attach the beads and pendants starting at the center and moving side to side.  (Here’s a link to my video on how to open and close jump rings below in case you’ve never done this before!)  7. Attach the final beads.  Attach the clasp to once side of the chain and a jump ring to the other. To make matching earrings, coil the smaller beads and attach them along with the stamped pendants to your ear wires using jump rings.

Positive Affirmations Necklace Pink

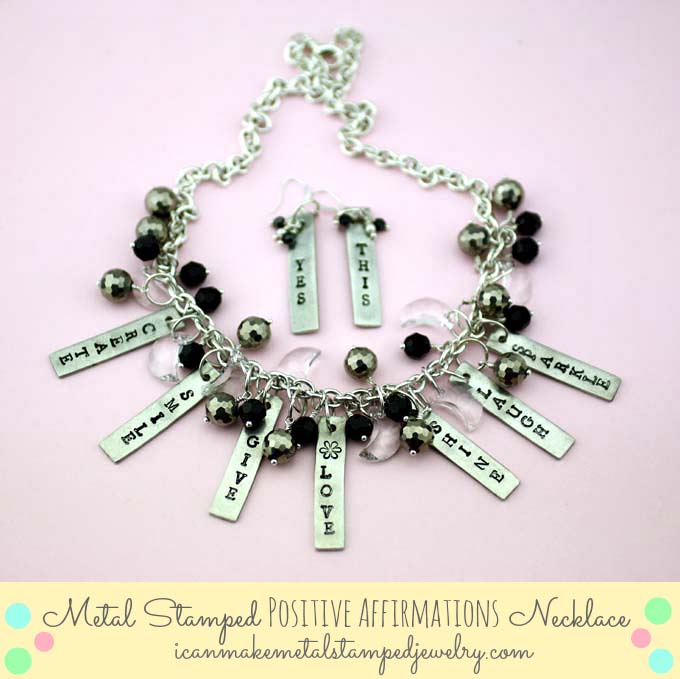
Wear your Metal Stamped Positive Affirmations Necklace with pride because, you made it yourself!  Yes, this.

Cheers,
Margot and Avalon

*DIY Project Policy: Our tutorials are meant for your creative inspiration. Feel free to make and gift or wear these designs. Please make sure that you give credit to us as the designer if you make and share these designs on your blog or social sites. Please do not make and sell copies of our designs or sell them as kits. Please do not teach these designs as classes for profit. This is how we make our living and we ask that you respect our creativity and the time it takes to design, photograph and write these free tutorials. You may use a single photograph from each project online in blog round-ups or blog posts if you include a direct link back to our tutorial. Any use of these designs for retail sale for profit online in places like Etsy or eBay or in retail bricks and mortar, flea markets or outdoor fairs is not permitted. Thank you!

(This blog uses affiliates links, if you click on them and make a purchase, we get a small percentage of the sale.  That’s how we keep the lights on, folks!)

Filed Under: Uncategorized Tagged With: DIY metal stamped jewelry, how to make metal stamped jewelry, metal stamped jewelry, positive affirmations jewelry, positive jewelry

Metal Stamping Blanks Hardness Chart

August 17, 2020 by decey Leave a Comment

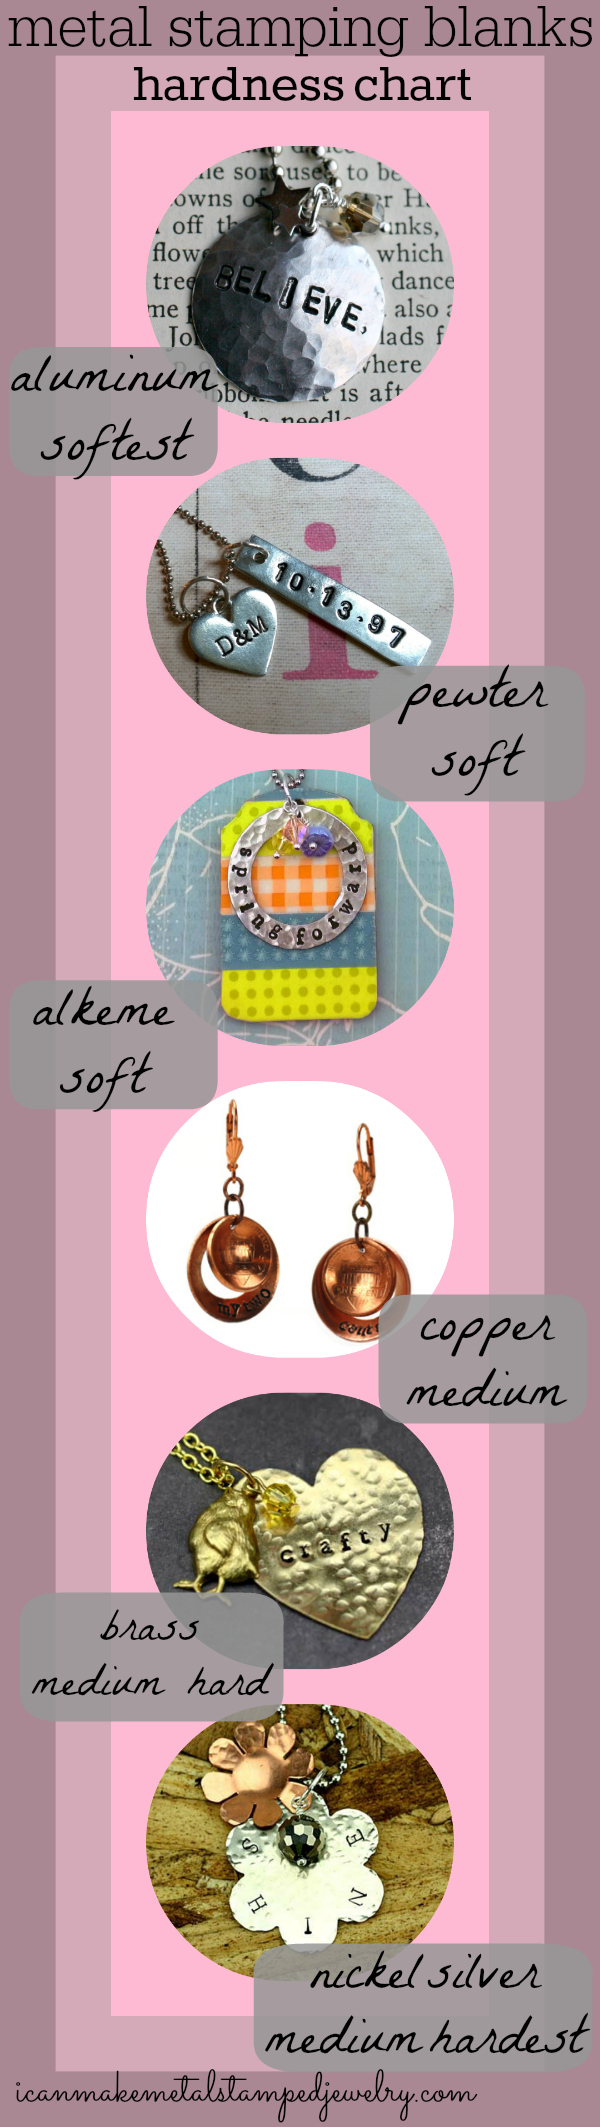
Metal Stamping Blanks Hardness Chart 4

When you’re first starting out with metal stamping, figuring out *what materials you need can be the hardest part. There are so many kinds of stamping blanks out there! Until you get the hang of stamping, we suggest you start with a softer and more affordable stamping surface. Then, as you become more confident, you can stamp into harder metals with better results. We’ve made this metal stamping blanks hardness chart to help you decide which material best suits your needs.

If you’re just getting started, we recommend Aluminum. It’s very soft, inexpensive and easy to make crisp, deep impressions. Best of all, you can find aluminum blanks in a wide variety of shapes and sizes. We think it looks best hammered, giving it the appearance of brushed metal. If you do hammer the surface, do that before you stamp so you aren’t hammering your stamped areas flat.

The next hardest material is Pewter. You may find pewter becomes your “go to” metal. It’s soft and easy to stamp and it has a very high end, finished jewelry look. Pewter looks great hammered or left plain. It has more of a vintage or antique appeal with a greyish cast. Pewter is an alloy, created mostly from tin with trace elements of other metals like copper, bismuth and antimony.

ImpressArt recently debuted a new metal stamping alloy. Alkeme is softer than regular base metal, but it can be buffed to a high shine like sterling silver. This material is very easy to stamp, but it’s a little harder than pewter.  We are simply mad for this new material! Sterling silver has become so expensive, it’s hard to justify the expense. If you’re selling your pieces, it’s difficult to stay competitive on prices. Alkeme has the look and performance of silver for a fraction of the cost.

Base metal blanks in copper offer the next level of hardness. Copper is easy to hammer, form and stamp and has a warm color that looks good on every skin tone. We use a lot of copper around here! Next comes brass, your gold alternative. Brass is harder to stamp, but it gives you the look of gold at an affordable price. Copper and brass both take to patinas beautifully. Brass works well with copper in mixed metal jewelry since they both have a warm cast. Try riveting, layering and alternating between the two for stunning finished pieces.  Finally, Nickel Silver is the hardest material. Nickel silver is a copper alloy made with nickel and often zinc. It’s often plated for use in jewelry and decorative objects, though nickel silver stamping blanks are not plated. Nickel silver is much shinier than pewter, but not as shiny as Alkeme. You’ll really need to hit it with some force to make deep impressions. It’s also important to note that some people are sensitive to nickel and can’t wear it close to their skin.

If you’re considering stamping into silverware, note that stainless steel is MUCH harder than nickel silver. Using your metal stamps on this surface can cause them to wear out. ImpressArt Premium Stamps have a lifetime guarantee and are specifically designed for use with hard metals.

So there you have it, we hope this metal stamping blanks hardness chart has been helpful. We use all of these materials in our metal stamped designs and find that each material offers something different to the design table. Do you have a favorite metal stamping material? Tell us in the comments! We’d love to know!

Happy Stamping,
Margot and Avalon

*This post contains affiliate links. If you click on a link and make a purchase, we get a small percentage of the sale. That’s how we keep the lights on, folks!

StudioPress Theme of the Month

Filed Under: Uncategorized Tagged With: choosing metal stamping blanks, how to choose blanks for hand stamping, metal stamping blanks, metal stamping hardness chart

Shine DIY Metal Stamped Layered Necklace

July 6, 2020 by decey Leave a Comment

Shine Finished Four

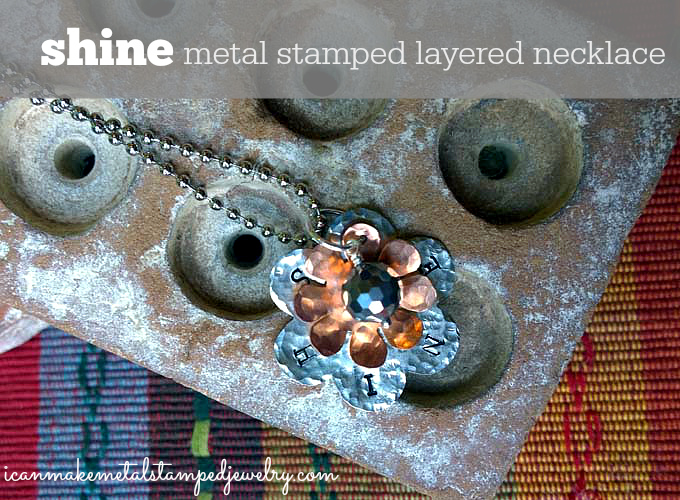
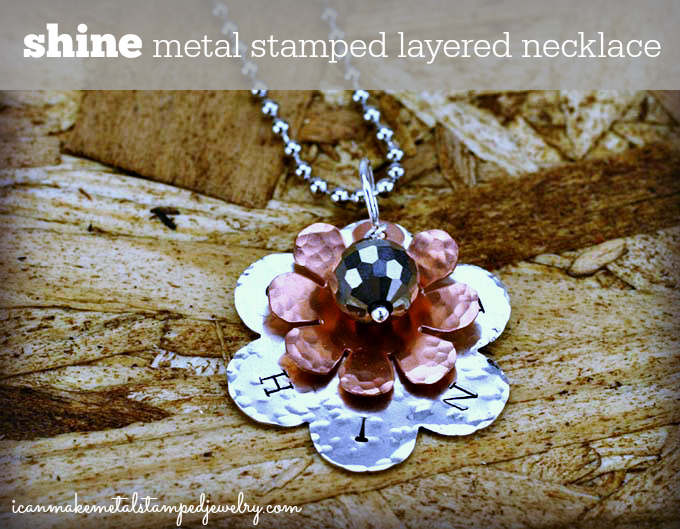
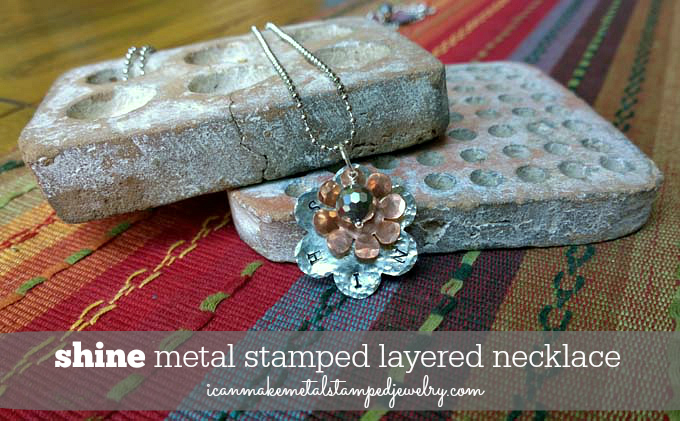
This Shine DIY Metal Stamped Layered Necklace is simple, striking, and layered with a lot of shine and sparkle. If you’re making this, you’ll be hammering, stamping, dapping and creating a coiled dangle, lots to learn and love! When you finish, you’ve got a little bauble that reminds you to shine your little light in the darkness. How cool is that?

You will need:

Folk Art Enamel Acrylic Paint, Licorice
ImpressArt, 8 Petal Flower, Copper, 15/16″ Stamping Blank
ImpressArt, 6 Petal Flower, Nickel Silver, 1″ Stamping Blank
Preciosa Czech Fire 8mm Polished Glass Bead, Faceted Round, Full Coating Silver, 75-Pack
Beadalon 10-MM Jump Ring, Nickel Free Silver Plate
Head Pins Ball Ends Ball Tips
Jewelry Ball Chain Necklaces with Lobster Clasp, 18-Inch, Bright Silver
ImpressArt Uppercase Alphabet Stamps ‘Newsprint’ 1/8 Inch (3mm) – 1 Set
ImpressArt 1 Pound Metal Stamping Hammer
ImpressArt 2 by 2-Inch Steel Block
Metal 2 Hole Punch
ImpressArt Stamp Straight Tape
ImpressArt Chasing Hammer
Round Nose Pliers
Bent Chain Nose Pliers
Flush Cutters
Dapping Block Set
Cotton swab
Paper towel

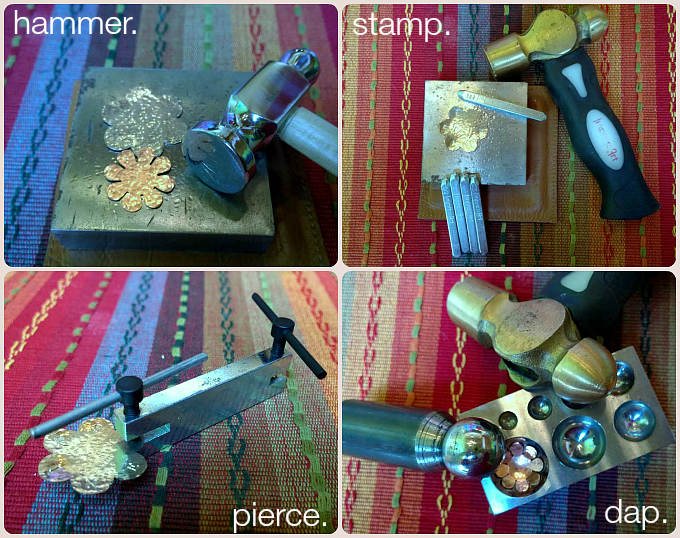
Steps 1-4

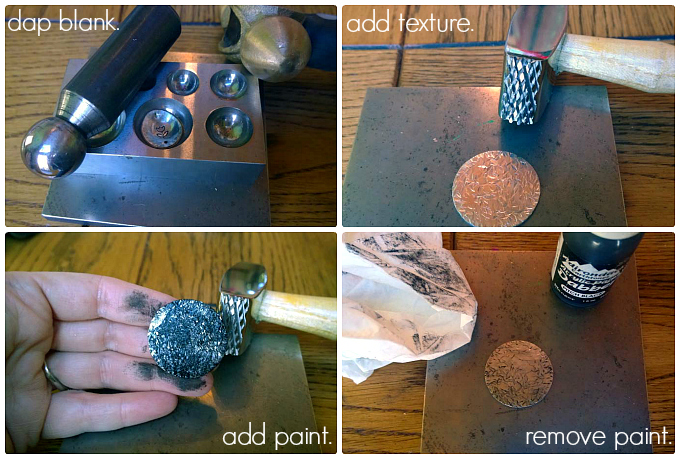
Step one: Use the round end of your chasing hammer to strike the blanks repeatedly creating hammered texture. Step two: Stamp S H I N E on your larger blank, one letter per petal. This leaves one petal unstamped. Step three: Use two-hole punch to pierce a hole in the unstamped petal of your flower. Add a hole to one petal of the copper flower. To darken the letters, use black enamel paint. Use a cotton swab to wipe the paint into the letters. Wipe off excess with a paper towel. Step four: Place copper flower in dapping block and use corresponding punch and your brass hammer to curve the shape as in photo. Hammer flat end of punch while moving round end in form on each hit to get a rounded shape.

Steps 5-8

Step five: Make the coiled dangle. Insert head pin into bead. Grasp wire at top of bead with round nose pliers. Bend wire to a 90 degree angle. Step six: Move pliers 1/2 turn. Grasp wire and bend over top of pliers forming loop. Grasp wire tail with chain nose pliers and wrap tightly from bottom of loop to top of bead. Step seven: Nip off wire tail with wire cutters. Tuck remaining tail into bottom of coil with chain nose pliers. Step eight: Use chain and bent nose pliers to open jump ring. Thread large pendant, small pendant and bead on jump ring in that order. Close jump ring securely with tension.

Shine Finished Five

You’ll love the movement of this necklace when you wear it. The hammered metal and faceted bead give it lots of sparkle!

Shine Finished Three

That’s how you make our Shine DIY Metal Stamped Layered Necklace. Fun, fast and fabulous. You can change the words, fonts, colors of metals and beads to make this uniquely your own.  That’s the fun of metal stamping, you get to share your story. What story are you going to share?

Happy stamping,
Margot and Avalon

*DIY Project Policy: Our tutorials are meant for your creative inspiration. Feel free to make and gift or wear these designs. Please make sure that you give credit to us as the designer if you make and share these designs on your blog or social sites. Please do not make and sell copies of our designs or sell them as kits. Please do not teach these designs as classes for profit. This is how we make our living and we ask that you respect our creativity and the time it takes to design, photograph and write these free tutorials. You may use a single photograph from each project online if you include a direct link back to our tutorial. Any use of these designs for retail sale for profit online in places like Etsy or eBay or in retail bricks and mortar, flea markets or outdoor fairs is not permitted. Thank you!

Filed Under: Uncategorized Tagged With: DIY hand stamped jewelry, DIY jewelry, DIY metal stamped jewelry, easy metal stamping projects, get started metal stamping, how to make metal stamped jewelry, metal stamped jewelry, metal stamping 101, metal stamping basics

Artist Spotlight: Karen Roark

May 23, 2020 by decey Leave a Comment

karen roark artist spotlight

We’re shining the spotlight on another talented metal stamping artist, the delightful Karen Roark of I Always Pick the Thimble! Karen throws down a dazzling array of delicious DIY from kitting to home decor to jewelry making on her blog. She’s a former Interior Architect who switched gears to open the retail store Urban Arts and Crafts in Kansas City, Missouri. Her metal stamped designs are sensational and she dishes up some terrific tips for metal stamping success in her posts. Please stop by her blog and social sites and show her a little love. Karen was kind enough to answer our Five Easy Questions, here are her insightful answers!

believe and let go pic

(Get the tutorial for Karen’s stunning DIY Believe and Let Go bracelet!)

Five Easy Questions

When did you start making jewelry and why?

I’ve been making jewelry for close to 10 years and metal stamping for about 4. It all began when I started seeing jewelry in clothing catalogs that I thought I could make for less – and I could! Metal stamping became an extension of my jewelry making because it’s so easy to personalize and incorporate into all types of jewelry pieces.

What is your favorite source for jewelry making inspiration?

I look through Sundance catalog for inspiration. I like working with metal, leather and natural stones and many of their pieces feature those materials.

What advice do you have for folks just starting out?

A good set of ergonomic jewelry making tools can make a world of difference! They can be a little pricey, but your hands will thank you. If you work with wire or headpins, your wire-wrapping techniques will improve as well.

What tips or tricks can you share for successful metal stamping?

Well, first of all, it’s probably not going to be perfect, and that’s o.k.. Don’t sweat it. You don’t want it to look machine made anyway, right? That being said, I always write out what I want to stamp on paper before I start. It helps prevent misspelling “typo’s’” or I guess in this case “stampo’s”! Before stamping, I draw light pencil lines and spacing marks on the metal pendants to help with alignment. Also, don’t be afraid to use the front and back of your “oops” pendants for practice. I will help increase your confidence before starting. The rest just takes a little practice.

Where can our readers find you?

I Always Pick the Thimble

Pinterest

Google+

Twitter

Urban Arts + Crafts Facebook

Big love to Karen Roark for stopping by and sharing some great advice! Check back Friday for some tips and techniques with a super simple DIY! We’re working on all kinds of good stuff behind the scenes, so stay tuned.

Happy Stamping,
Margot and Avalon

Filed Under: Uncategorized Tagged With: DIY jewelry, DIY Metal stamping, I Always Pick the Thimble Blog, jewelry artist spotlight, karen roark, metal stamping artist, metal stamping tips

  • « Go to Previous Page
  • Page 1
  • Interim pages omitted …
  • Page 12
  • Page 13
  • Page 14
  • Page 15
  • Go to Next Page »

Copyright © 2026 · Aspire Theme on Genesis Framework · WordPress · Log in