• Skip to main content

I can make metal stamped jewelry

Welcome to Metal Stamping!

May 20, 2022 by decey Leave a Comment

Stamp it Pretty

Welcome to metal stamping!  It’s fun, it’s easy and it’s a great way to create personalized jewelry for yourself, your family and your friends.  We’re going to be sharing tutorials, tips, tricks, tools and everything you need to get started and explore making metal stamped jewelry.  Yes, it may seem a little daunting swinging a one pound brass hammer at your hand, but with practice and perseverance you’ll be a pro in no time at all.

We’ll show you how to stamp letters, words, messages and images into metal blanks.  We’ll share techniques for hammering, dapping, texturing and coloring the metal.  We’ll show you how to turn your stamped metal blanks into stylish and chic jewelry using a variety of simple jewelry making techniques. We’ll give you the best information in detail and depth, because we want you to succeed.  We’ll have videos, step by step tutorials and a lot of eye candy for inspiration.  We work with metal stamps on a regular basis and we LOVE stamping.  We think you’re going to love it too.

Get ready to ‘get hammered’ with us and soon enough you’ll be able to say, “I can make metal stamped jewelry!”

How cool is that?

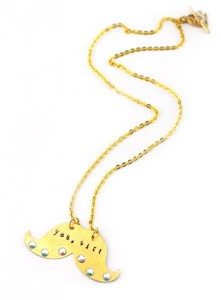
Welcome to metal stamping, we think you’re going to love it.  (PS: If you love the design above, you can find the tutorial here!)

Follow us on Bloglovin’:

Follow on Bloglovin

Filed Under: Uncategorized Tagged With: how to make metal stamped jewelry, metal stamped jewelry, metal stamping, welcome to metal stamping

12 Terrific DIY Metal Stamped Pendants

May 16, 2022 by decey Leave a Comment

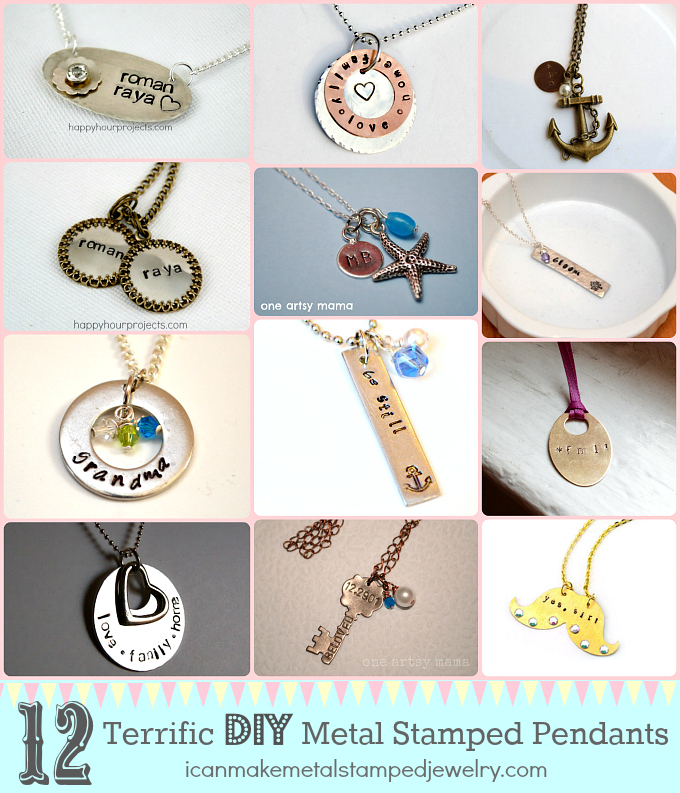
12 Terrific DIY Metal Stamped Pendants

This week’s metal stamping round up features plenty of inspiration with 12 Terrific DIY Metal Stamped Pendants.  Some of our favorite DIY bloggers have done it again with a plethora of pretty pendants.  I love the variety here in styles, mediums and metals.  Get the links to these projects below and be sure you visit these talented ladies and say hello!

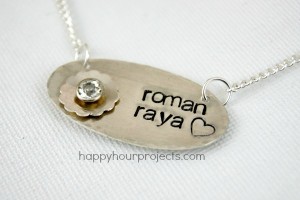
01.4

Learn how to stamp and rivet with this tutorial from Happy Hour Projects.

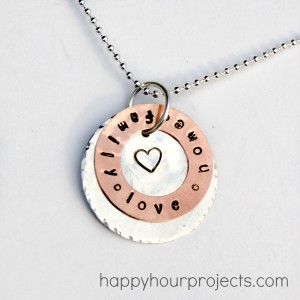
01.23

Here’s another stunner from Happy Hour Projects, with a combination of copper and silver that’s sure to please!

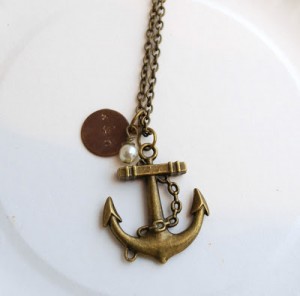
anchor1

Anchors away!  Get in on the nautical trend with this layered stamped design from One Artsy Mama.

04.21

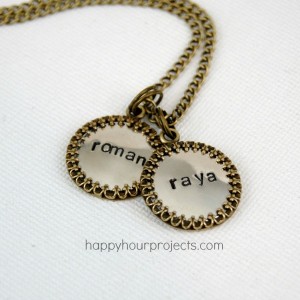
It’s a twofer, with fabulous stamped framed pendants from Happy Hour Projects.

beachnecklace5

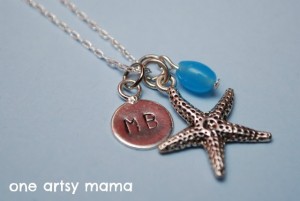
More nautical themed loveliness with this starfish and stamped charm embellished set from One Artsy Mama for Angela Strand.

bloomnecklace

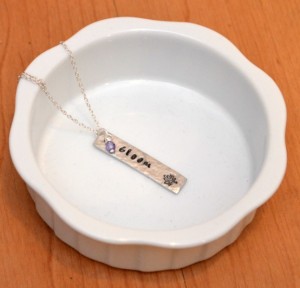
Get that spring feeling with this lovely bloom pendant from One Artsy Mama.

grandmanecklace1

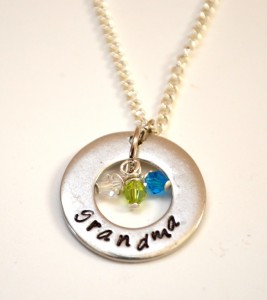
Give grandma a gift she’s sure to treasure with this stamped washer pendant from One Artsy Mama.

impressart10b

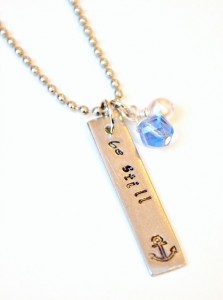
Here’s a lovely reminder to be still from One Artsy Mama.

metal201-12

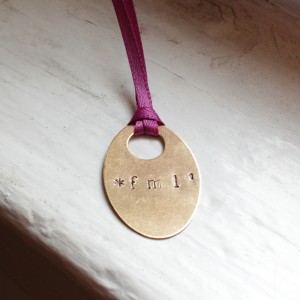
Feeling a little more, shall we say, cheeky?  Try this ‘fml’ pendant from Hands Occupied.

Necklace

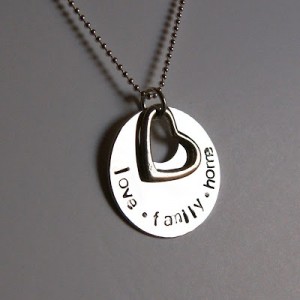
Love, family and home, three things to cherish in this simply striking stamped pendant from Happy Hour Projects.

key

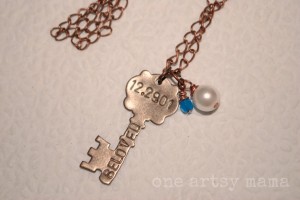
Stamp a key shaped blank to make a stunning one of a kind design with One Artsy Mama.

yes-sir-necklace

And last, but surely not least, here’s our ‘yes, sir’ mustache pendant for ImpressArt!

There you go,  12 Terrific DIY Metal Stamped Pendants!  Which one is your favorite?  Let us know in the comments!

Cheers,
Margot and Avalon

Filed Under: Uncategorized Tagged With: DIY hand stamped jewelry, DIY metal stamped jewelry, how to make metal stamped jewelry, how to make metal stamped pendants, metal stamped jewelry, metal stamped pendants

16 Stunning Wire Heart Jewelry Projects

May 12, 2022 by decey Leave a Comment

16 stunning wire heart jewelry projects DIY

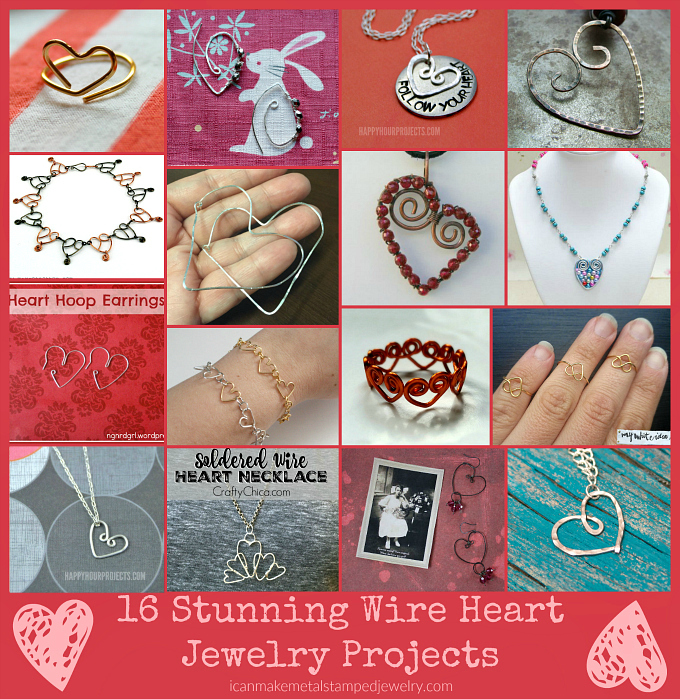
Certain jewelry making techniques become iconic with the passage of time. There’s something enticingly tough and tender about wire heart jewelry, and these DIY projects all offer a slightly different take on the idea. From rings to bracelets to pendants, there’s a little bit of everything here. We love seeing the endless ways designs can be interpreted with just a few small changes and a fresh pair of eyes. It’s hard to say who first bent a length of wire into a heart shape and made it into jewelry, but it’s clear that this idea is one people continue to love.

(From Right to Left, Top to Bottom)

Wire Heart Midi Ring from A Few Good Things

Anatomical Wire Heart Earrings from I Can Make Metal Stamped Jewelry

Follow Your Heart Necklace from Happy Hour Projects

Wire Heart Pendant from Heather Powers for Art Bead Scene

Hearts on Wire from Margot Potter for Beadalon

DIY Hammered Heart Hoops from Crafty Chica

I Heart Hearts from Studio Dax

Dainty Blue Heart Shaped Pendant Necklace with Wire and Beads from Creatsie

Heart Hoop Earrings from Making My Stead

Jewelry Wire Heart Chain DIY from Dream a Little Bigger

DIY Wire Wrapped Heart Ring from Muhaiminah Faiz

Heart Ring DIY from My White Idea

DIY Wire Heart Necklace from Happy Hour Projects

Soldered Heart Wire Necklace from Crafty Chica

Queen of Hearts from Margot Potter for The Impatient Crafter

DIY Hammered Heart Necklace from Happy Go Lucky

There you have it, a fabulous round up of 16 Stunning Wire Heart Jewelry Projects just in time for Valentine’s Day. Nothing says I love you quite like a handcrafted gift with heart. Do you have a unique take on making wire heart jewelry? Will you be making any of these wire heart jewelry projects? Let us know in the comments!

Happy Stamping,
Margot and Avalon

Filed Under: Uncategorized Tagged With: DIY jewelry, DIY wire heart jewelry, diy wire hearts, easy wire heart jewelry, easy wire jewelry, icanmakemetalstampedjewelry, wire heart jewelry, wire jewelry

Craftsy Class Giveaway!

March 27, 2022 by decey Leave a Comment

Craftsy Class Giveaway 2

THIS GIVEAWAY HAS ENDED!

We’re super excited to be hosting a Craftsy Class Giveaway this week! Enter to win a Craftsy class! Craftsy is an online site dedicated to virtual video and step by step photo tutorial classes. They’ve got some of the most well known and respected instructors in their ranks and a wide array of classes on everything from jewelry making to cake decorating. They offer patterns, projects and classes along with an array of products. Best of all, you can take the classes in your own home, on your own schedule.

Here’s a list of the class categories:

        • Cake Decorating
        • Knitting
        • Quilting
        • Sewing
        • Fine Art
        • Photography
        • Food & Cooking
        • Crocheting
        • Embroidery
        • Home & Garden
        • Jewelry Making
        • Paper Crafts
        • Weaving
        • Spinning

So many crafts, so little time. If you’ve been thinking about learning something new, this is your opportunity to dive right in.

Enter for a chance to win a knitting or crochet class on Craftsy. One entry per customer. Enter to win a Craftsy class! Best of luck to you! This Craftsy Class Giveaway will run for one week, Craftsy will select a winner on the 24th.  Good stuff, eh?

Cheers,
Margot and Avalon

(FTC DISCLOSURE: This post was sponsored by Craftsy and contains affiliate links.  If you click on a link and enter, we get a small referral fee.  That’s how we keep the lights on!)

Quilting Supplies at Craftsy.com

Filed Under: Uncategorized Tagged With: class giveaway, craft class giveaway, craftsy, craftsy class giveaway

Fabulous Photo Pendant DIY

February 28, 2022 by decey Leave a Comment

Fab Photo 3

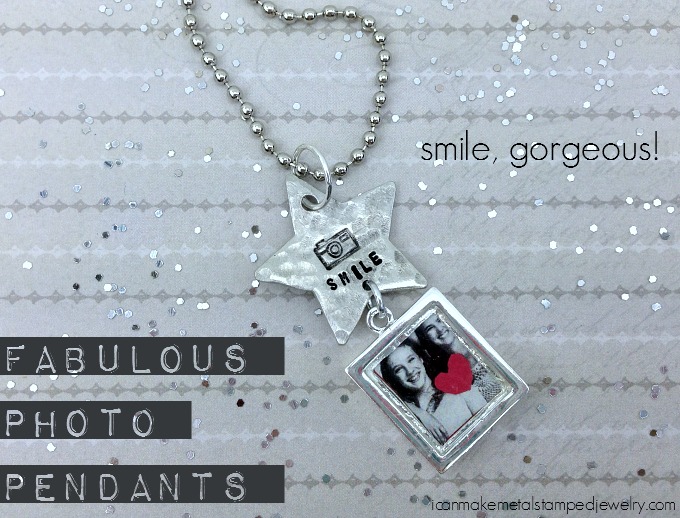
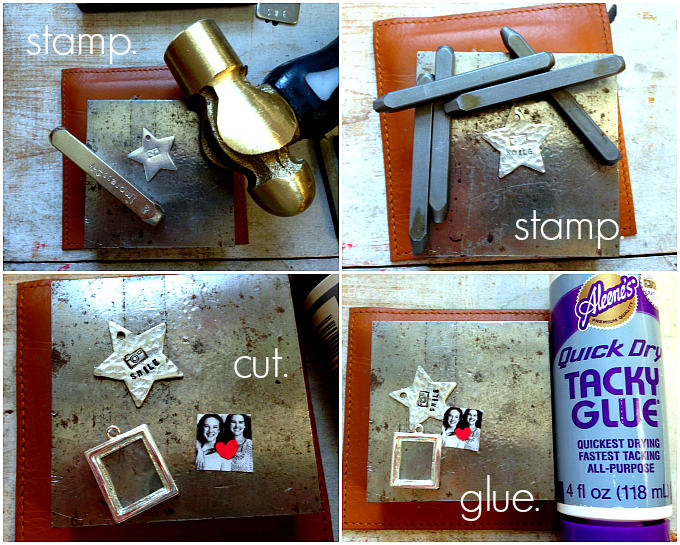
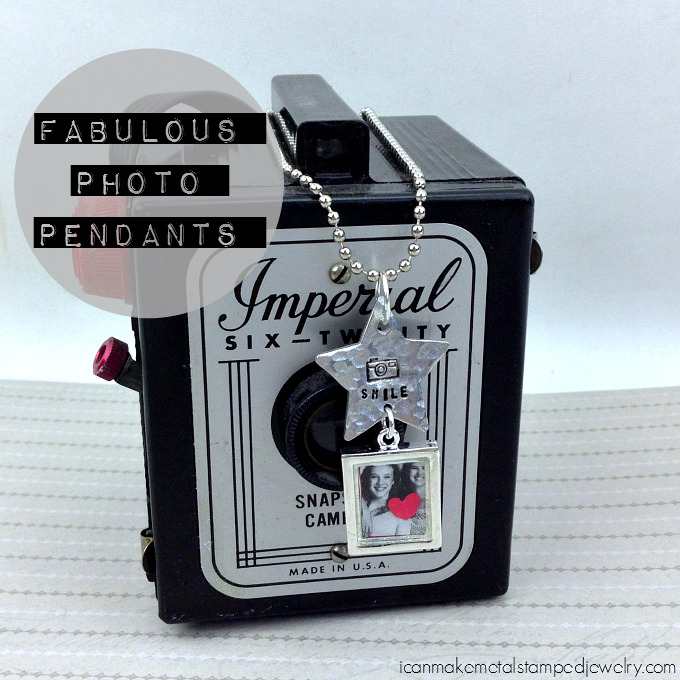
Today we’re sharing a Fabulous Photo Pendant DIY! The thing we love most about hand stamped jewelry is that it’s so easy to customize and to share your story with others. Nothing says, “I love you” quite like a hand made gift, especially when you include a personalized photo and a sweet sentiment they can wear. You’ll need to use photo editing software to size your image to fit in the tiny frame. We love PicMonkey, because it makes it so easy to edit photos even for the novice photo editor, you can even add the heart accent there instead of cutting and gluing.  We love adding a little dimension with a hand cut heart and Aleene’s new Tacky Glue bottles make it quick and easy to assemble your mini-collage. Oh and have we mentioned how much we love this tiny camera stamp from ImpressArt? See below for some tips on success with using design stamps.

Just print, cut, glue, stamp, connect and you’ve got a gift for your BFF or your sweetheart in under 30 minutes. Now that is fabulous! (NOTE: Our posts contain affiliate links. This is how we are able to provide these “free” tutorials. When you click on a link and buy something, we get a small percentage of the sale.)

What you need:

Image sized to fit frame
Tiny red paper heart
Tiny photo frame pendant
ImpressArt Soft Strike pewter star pendant
6mm Jump Ring, Silver Plate
10mm Jump Ring, Silver Plate
Ball chain necklace
Aleene’s Always Ready Quick Dry “Tacky” Glue-4Oz
Folk Art Enamel Acrylic Paint in Licorice
ImpressArt- 6mm, Camera Metal Stamp
1/16″ Letter and Number Set Metal Stamps
ImpressArt 1/2 lb. Brass Stamping Hammer-
ImpressArt 2 by 2-Inch Steel Block, Small
Eurotool EuroPunch Pliers
Cotton swab
Paper towel

Quick tips for success stamping design stamps: We usually recommend that you only strike your blank one time, this helps prevent skipping or ghost impressions. When using design stamps, you can strike the stamp more than once BUT it is very important that you do not lift or shift the stamp. First make sure that all of the surface area of the image on your stamp is in direct contact with the blank. Hit once hard dead center. Rock the stamp gently to the upper left, upper right, lower left and lower right hitting it each time with your hammer at an angle, but keeping the stamp in the same position on the blank. This takes practice, so grab some sheet metal or a blank you’ve already messed up to get a feel for the motion.

1-4

Step one: Stamp the camera stamp in the center of the star blank. Use the rocking technique to make sure you get a crisp impression. Step two: Stamp the word “smile” under the camera. Start in the center with the letter “I” and stamp left and right so the word is centered. (Note: We used the round end of our hammer to add texture to the surface of the blank. Gently hit the blank with the hammer repeatedly to recreate this look.) Step three: Use cotton swab to apply enamel paint to stamped areas of your blank, allow to sit for 30 seconds and wipe off excess with paper towel. Cut your photo to fit the frame. Fold and cut red paper to make heart. Step four: Glue heart to image using a thin layer of Tacky Glue applied with your finger tip.

5-8

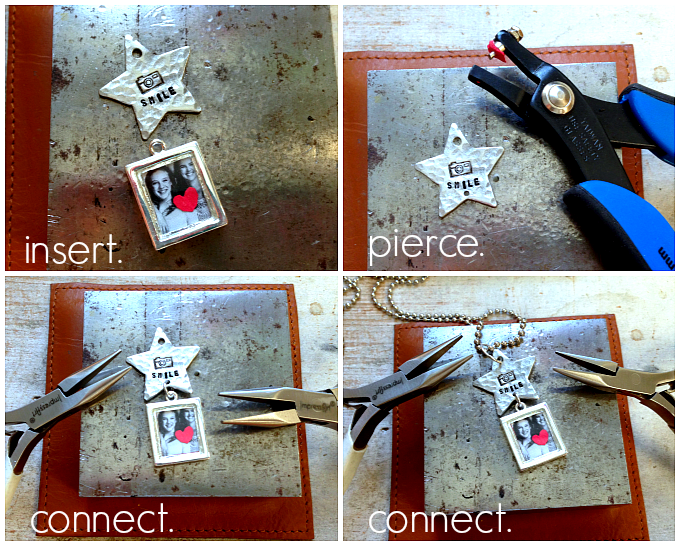
Step five: Insert your dried collage into the frame. You can add a thin layer of glue to the back to secure it, but do this carefully to avoid smearing glue on front of glass. Step six: Mark and pierce a hole in the center bottom of the star. Step seven: Connect the pendants with a 6mm jump ring. Step eight: Connect a 10mm jump ring to the top of the star and slide your ball chain through.

Fab Photo LS

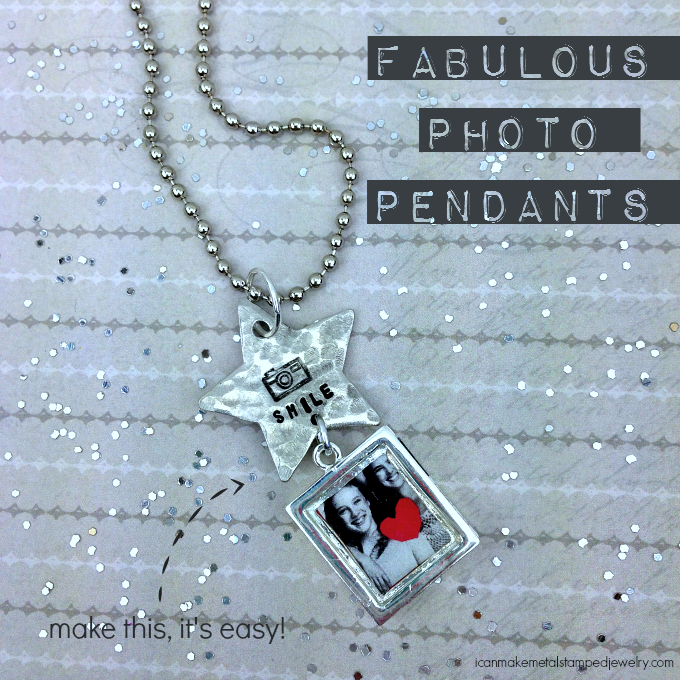
Smile, gorgeous!

Fab Photo Pendants

You made your own fabulous photo pendant DIY! Go, you!

Cheers,
Margot and Avalon

*DIY Project Policy: Our tutorials are meant for your creative inspiration. Feel free to make and gift or wear these designs. Please make sure that you give credit to us as the designer if you make and share these designs on your blog or social sites. Please do not make and sell copies of our designs or sell them as kits. Please do not teach these designs as classes for profit. This is how we make our living and we ask that you respect our creativity and the time it takes to design, photograph and write these free tutorials. You may use a single photograph from each project online in blog round-ups or blog posts ONLY if you include a direct link back to our tutorial. Any use of these designs for retail sale for profit online in places like Etsy or eBay or in retail bricks and mortar, flea markets or outdoor fairs is not permitted. Thank you!

Filed Under: Uncategorized Tagged With: collage jewelry, DIY jewelry, DIY photo jewelry, hand stamped jewelry, memory jewelry, metal stamped jewelry, mixed media jewelry, personalized DIY jewelry, photo jewelry DIY, photo pendant DIY

  • « Go to Previous Page
  • Page 1
  • Interim pages omitted …
  • Page 9
  • Page 10
  • Page 11
  • Page 12
  • Page 13
  • Interim pages omitted …
  • Page 15
  • Go to Next Page »

Copyright © 2026 · Aspire Theme on Genesis Framework · WordPress · Log in