• Skip to main content

I can make metal stamped jewelry

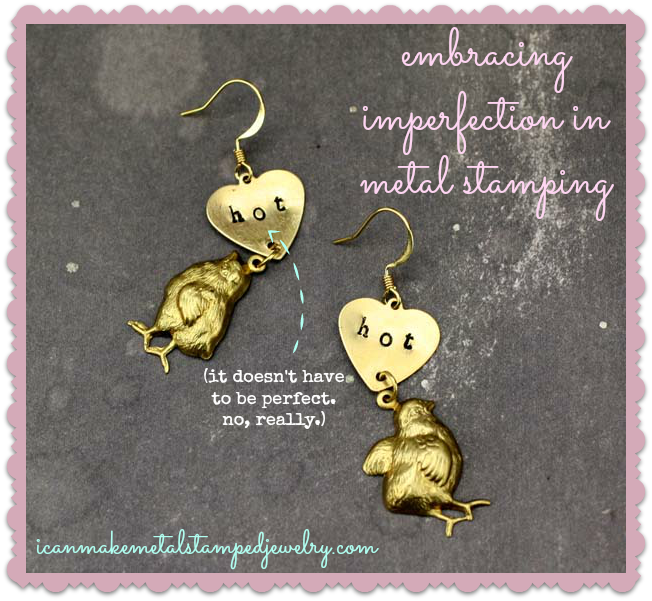
Embracing Imperfection in Metal Stamping

January 23, 2023 by decey Leave a Comment

Embracing Imperfection in Metal Stamping

I was hosting metal stamping make and takes at a big trade show last month when a woman walked up to the podium.  I could tell she was a perfectionist, she was very concerned with getting it right.  It took her far longer than most to stamp the three tiny pieces of metal with one letter.  She was becoming increasingly flustered.

“How do I make this perfect?” She asked.

“You don’t.” I answered, pausing.  “If you want perfect, get a cast metal or laser inscribed piece of jewelry.  This is metal stamping, it’s done my hand, it’s meant to have some imperfection.”

“I want it to be perfect.” She pouted.

I couldn’t help her.  This was something in her head that I simply couldn’t fix.  Some people are not capable of embracing imperfection in metal stamping or life in general. Which is funny, considering most things are imperfect.  I find imperfection beautiful.  Flaws, scars, asymmetry and inconsistencies fascinate me.  I am not afraid of imperfection, I embrace it.  Yet, I have to admit that sometimes even I look at my metal stamped pieces so intensely, that I begin to fall into the ‘it’s not perfect’ trap.

Then I let that go.  Walk away, come back with fresh eyes and most of the time those tiny flaws have disappeared.  There are a few things you can do to approach this.  One approach is to intentionally skew the placement of your letters.  If you make them cattywompus on purpose, then ‘perfect’ loses meaning.  Plus, angling your letters adds a lovely touch of whimsy.  Here’s an example of a cattywompus design.:
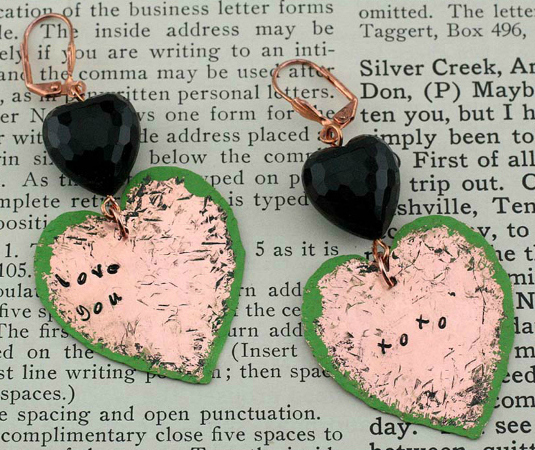
Angled Letters

(You can get the instructions to make these earrings on the ImpressArt website.)

If that isn’t your style, there are ways to line up your letters, plan your spacing and get more consistent results.  Using tape to hold the blank and placing the top of the tape just below where you want to stamp offers a guideline, marking the tape with equally spaced lines helps with spacing, making sure the words you want to stamp fit the width and height of the piece prevents running out of room, marking letter placement with a pencil offers a removable guideline, starting in the center and working to each side keeps your words centered.  I like these tips and tricks from I Always Choose the Thimble on stamping and kerning, which utilizes techniques from typesetting.  Here is a piece I stamped marking the tape and sliding the blank down to the top of the tape:
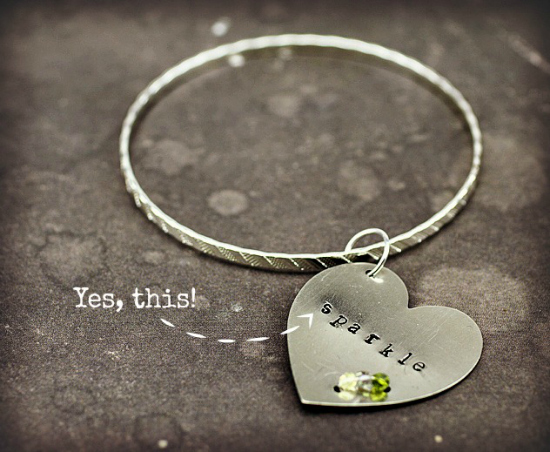
sparkle bracelet

It’s easier to stamp straight lines than along curves, but with a little practice and making sure the stamps are curved you can achieve lovely results.  Here’s a curved design, using the petals helped with the placement, it was easier to center the stamps:
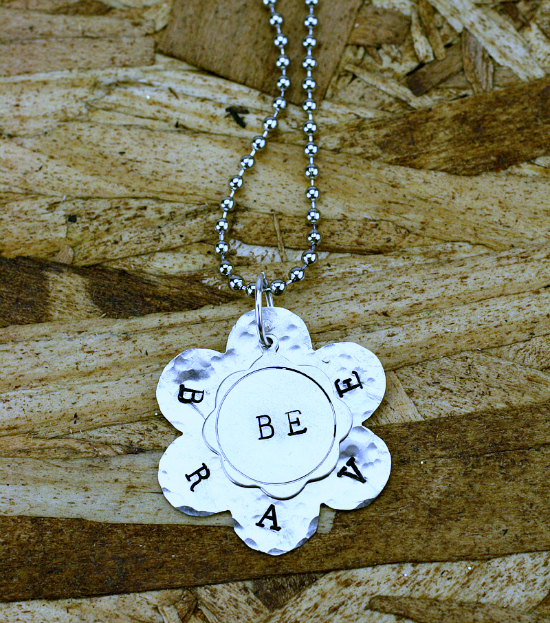
Be Brave Smaller

As you can see, even my best efforts are not perfect and I am fine with that.  When you’re first starting out with stamping, using thin rectangular blanks is much easier whether you’re stamping horizontally or vertically.  There isn’t much room for error and that’s a good thing!  Practicing on thin metal strips is another way to work on your technique.  With metal stamping, practice doesn’t make perfect, but it definitely makes you more consistent.

My advice, embracing imperfection in metal stamping is the key to enjoying it! Nothing will make you crazier than trying to force perfection on something that isn’t designed for it.  After all, that imperfection is how you know it’s been hand made.

Cheers,
Madge

(Disclosure: Affiliate link below, if you buy this kit, I get a small percentage of the sale.)

Want to get started metal stamping?  Here’s a great starter kit from ImpressArt and PJ Tool Jewelry:
Filed Under: Uncategorized Tagged With: DIY metal stamped jewelry, how to make metal stamped jewelry, metal stamped jewelry, metal stamping 101, metal stamping basics

Last Minute Metal Stamped Earrings

January 15, 2023 by decey Leave a Comment

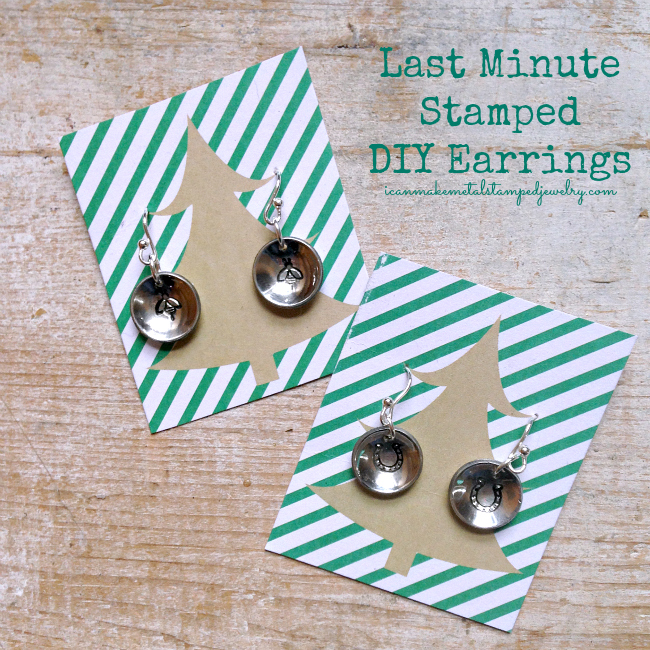
Last Minute Metal Stamped DIY Earrings Margot Potter

If you’re still looking for the perfect DIY holiday gifts, it doesn’t get easier or prettier than these last minute metal stamped earrings. Using design stamps is a lovely way to make a personalized gift. These are easy for the novice stamper if they use softer metal blanks like aluminum or pewter. The trick with design stamps is keeping the stamp in full contact with the blank and then rocking and hitting it from multiple angles. It does take a little practice, so get some sheet metal and perfect your technique. Use gift tags to display the earrings for a perfect presentation.

Last Minute Metal Stamped Earrings Action Shot

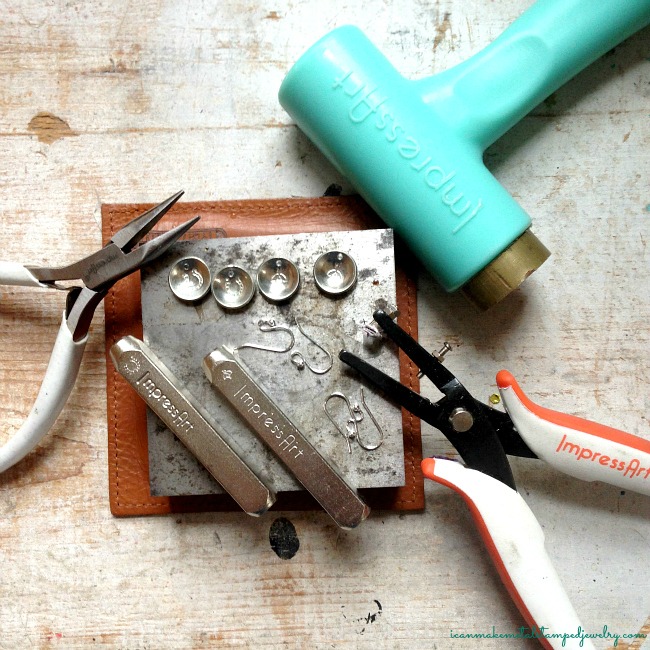
You will need (These are affiliate links, if you click on a link and buy something we get a small percentage of the sale, that’s how we can afford to share these free tutorials!)

2 ImpressArt, Circle, 1/2″, Aluminum Stamping Blanks
ImpressArt Design Stamps (We used Bumble Bee and Horse Shoe)
2 6-MM Jump Ring, Silver Plate
2 Beadalon Ball Earwires Silver Plated
2 Christmas Gift Tags
Ergo-Angle Metal Stamping Hammer
ImpressArt 4 by 4-Inch Steel Block
ImpressArt Hole Punch Pliers
2 Pairs ImpressArt Chain Nose Pliers
ImpressArt Stamp Enamel or Folk Art Enamel Acrylic Paint, Licorice
Dapping Block Set
Paper Towel

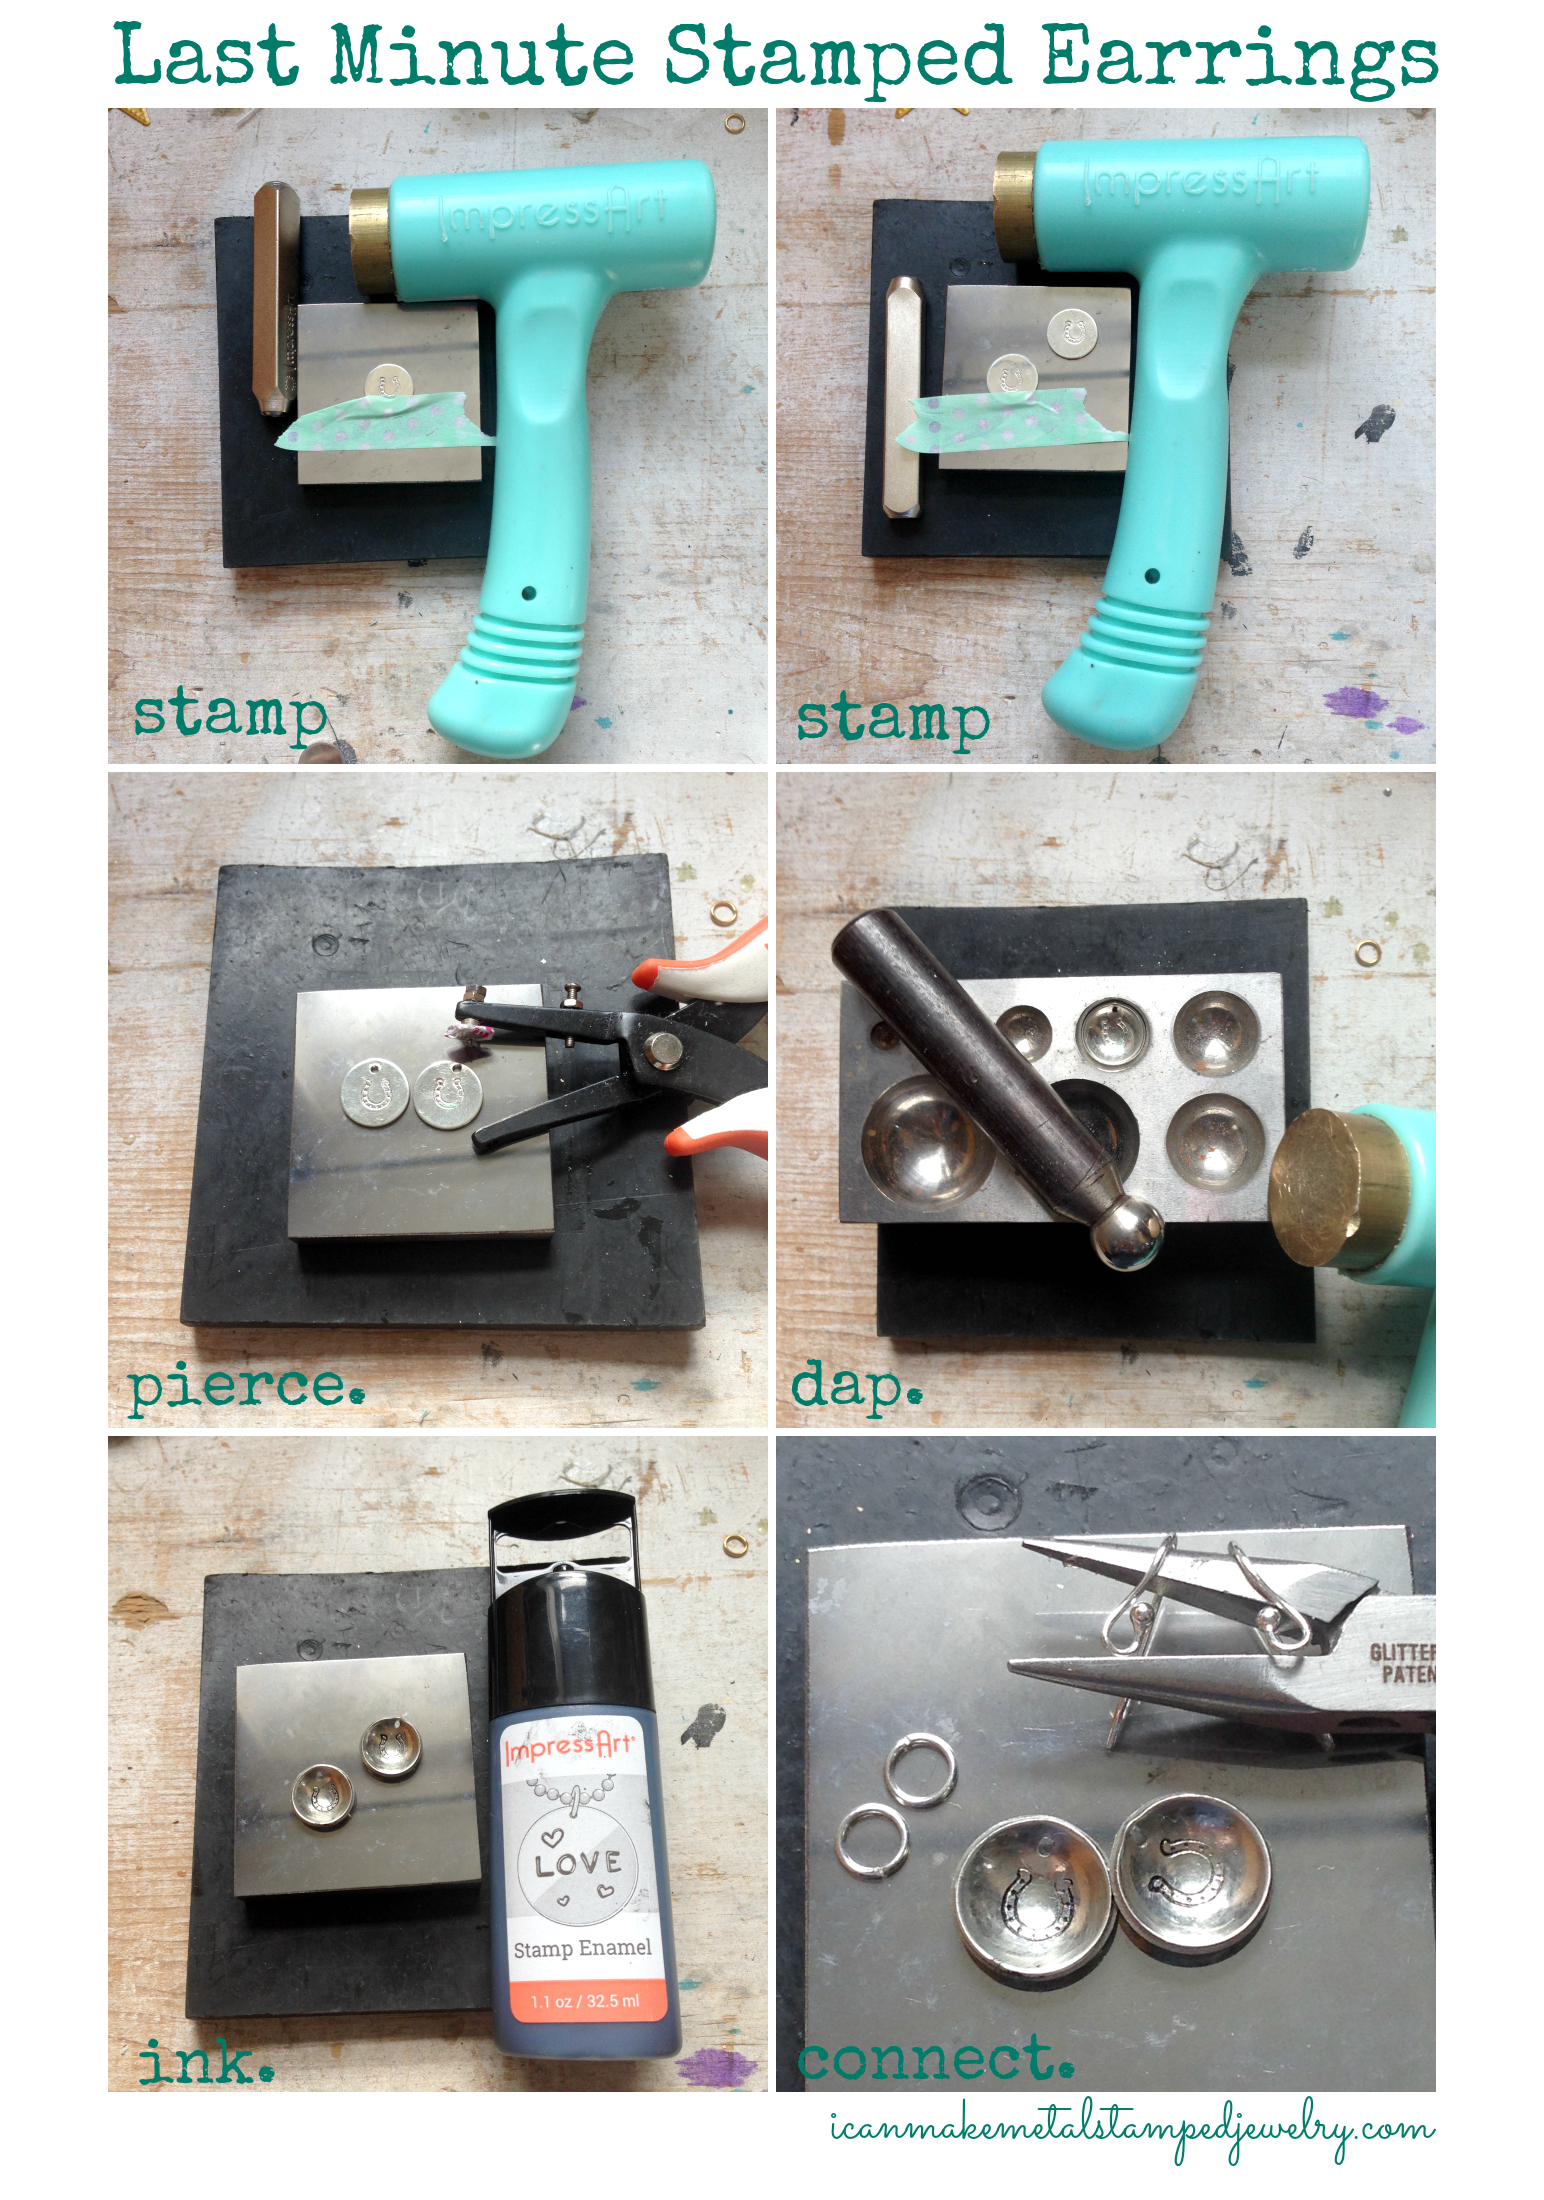
Last Minute Metal Stamped Earrings Steps

(Click on graphic to see more detail)


Step One: Tape blank to bench block.

Step Two: Hold stamp firmly centering and hitting dead center once. DO NOT LIFT STAMP. Rock stamp to top left, hit, top right, hit, bottom left, hit, bottom right, hit and dead center and hit one last time. As long as you don’t lift the stamp, this will help you get a full impression.

Step Three: Repeat for second blank.

Step Four: Use hole punch pliers to pierce a hole in the top center of each blank.

Step Five: Place blanks in dapping block, place dapping tool over blank. Hit top of dapping tool with hammer, moving tool around as you hit to form a concave shape. Repeat for second blank.

Step Six: Apply enamel, let sit for 10 seconds, wipe excess with paper towel.

Step Seven: You need to use jump rings with these blanks so they’ll sway when you wear the earrings. Gently grasp and turn the earring wire loops as shown so the earrings will hang straight when worn. Connect earrings with jump rings to earring wires with chain nose pliers. Make sure the rings are closed with tension!

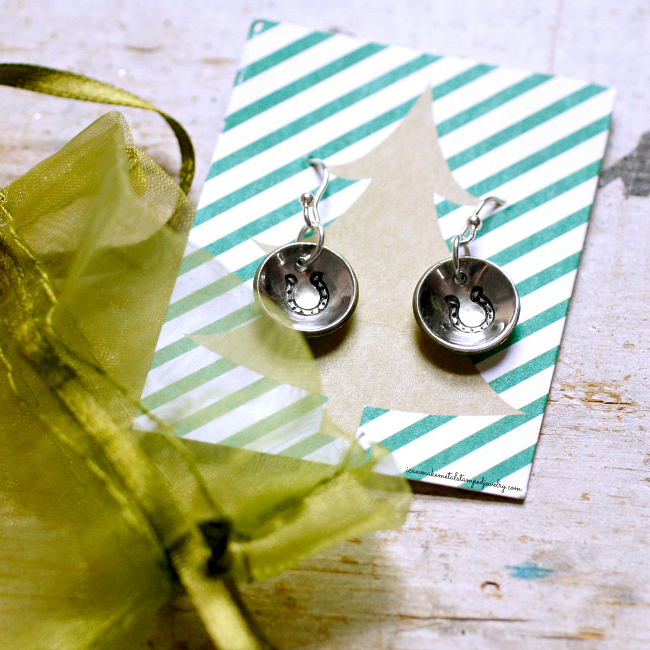
Step eight: Pierce the gift tag with a straight pin and insert the earrings.

Last Minute DIY Earrings Potter Two

We used Organza Drawstring Gift Bags to wrap these. Simply fabulous. You can make these last minute metal stamped earrings in just a few minutes, so stamp up some for every gal on your gift list! If you make some, tag them on social media with #handstampedholidays! We love to see your creations.

Cheers,
Margot and Avalon

Filed Under: Uncategorized Tagged With: DIY Earrings, DIY jewelry, easy diy earrings, hand stamped earrings, Hand Stamped Holidays, how to make metal stamped earrings, last minute DIY gifts, last minute gifts, margot potter

DIY Lucky Charm Metal Stamped Necklace

January 14, 2023 by decey Leave a Comment

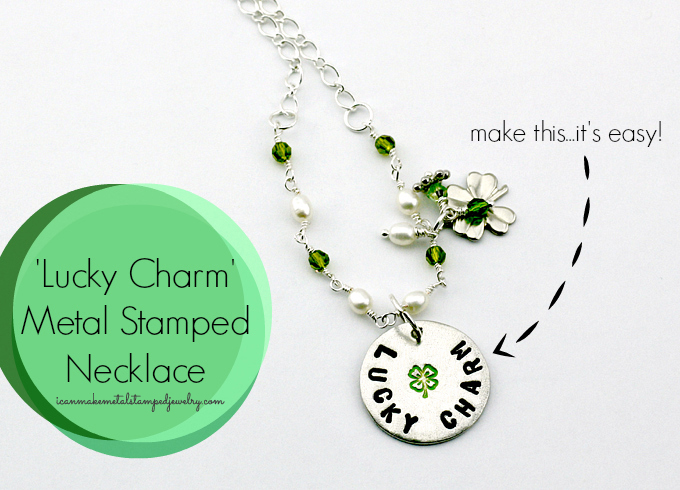
Lucky Charm Close Up Text copy

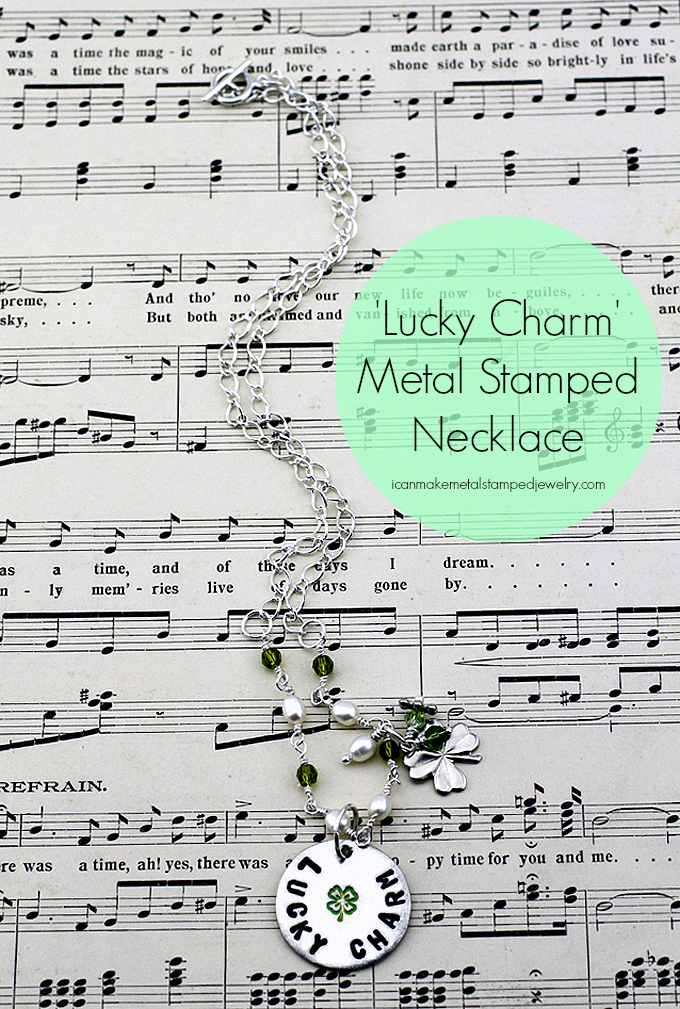
Happy St. Patrick’s Day!  We’ve got a DIY Lucky Charm Metal Stamped Necklace that you can make and wear anytime you need to feel lucky.  You’ll learn how to make the charm and how to create a coiled and beaded chain in this easy tutorial.  Get kisses, not pinches, when you sport this on the town.

Here’s what you need:
ImpressArt SoftStrike Pewter 15/16″ Circle Blank
4mm Swarovski Crystals in Shades of Green
4mm Oval Freshwater Pearls
Daisy Spacer Metal Bead, 4mm
Shamrock Charm Bead
4 Beadalon Jump Rings 6mm Silver Plated
Beadalon 10-MM Jump Ring
Beadalon Ball Pin Medium Head Pins
German Style Wire, Round, Silver Plated, 24 gauge
Folk Art Enamel 2-Ounce Acrylic Paint, Licorice
Folk Art Enamel 2-Ounce Acrylic Paint, Evergreen
Beadalon Chain
Toggle Clasp
ImpressArt- 6mm, Four Leaf Clover Metal Stamp
ImpressArt Basic Metal Stamp Set, Uppercase, 3mm
Ergo-Angle Metal Stamping Hammer
ImpressArt 2 by 2-Inch Steel Block
ImpressArt Stamp Straight Tape
Round Nose Pliers
ImpressArt Bent Nose Pliers
ImpressArt Chain Nose Pliers
ImpressArt Flush Cutters

Step One

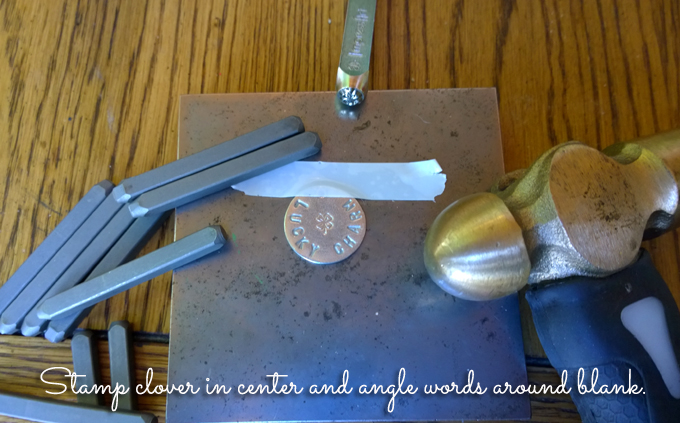
Step one: Stamp the clover in center of blank.  Stamp around the edges, spacing the letters out and turning the block to face you as you stamp. Start in the center, working your way up both sides to spell Lucky Charm.

Step two

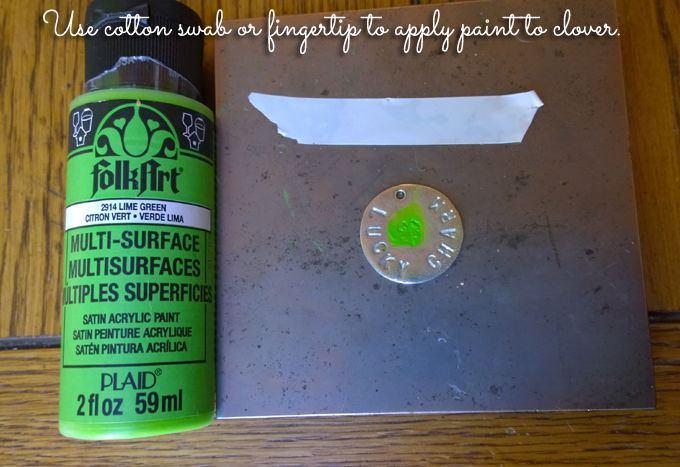
Step two: Use your fingertip or a cotton swab to wipe a small amount of paint into the clover.  Let sit for 30 seconds, wipe off surface leaving paint in stamped area.  Try to avoid getting green paint in the letters.

Step Three copy

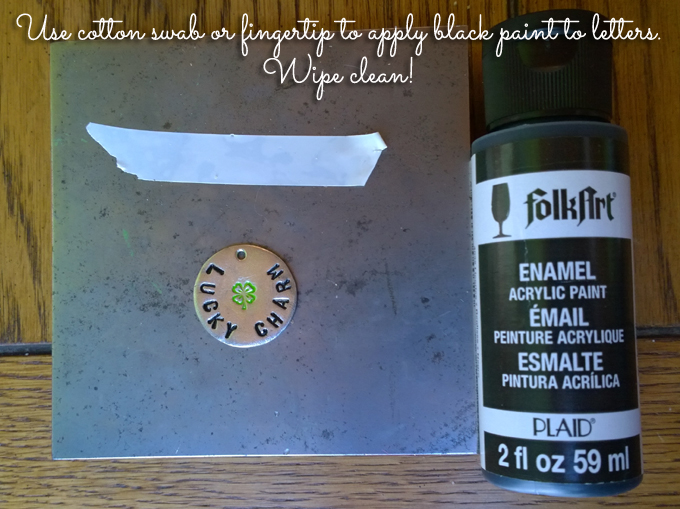
Step Three: Use your fingertip or a cotton swab to rub black enamel paint into letters.  Allow to sit for 30 seconds and wipe paint off of surface.

Step Four A

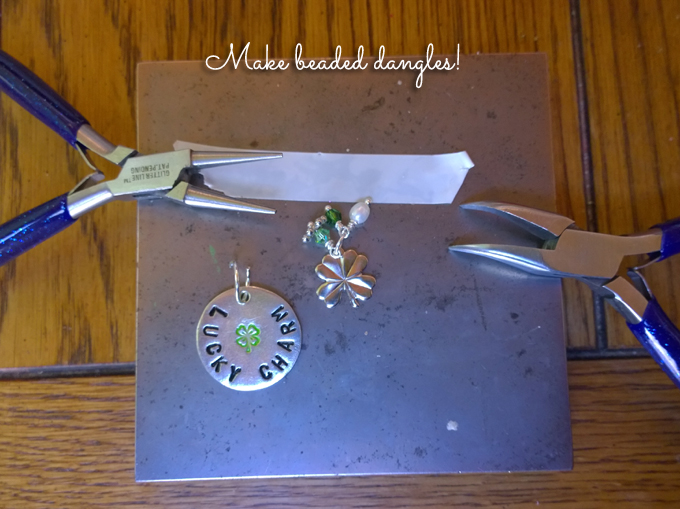
Step Four: Use beads and a pearl to make beaded charms.

Step Five

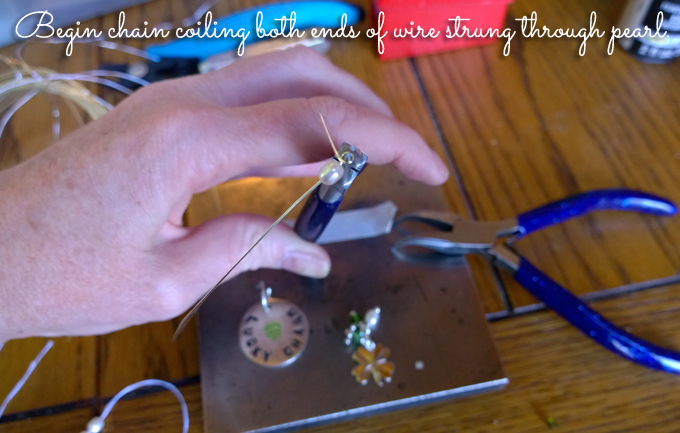
Step Five: Make your first coiled bead in your beaded chain.  You’ll need to make wrapped coils on both ends.  If you don’t know how to make coils, here’s a video tutorial.

Step Six

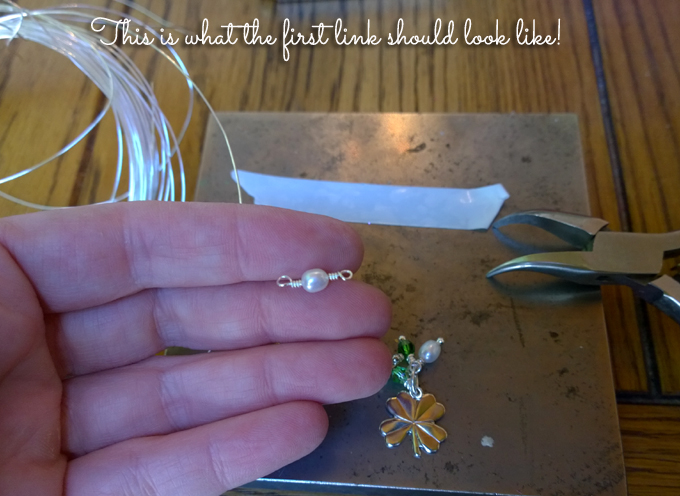
Step Six: This is what the coiled bead should look like!

Step Seven

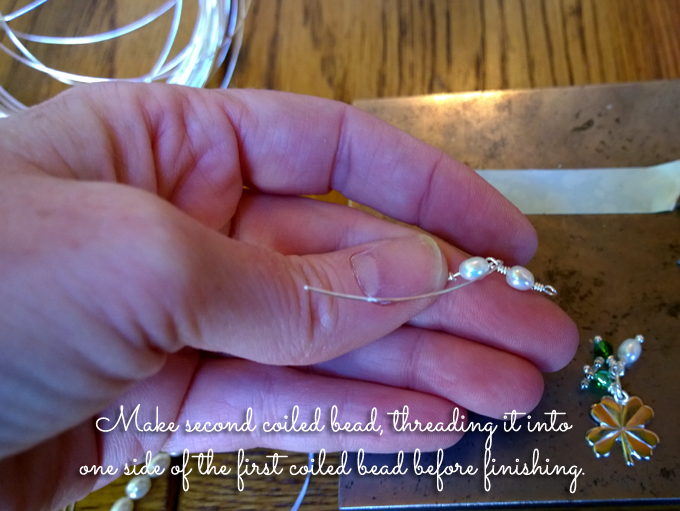
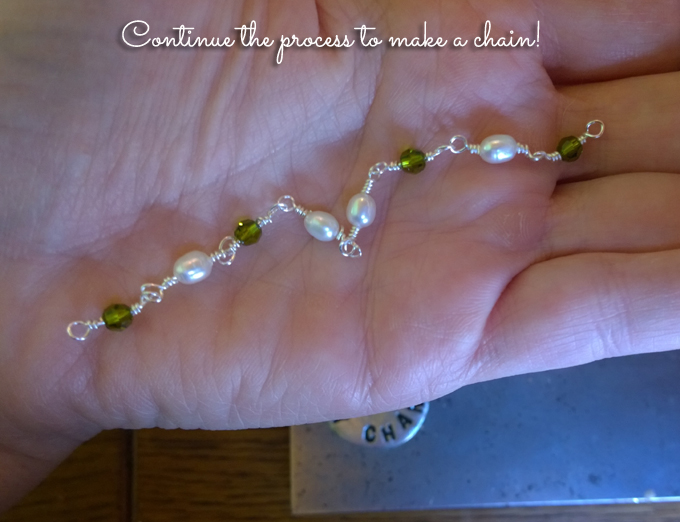
Step seven: To make the second coiled bead, make a finished coil on one end.  Start your loop on the other end, thread it into one side of the first coiled bead, finish wrapping to connect them.  Keep going, alternating between crystals and pearls on both sides for a total of four pearls and four crystals.

Step Eight

Step Eight:  This is your finished chain. The pendant will hang between the two pearls in the front.

Step Nine

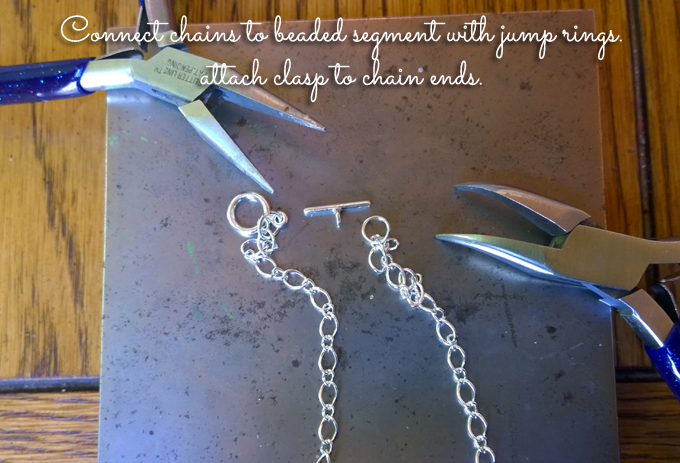
Step Nine: Connect the beaded chain to two chain lengths using jump rings.  Finish the chain with a clasp.  The toggle bar should be attached directly to the final chain link, you can open and close it with your pliers. The circle end is attached with a jump ring.

Step Ten

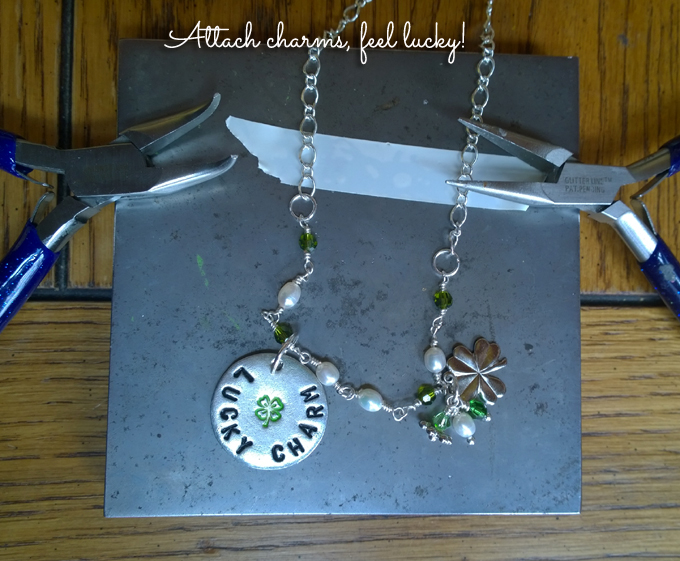
Step Ten: This is the front half of your necklace.  Attach the stamped charm with a 10mm jump ring and the dangles all hang in between the first crystal and second pearl on the left side of the design.  That’s it!  Simply charming, yes?

Lucky Charm Necklace Full View

We hope you enjoy making and wearing this Lucky Charm Metal Stamped Necklace as much as we do!  Happy St. Patty’s Day from our home to yours.

Cheers,
Margot and Avalon

*DIY Project Policy: Our tutorials are meant for your creative inspiration. Feel free to make and gift or wear these designs. Please make sure that you give credit to us as the designer if you make and share these designs on your blog or social sites. Please do not make and sell copies of our designs or sell them as kits. Please do not teach these designs as classes for profit. This is how we make our living and we ask that you respect our creativity and the time it takes to design, photograph and write these free tutorials. You may use a single photograph from each project online if you include a direct link back to our tutorial. Any use of these designs for retail sale for profit online in places like Etsy or eBay or in retail bricks and mortar, flea markets or outdoor fairs is not permitted. Thank you!

Filed Under: Uncategorized Tagged With: DIY hand stamped jewelry, DIY jewelry, DIY metal stamped jewelry, how to make metal stamped jewelry, lucky jewelry, metal stamped jewelry, metal stamping basics, shamrock jewelry, st. patrick's day jewelry

DIY Longitude Latitude Necklace

December 2, 2022 by decey Leave a Comment

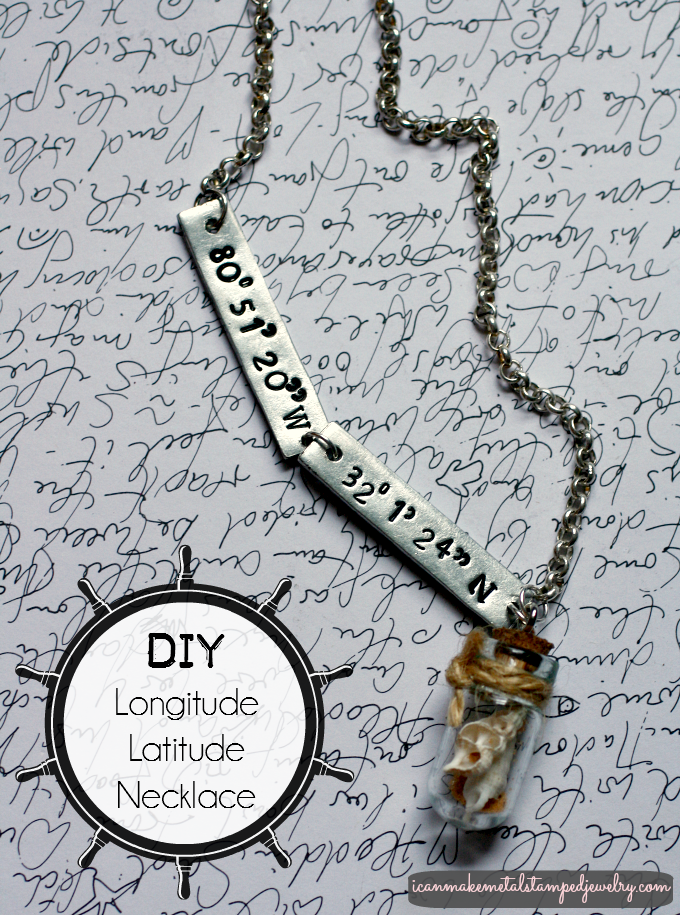
Longitude Latitude Necklace LS Two

Changes in latitudes, changes in attitudes,
Nothing remains quite the same.
Through all of the islands and all of the highlands,
If we couldn’t laugh we would all go insane” Jimmy Buffet

We just got back from a delicious week at the beach with family. We were in Ocean City, New Jersey, which is a lovely beach indeed. Still, my favorite beach by far is Tybee Island off of the coast of Georgia. I have a collection of shells from Tybee and I’ve been meaning to make this necklace for ages. The past week at the beach reminded me that I always leave a piece of my heart at the ocean. So, here is my favorite place in longitude and latitude. You can pick yours, sand, sea or soil and make your own personal DIY Longitude Latitude Necklace. We’d love to know where you’d pick, so leave a comment!

Here’s what you need:
2 ImpressArt Pewter Stamping Blanks Rectangles
Small Glass Mini Bottle with Cork Top
Stainless Steel Screw Eye w/Ring
Beadalon Chain Rolo 3.8mm Silver Plated
4 6mm Beadalon 6-MM Jump Ring, Silver Plate
Beadalon Lobster Clasp Swivel
Jute twine
Extra Tiny Sea Shells
Sand
Folk Art Enamel Acrylic Paint, Licorice
Aleene’s Max Tacky Adhesive
Beadsmith 36 Piece Letter & Number Punch Set For Stamping Metal 1/8 Inch 3mm (1 Set W/ Wood Case)
Letter & Number Punch Set 1/16 Inch 1.5mm
Metal Punctuation Stamp Set, 1/16″
ImpressArt Large Metal Stamping Block
ImpressArt 1 lb. Brass Stamping Hammer
1.25mm Round Hole Punch Pliers for Sheet Metal
Cotton swab
Paper towel

Amazon.com Widgets

Amazon.com Widgets

1-3

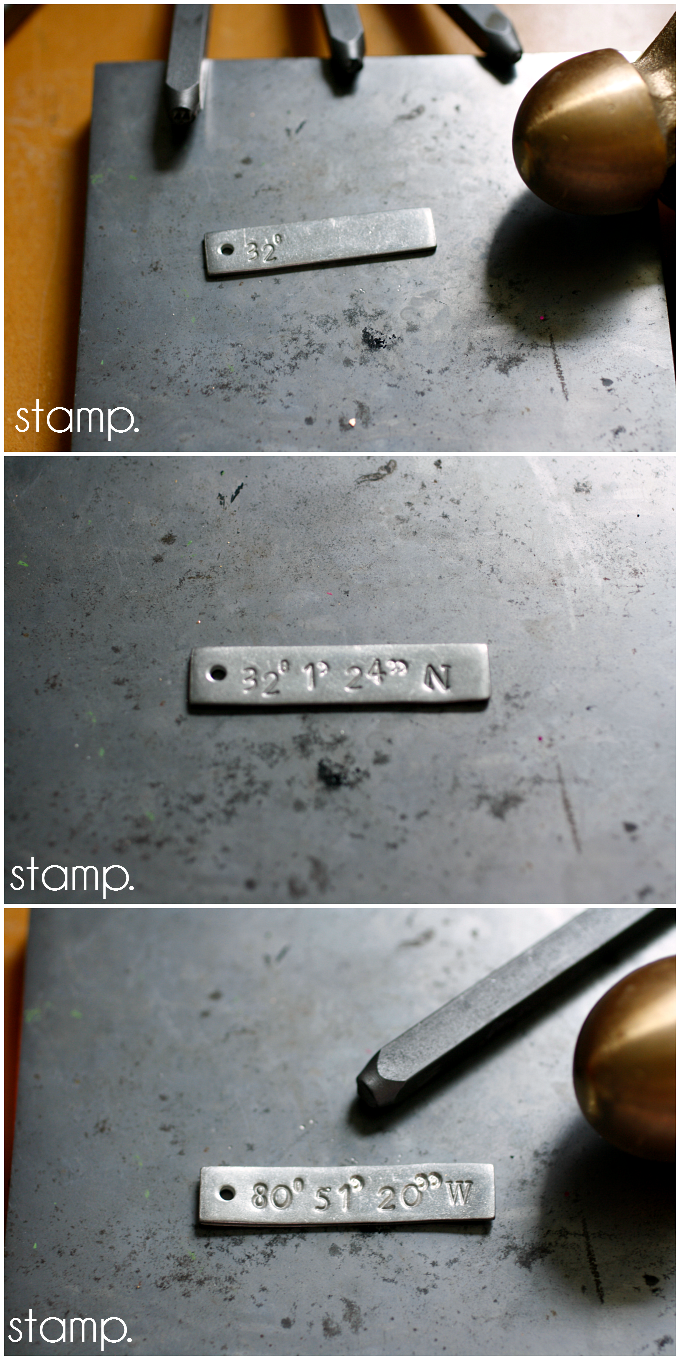
Step one: Use the 1/8″ number stamps to stamp your first two numbers, add the degree mark using the 1/16″ number stamps and the number zero. Step two: Continue stamping your numbers, using the apostrophes as shown. You can find the longitude and latitude of your favorite place with a simple Google search. I abbreviated my numbers as they were super long, you can opt to be more exact if you desire. Step three: The last thing you’ll stamp is the direction using the uppercase premium font. Make a stamped blank for longitude and a second for latitude.

4-6

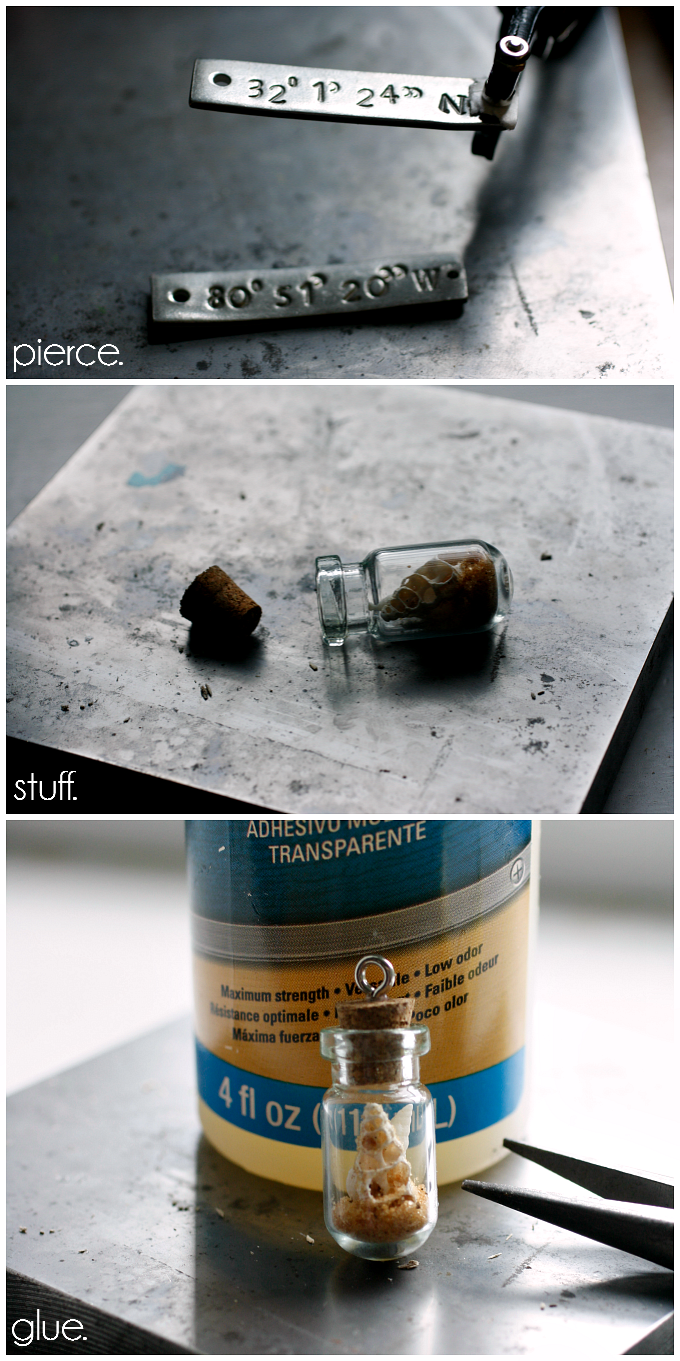
Step four: Use the metal punch to pierce a hole in the bottom of each stamped blank. (Design tip: If you want the stamped areas to have more definition, swipe some paint across the top with a cotton swab and wipe off excess with a paper towel.) Step five: Stuff your tiny vial with shells and sand (or whatever you wish to represent your favorite place.) Step six: Add some max tacky glue to the cork and allow to dry. Add glue to the tiny screw bail and screw into center of cork, this turns your vial into a pendant.

7-9

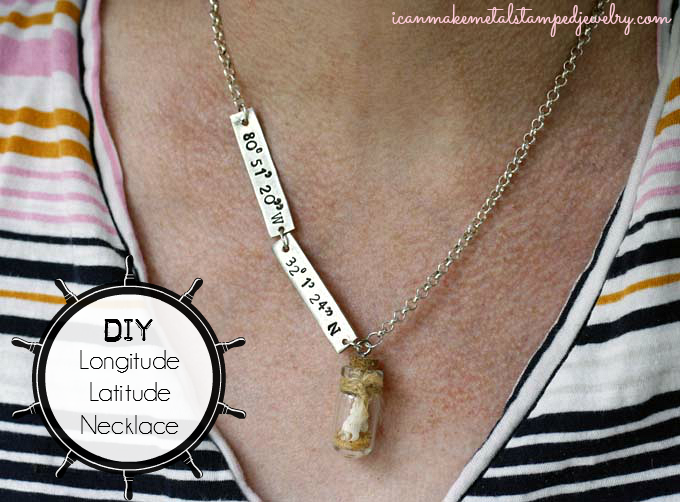
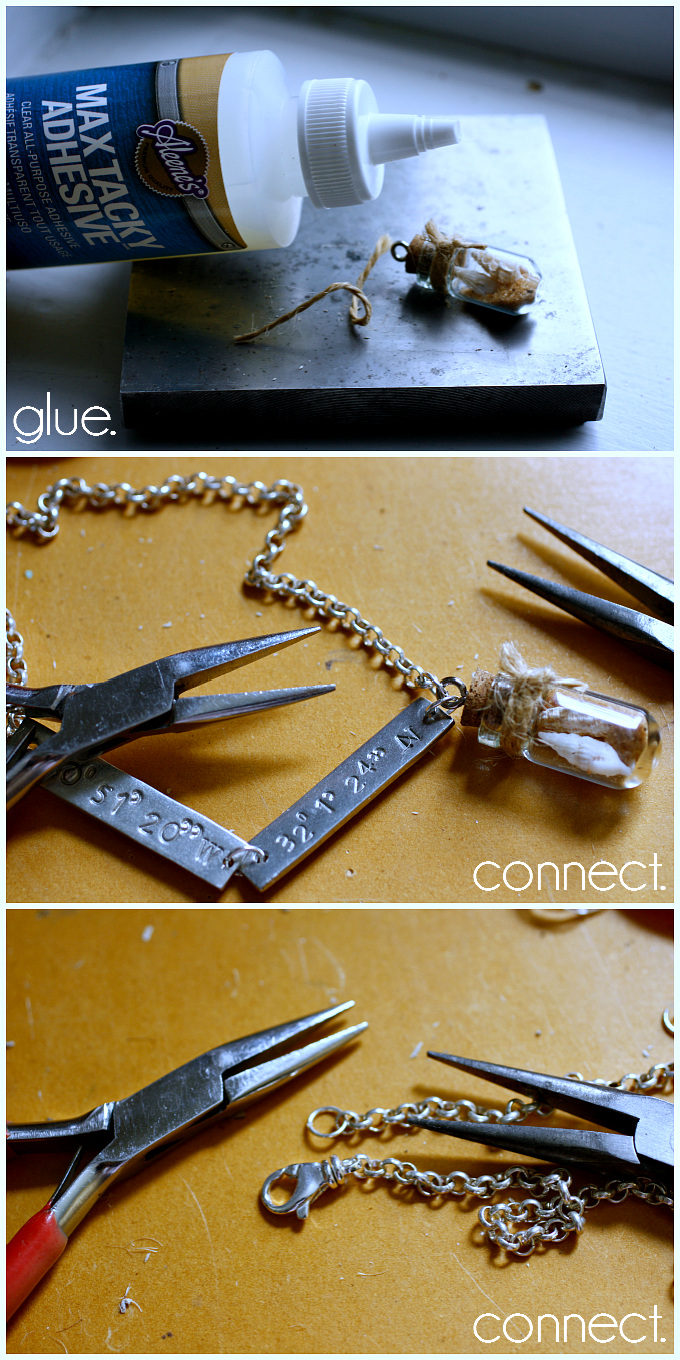
Step seven: Tie a tiny piece of twine around the neck of your glass vial. Dab a little glue on the knot and let it dry. Step eight: Connect the stamped blanks to the pendant and chain as shown. Step nine: Attach a jump ring to the end of the chain and a clasp to the other.

LL Three

Wear your lovely DIY Longitude Latitude Necklace any time you need a little virtual escape. I can almost hear the tiny waves coming from mine.

Okay, not really.

Still, it makes me smile and that’s something.

Cheers,
Margot and Avalon

*DIY Project Policy: Our tutorials are meant for your creative inspiration. Feel free to make and gift or wear these designs. Please make sure that you give credit to us as the designer if you make and share these designs on your blog or social sites. Please do not make and sell copies of our designs or sell them as kits. Please do not teach these designs as classes for profit. This is how we make our living and we ask that you respect our creativity and the time it takes to design, photograph and write these free tutorials. You may use a single photograph from each project online in blog round-ups or blog posts ONLY if you include a direct link back to our tutorial. Any use of these designs for retail sale for profit online in places like Etsy or eBay or in retail bricks and mortar, flea markets or outdoor fairs is not permitted. Thank you!

(FTC DISCLOSURE: *This post contains affiliate links, if you click on a link and make a purchase we get a small percentage of the sale. The blogger is employed by ImpressArt, but this is her personal blog. All opinions are 100% her own!)

Filed Under: Uncategorized Tagged With: DIY fashion, DIY jewelry, DIY longitude latitude necklace, easy metal stamped jewelry, hand stamped necklace, longitude latitude necklace, memory jewelry, metal stamped jewelry, metal stamped necklace

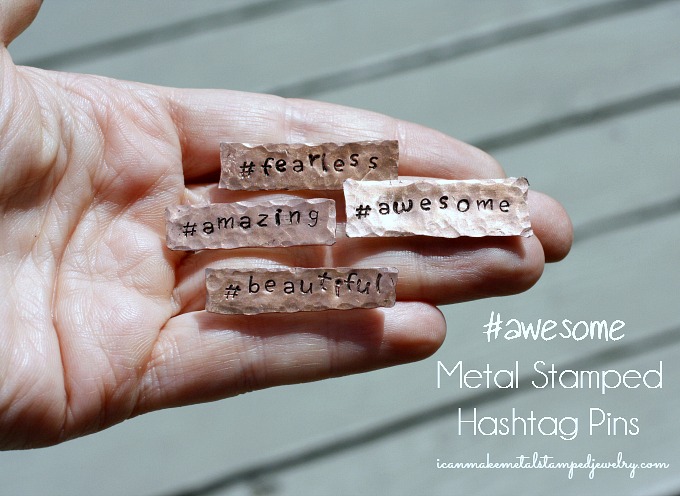
#awesome metal stamped hashtag pins

November 12, 2022 by decey Leave a Comment

Hashtag Pins 3  Final

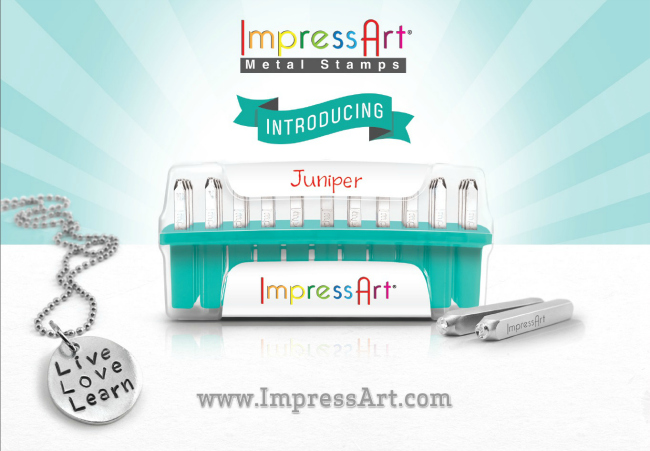
*ImpressArt just released an adorable new font that is great for making whimsical, fun, handcrafted designs. Juniper plays on the hand written font trend with an easy to read upper and lower case font that comes in these super awesome new slotted stackable cases! Every letter and symbol has a market slot. No more hunting and pecking, it’s so easy to just pull the stamp you need and slide it right back into the case.

juniper

We were particularly excited about the hashtag stamp. We decided to make some #positive #awesome metal stamped hashtag pins. Get the project below and don’t forget to enter to win our Juniper lower case font giveaway! Let’s get started!

[Read more…] about #awesome metal stamped hashtag pins

Filed Under: Uncategorized Tagged With: DIY hashtag jewelry, DIY jewelry making, DIY Jewelry Making Giveaway, DIY metal stamped jewelry, DIY metal stamped pins, easy DIY jewelry, fun DIY jewelry, ImpressArt Juniper Font, Juniper Font Set Giveaway

  • « Go to Previous Page
  • Page 1
  • Interim pages omitted …
  • Page 7
  • Page 8
  • Page 9
  • Page 10
  • Page 11
  • Interim pages omitted …
  • Page 15
  • Go to Next Page »

Copyright © 2026 · Aspire Theme on Genesis Framework · WordPress · Log in