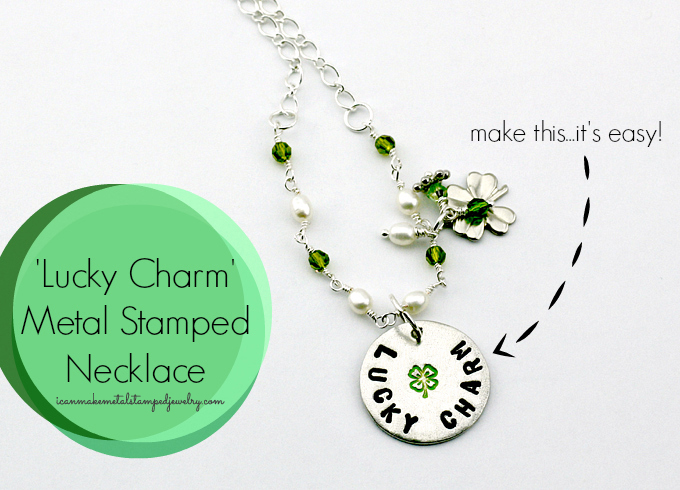
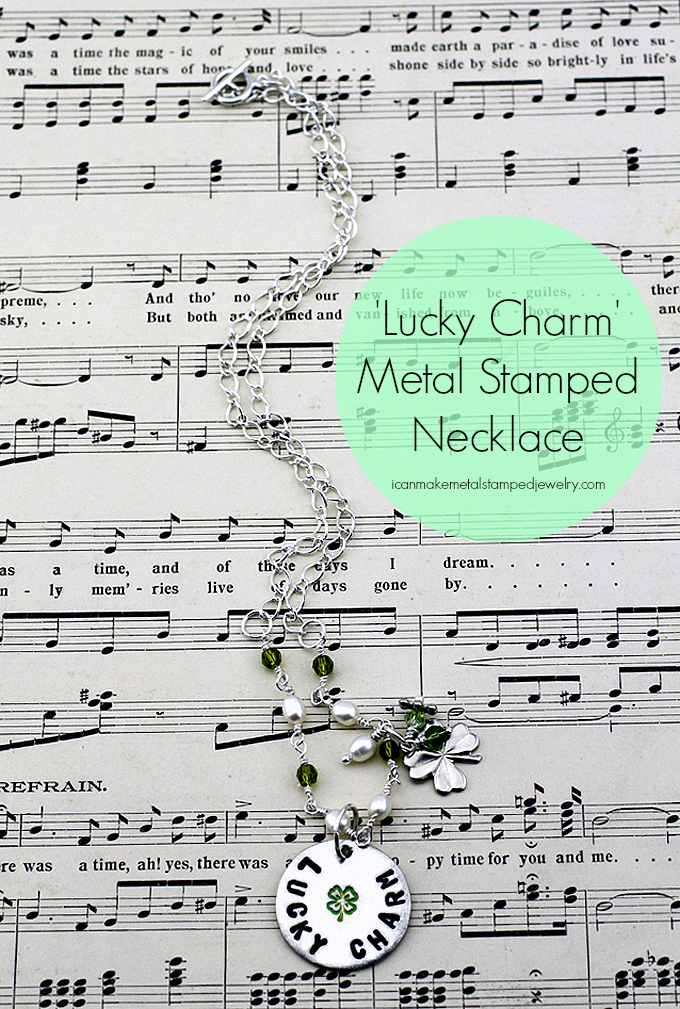
Happy St. Patrick’s Day! We’ve got a DIY Lucky Charm Metal Stamped Necklace that you can make and wear anytime you need to feel lucky. You’ll learn how to make the charm and how to create a coiled and beaded chain in this easy tutorial. Get kisses, not pinches, when you sport this on the town.
Here’s what you need:
ImpressArt SoftStrike Pewter 15/16″ Circle Blank
4mm Swarovski Crystals in Shades of Green
4mm Oval Freshwater Pearls
Daisy Spacer Metal Bead, 4mm
Shamrock Charm Bead
4 Beadalon Jump Rings 6mm Silver Plated
Beadalon 10-MM Jump Ring
Beadalon Ball Pin Medium Head Pins
German Style Wire, Round, Silver Plated, 24 gauge
Folk Art Enamel 2-Ounce Acrylic Paint, Licorice
Folk Art Enamel 2-Ounce Acrylic Paint, Evergreen
Beadalon Chain
Toggle Clasp
ImpressArt- 6mm, Four Leaf Clover Metal Stamp
ImpressArt Basic Metal Stamp Set, Uppercase, 3mm
Ergo-Angle Metal Stamping Hammer
ImpressArt 2 by 2-Inch Steel Block
ImpressArt Stamp Straight Tape
Round Nose Pliers
ImpressArt Bent Nose Pliers
ImpressArt Chain Nose Pliers
ImpressArt Flush Cutters
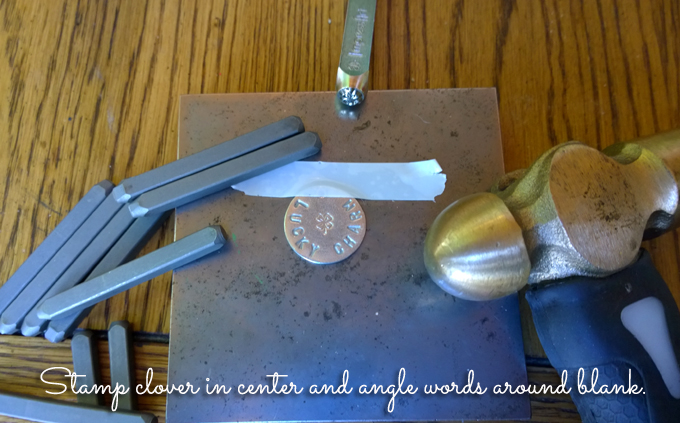
Step one: Stamp the clover in center of blank. Stamp around the edges, spacing the letters out and turning the block to face you as you stamp. Start in the center, working your way up both sides to spell Lucky Charm.
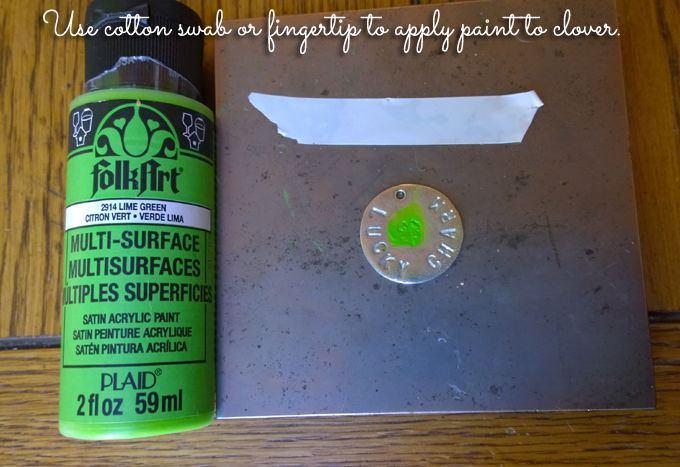
Step two: Use your fingertip or a cotton swab to wipe a small amount of paint into the clover. Let sit for 30 seconds, wipe off surface leaving paint in stamped area. Try to avoid getting green paint in the letters.
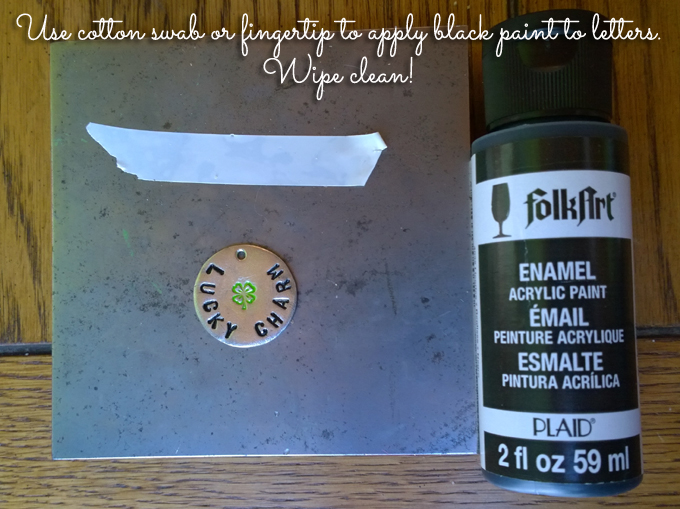
Step Three: Use your fingertip or a cotton swab to rub black enamel paint into letters. Allow to sit for 30 seconds and wipe paint off of surface.
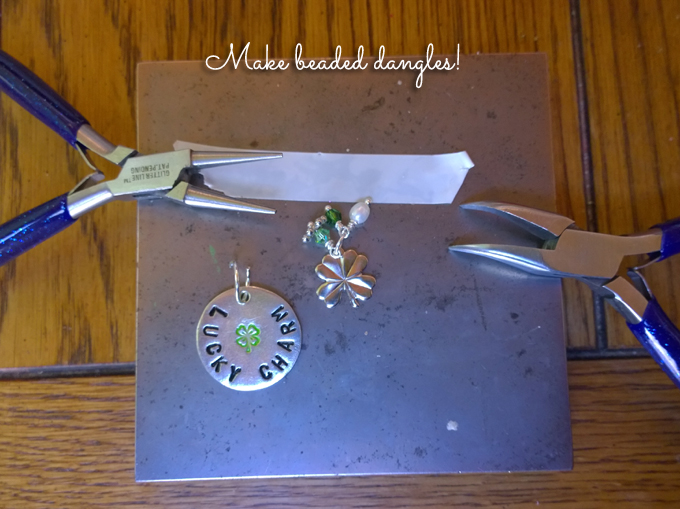
Step Four: Use beads and a pearl to make beaded charms.
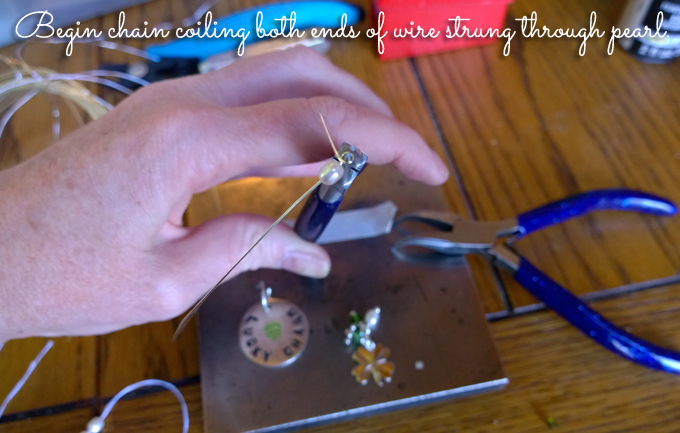
Step Five: Make your first coiled bead in your beaded chain. You’ll need to make wrapped coils on both ends. If you don’t know how to make coils, here’s a video tutorial.
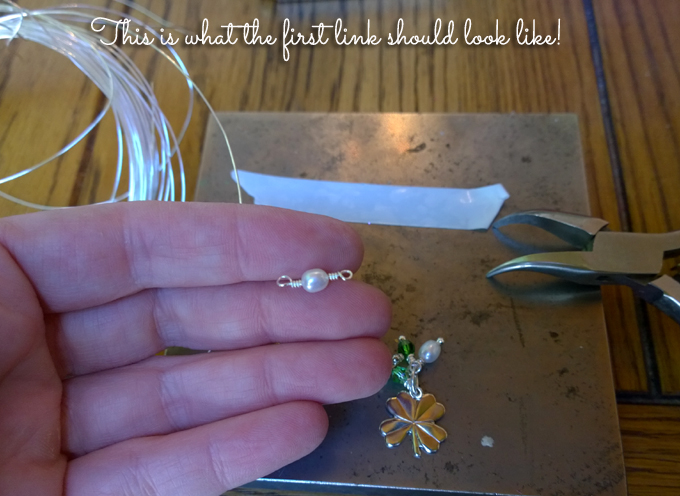
Step Six: This is what the coiled bead should look like!
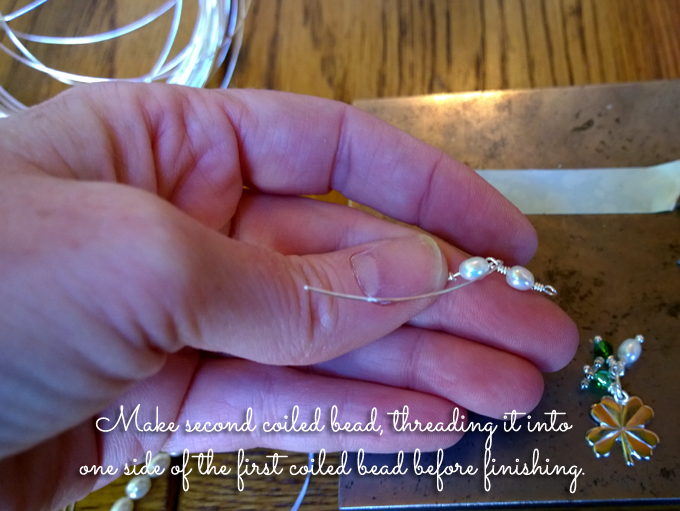
Step seven: To make the second coiled bead, make a finished coil on one end. Start your loop on the other end, thread it into one side of the first coiled bead, finish wrapping to connect them. Keep going, alternating between crystals and pearls on both sides for a total of four pearls and four crystals.
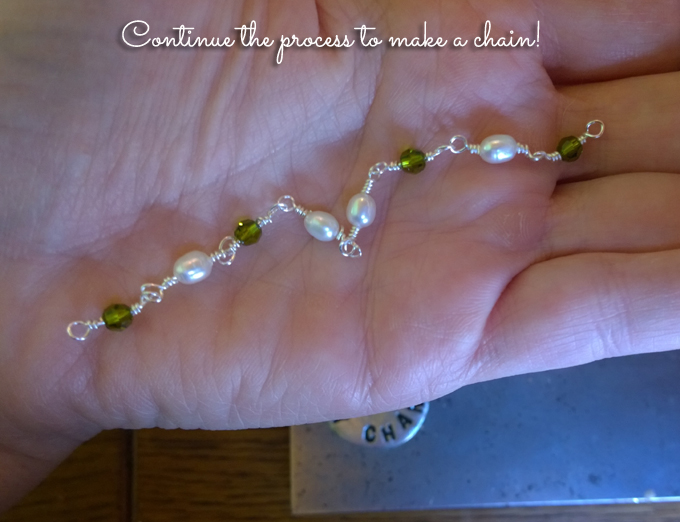
Step Eight: This is your finished chain. The pendant will hang between the two pearls in the front.
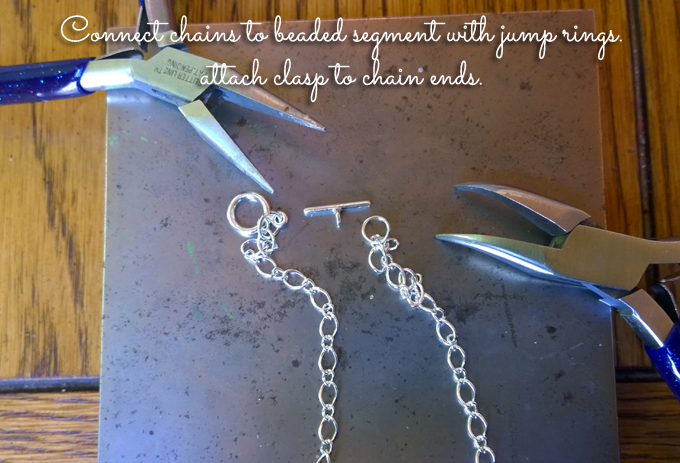
Step Nine: Connect the beaded chain to two chain lengths using jump rings. Finish the chain with a clasp. The toggle bar should be attached directly to the final chain link, you can open and close it with your pliers. The circle end is attached with a jump ring.

Step Ten: This is the front half of your necklace. Attach the stamped charm with a 10mm jump ring and the dangles all hang in between the first crystal and second pearl on the left side of the design. That’s it! Simply charming, yes?
We hope you enjoy making and wearing this Lucky Charm Metal Stamped Necklace as much as we do! Happy St. Patty’s Day from our home to yours.
Cheers,
Margot and Avalon
*DIY Project Policy: Our tutorials are meant for your creative inspiration. Feel free to make and gift or wear these designs. Please make sure that you give credit to us as the designer if you make and share these designs on your blog or social sites. Please do not make and sell copies of our designs or sell them as kits. Please do not teach these designs as classes for profit. This is how we make our living and we ask that you respect our creativity and the time it takes to design, photograph and write these free tutorials. You may use a single photograph from each project online if you include a direct link back to our tutorial. Any use of these designs for retail sale for profit online in places like Etsy or eBay or in retail bricks and mortar, flea markets or outdoor fairs is not permitted. Thank you!