Tag: memory jewelry

  • DIY Longitude Latitude Necklace

    Longitude Latitude Necklace LS Two

    Changes in latitudes, changes in attitudes,
    Nothing remains quite the same.
    Through all of the islands and all of the highlands,
    If we couldn’t laugh we would all go insane” Jimmy Buffet

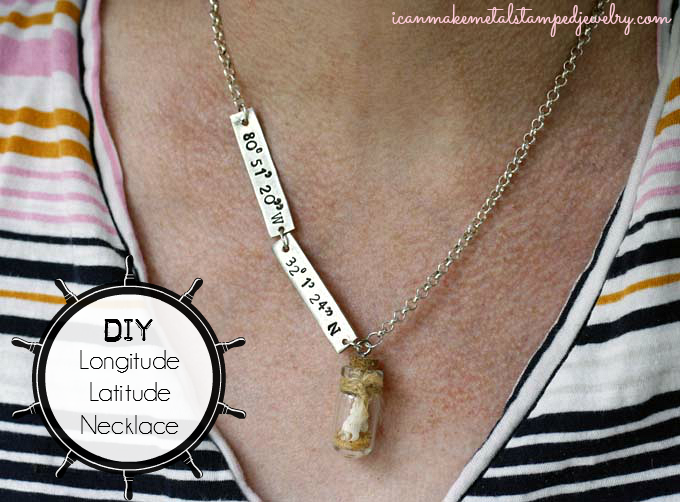
    We just got back from a delicious week at the beach with family. We were in Ocean City, New Jersey, which is a lovely beach indeed. Still, my favorite beach by far is Tybee Island off of the coast of Georgia. I have a collection of shells from Tybee and I’ve been meaning to make this necklace for ages. The past week at the beach reminded me that I always leave a piece of my heart at the ocean. So, here is my favorite place in longitude and latitude. You can pick yours, sand, sea or soil and make your own personal DIY Longitude Latitude Necklace. We’d love to know where you’d pick, so leave a comment!

    Here’s what you need:
    2 ImpressArt Pewter Stamping Blanks Rectangles
    Small Glass Mini Bottle with Cork Top
    Stainless Steel Screw Eye w/Ring
    Beadalon Chain Rolo 3.8mm Silver Plated
    4 6mm Beadalon 6-MM Jump Ring, Silver Plate
    Beadalon Lobster Clasp Swivel
    Jute twine
    Extra Tiny Sea Shells
    Sand
    Folk Art Enamel Acrylic Paint, Licorice
    Aleene’s Max Tacky Adhesive
    Beadsmith 36 Piece Letter & Number Punch Set For Stamping Metal 1/8 Inch 3mm (1 Set W/ Wood Case)
    Letter & Number Punch Set 1/16 Inch 1.5mm
    Metal Punctuation Stamp Set, 1/16″
    ImpressArt Large Metal Stamping Block
    ImpressArt 1 lb. Brass Stamping Hammer
    1.25mm Round Hole Punch Pliers for Sheet Metal
    Cotton swab
    Paper towel

    Amazon.com Widgets

    Amazon.com Widgets

    1-3

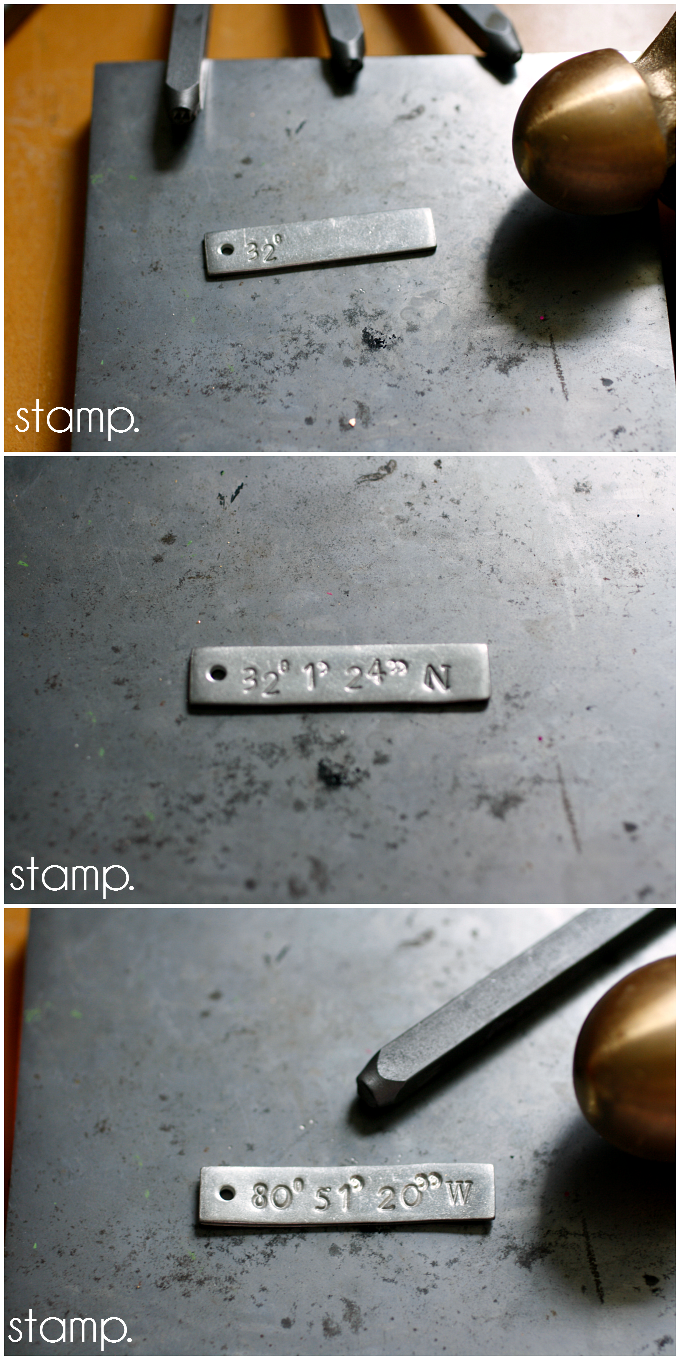
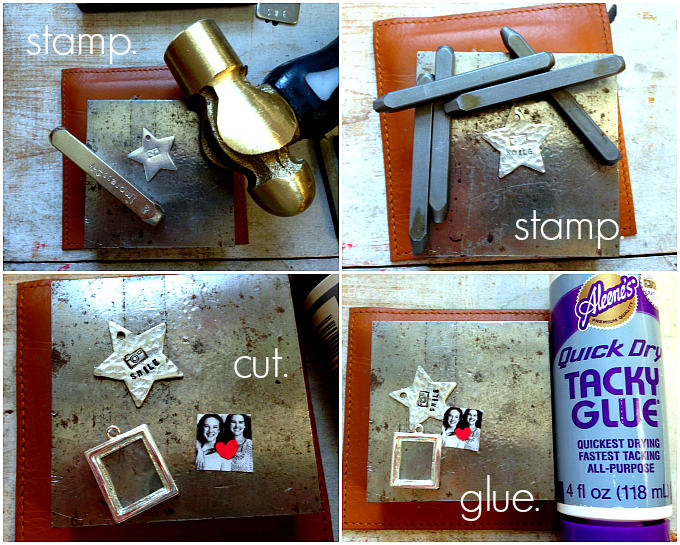
    Step one: Use the 1/8″ number stamps to stamp your first two numbers, add the degree mark using the 1/16″ number stamps and the number zero. Step two: Continue stamping your numbers, using the apostrophes as shown. You can find the longitude and latitude of your favorite place with a simple Google search. I abbreviated my numbers as they were super long, you can opt to be more exact if you desire. Step three: The last thing you’ll stamp is the direction using the uppercase premium font. Make a stamped blank for longitude and a second for latitude.

    4-6

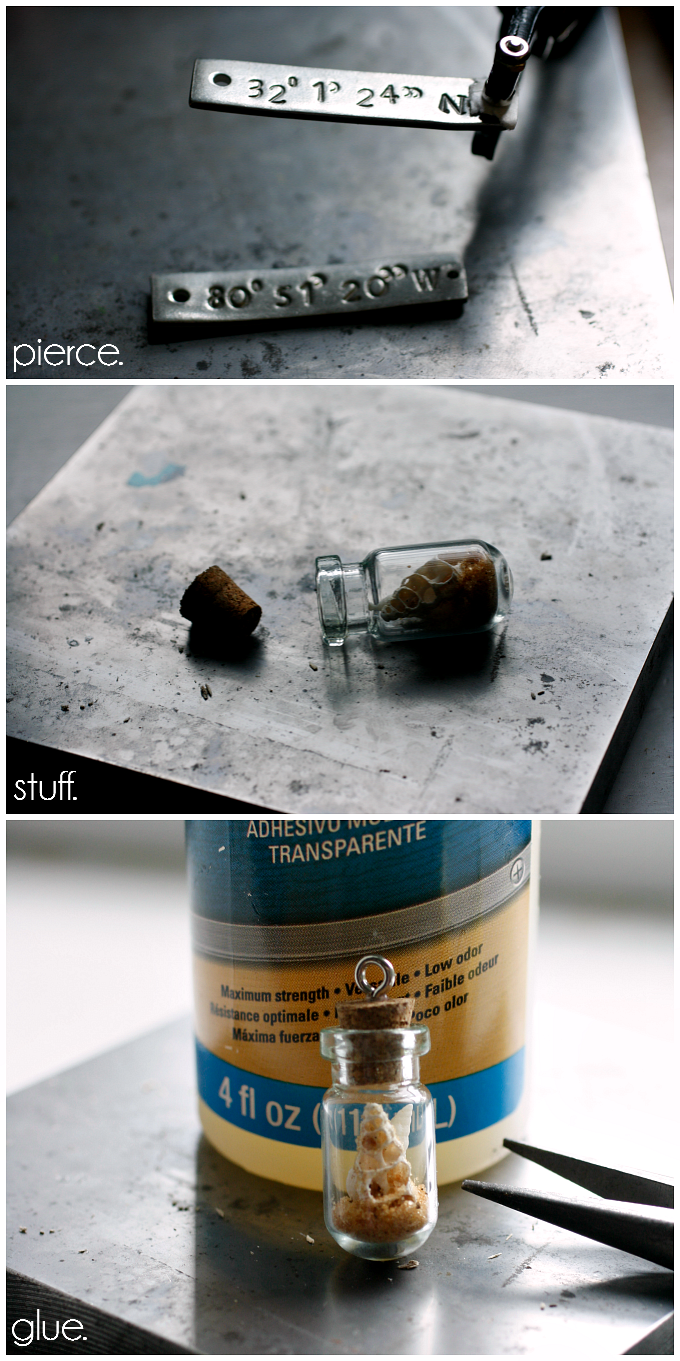
    Step four: Use the metal punch to pierce a hole in the bottom of each stamped blank. (Design tip: If you want the stamped areas to have more definition, swipe some paint across the top with a cotton swab and wipe off excess with a paper towel.) Step five: Stuff your tiny vial with shells and sand (or whatever you wish to represent your favorite place.) Step six: Add some max tacky glue to the cork and allow to dry. Add glue to the tiny screw bail and screw into center of cork, this turns your vial into a pendant.

    7-9

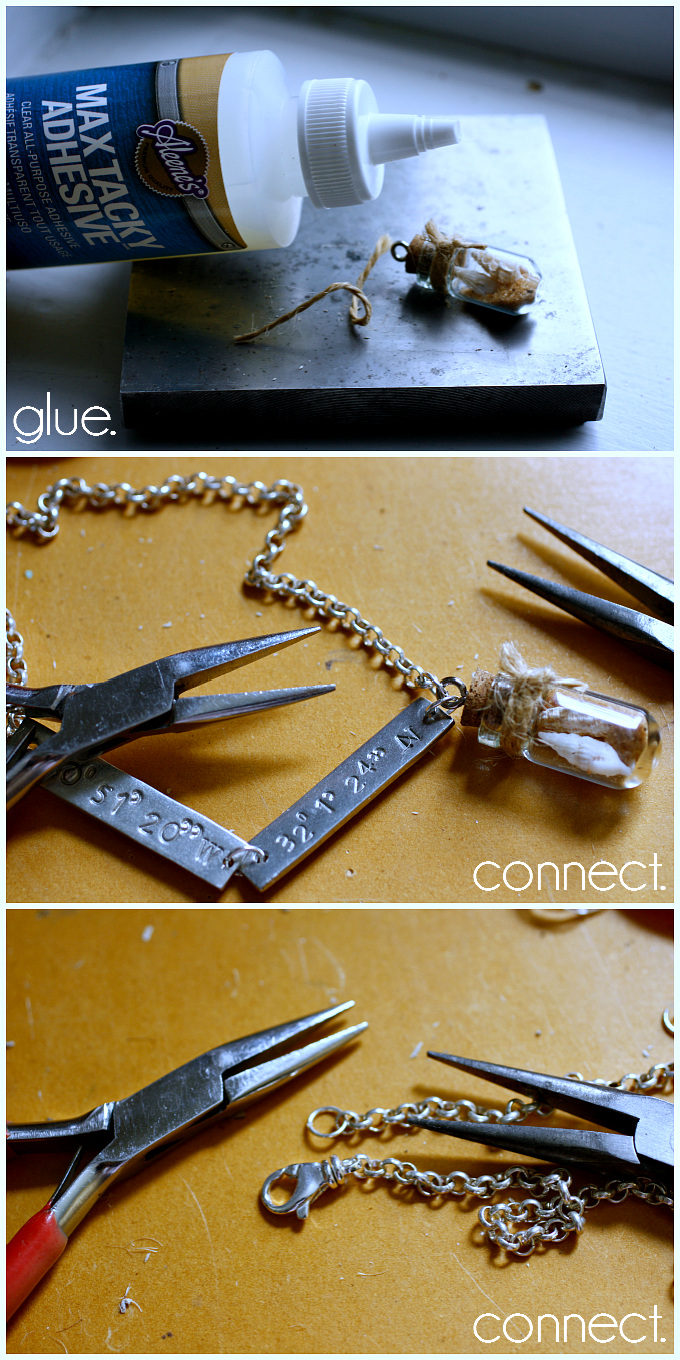
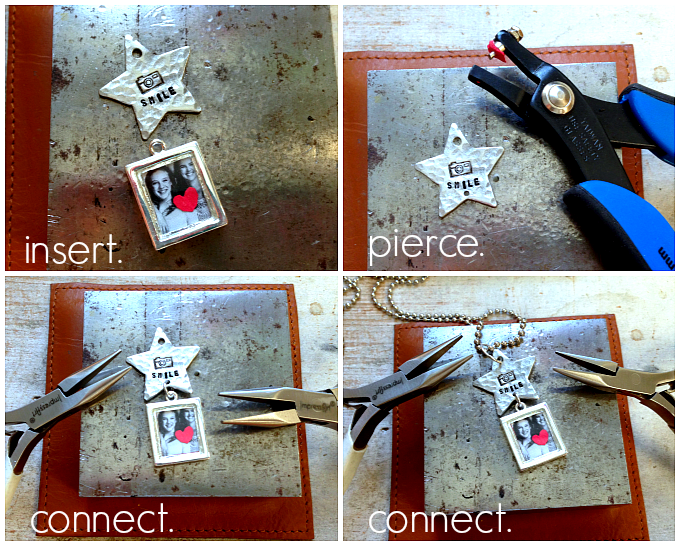
    Step seven: Tie a tiny piece of twine around the neck of your glass vial. Dab a little glue on the knot and let it dry. Step eight: Connect the stamped blanks to the pendant and chain as shown. Step nine: Attach a jump ring to the end of the chain and a clasp to the other.

    LL Three

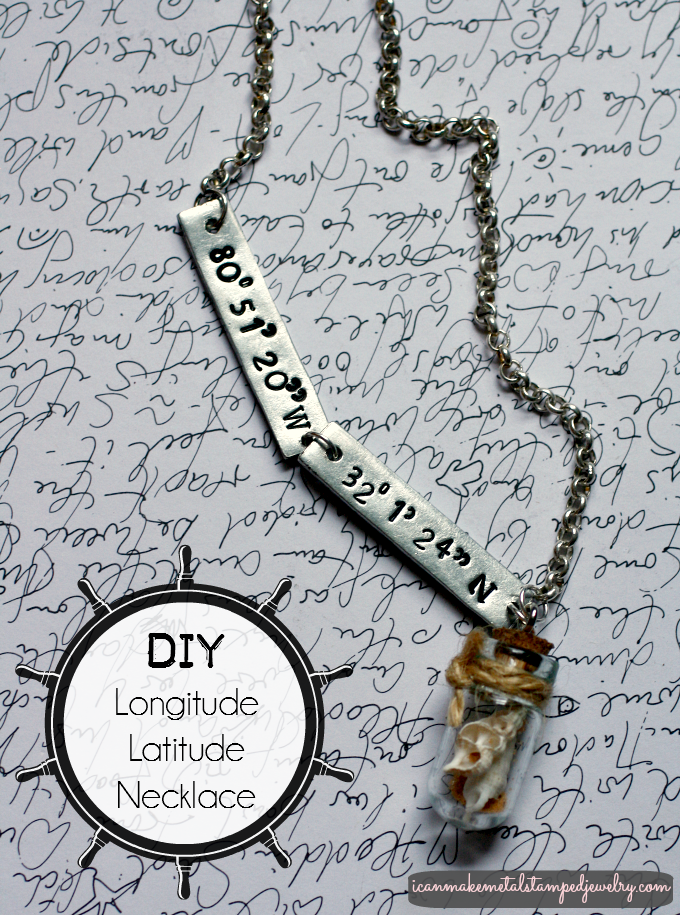
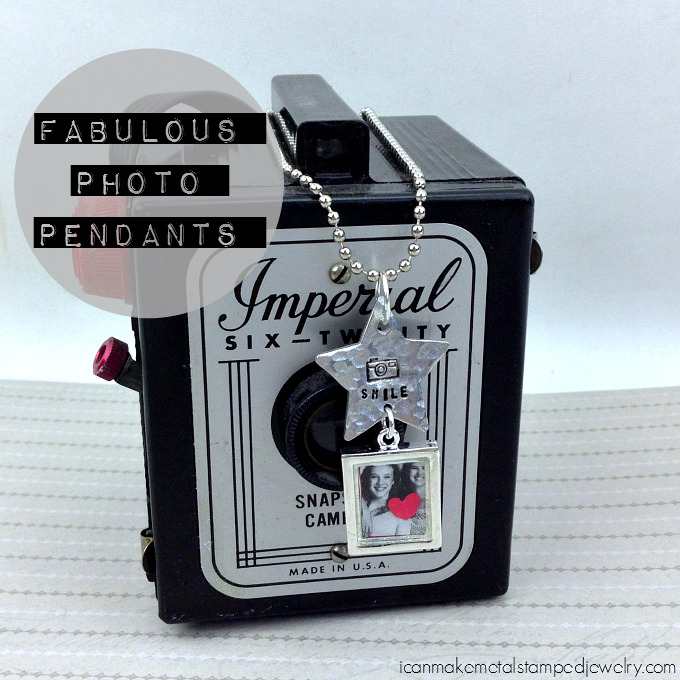
    Wear your lovely DIY Longitude Latitude Necklace any time you need a little virtual escape. I can almost hear the tiny waves coming from mine.

    Okay, not really.

    Still, it makes me smile and that’s something.

    Cheers,
    Margot and Avalon

    *DIY Project Policy: Our tutorials are meant for your creative inspiration. Feel free to make and gift or wear these designs. Please make sure that you give credit to us as the designer if you make and share these designs on your blog or social sites. Please do not make and sell copies of our designs or sell them as kits. Please do not teach these designs as classes for profit. This is how we make our living and we ask that you respect our creativity and the time it takes to design, photograph and write these free tutorials. You may use a single photograph from each project online in blog round-ups or blog posts ONLY if you include a direct link back to our tutorial. Any use of these designs for retail sale for profit online in places like Etsy or eBay or in retail bricks and mortar, flea markets or outdoor fairs is not permitted. Thank you!

    (FTC DISCLOSURE: *This post contains affiliate links, if you click on a link and make a purchase we get a small percentage of the sale. The blogger is employed by ImpressArt, but this is her personal blog. All opinions are 100% her own!)

  • Fabulous Photo Pendant DIY

    Fab Photo 3

    Today we’re sharing a Fabulous Photo Pendant DIY! The thing we love most about hand stamped jewelry is that it’s so easy to customize and to share your story with others. Nothing says, “I love you” quite like a hand made gift, especially when you include a personalized photo and a sweet sentiment they can wear. You’ll need to use photo editing software to size your image to fit in the tiny frame. We love PicMonkey, because it makes it so easy to edit photos even for the novice photo editor, you can even add the heart accent there instead of cutting and gluing.  We love adding a little dimension with a hand cut heart and Aleene’s new Tacky Glue bottles make it quick and easy to assemble your mini-collage. Oh and have we mentioned how much we love this tiny camera stamp from ImpressArt? See below for some tips on success with using design stamps.

    Just print, cut, glue, stamp, connect and you’ve got a gift for your BFF or your sweetheart in under 30 minutes. Now that is fabulous! (NOTE: Our posts contain affiliate links. This is how we are able to provide these “free” tutorials. When you click on a link and buy something, we get a small percentage of the sale.)

    What you need:

    Image sized to fit frame
    Tiny red paper heart
    Tiny photo frame pendant
    ImpressArt Soft Strike pewter star pendant
    6mm Jump Ring, Silver Plate
    10mm Jump Ring, Silver Plate
    Ball chain necklace
    Aleene’s Always Ready Quick Dry “Tacky” Glue-4Oz
    Folk Art Enamel Acrylic Paint in Licorice
    ImpressArt- 6mm, Camera Metal Stamp
    1/16″ Letter and Number Set Metal Stamps
    ImpressArt 1/2 lb. Brass Stamping Hammer-
    ImpressArt 2 by 2-Inch Steel Block, Small
    Eurotool EuroPunch Pliers
    Cotton swab
    Paper towel

    Quick tips for success stamping design stamps: We usually recommend that you only strike your blank one time, this helps prevent skipping or ghost impressions. When using design stamps, you can strike the stamp more than once BUT it is very important that you do not lift or shift the stamp. First make sure that all of the surface area of the image on your stamp is in direct contact with the blank. Hit once hard dead center. Rock the stamp gently to the upper left, upper right, lower left and lower right hitting it each time with your hammer at an angle, but keeping the stamp in the same position on the blank. This takes practice, so grab some sheet metal or a blank you’ve already messed up to get a feel for the motion.

    1-4

    Step one: Stamp the camera stamp in the center of the star blank. Use the rocking technique to make sure you get a crisp impression. Step two: Stamp the word “smile” under the camera. Start in the center with the letter “I” and stamp left and right so the word is centered. (Note: We used the round end of our hammer to add texture to the surface of the blank. Gently hit the blank with the hammer repeatedly to recreate this look.) Step three: Use cotton swab to apply enamel paint to stamped areas of your blank, allow to sit for 30 seconds and wipe off excess with paper towel. Cut your photo to fit the frame. Fold and cut red paper to make heart. Step four: Glue heart to image using a thin layer of Tacky Glue applied with your finger tip.

    5-8

    Step five: Insert your dried collage into the frame. You can add a thin layer of glue to the back to secure it, but do this carefully to avoid smearing glue on front of glass. Step six: Mark and pierce a hole in the center bottom of the star. Step seven: Connect the pendants with a 6mm jump ring. Step eight: Connect a 10mm jump ring to the top of the star and slide your ball chain through.

    Fab Photo LS

    Smile, gorgeous!

    Fab Photo Pendants

    You made your own fabulous photo pendant DIY! Go, you!

    Cheers,
    Margot and Avalon

    *DIY Project Policy: Our tutorials are meant for your creative inspiration. Feel free to make and gift or wear these designs. Please make sure that you give credit to us as the designer if you make and share these designs on your blog or social sites. Please do not make and sell copies of our designs or sell them as kits. Please do not teach these designs as classes for profit. This is how we make our living and we ask that you respect our creativity and the time it takes to design, photograph and write these free tutorials. You may use a single photograph from each project online in blog round-ups or blog posts ONLY if you include a direct link back to our tutorial. Any use of these designs for retail sale for profit online in places like Etsy or eBay or in retail bricks and mortar, flea markets or outdoor fairs is not permitted. Thank you!