Tag: positive affirmations jewelry

  • Lucky Girl Hand Stamped Necklace

    Lucky Girl Hand Stamped Necklace Three Text

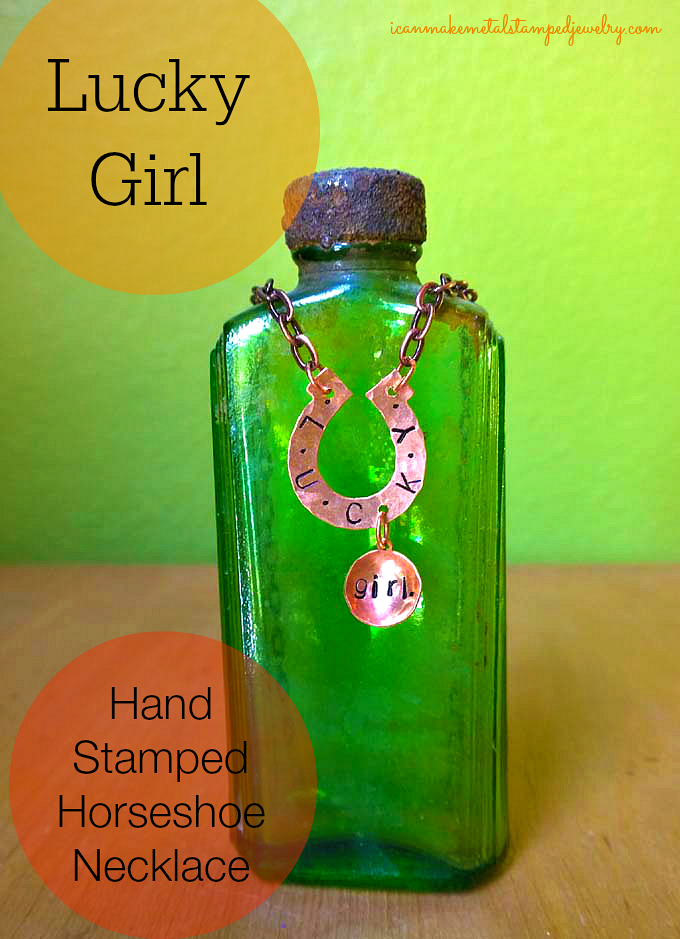
    Here’s a fun Lucky Girl Hand Stamped Necklace that’s perfect for t-shirt season! We’re in the middle of some big changes here at Casa de Potter. I believe we make our own luck and so far, that’s been proving true as we navigate the challenges we’re facing. This is a little talisman to remind me of that whenever I start to feel stressed. I LOVE these horseshoe blanks from ImpressArt, don’t you? As soon as I saw them, I had the idea for this necklace Cute, yes? Easy too! This should take about 30-45 minutes to recreate, so it’s not as simple as our 10 minute crafts, but you can do this and we’ll show you how.

    *You will need:

    ImpressArt Horseshoe Stamping Blanks
    ImpressArt 1/2″ Circle Stamping Blank
    5 6mm Nickel Free Copper Plated Jump Ring
    Copper Chain with Clasp
    Folk Art Enamel Paint-Licorice
    Awl
    3mm Upper and Lower Case Stamps
    ImpressArt Metal Stamping Hammer
    ImpressArt Nylon Hammer
    ImpressArt Chasing Hammer
    ImpressArt Steel Stamping Block
    ImpressArt 2-Hole Punch
    Impress Art Stamp Straight Tape
    Steel Dapping Block
    Dapping Punches
    Cotton swab
    Paper towel

    Amazon.com Widgets

    Amazon.com Widgets

    1-4

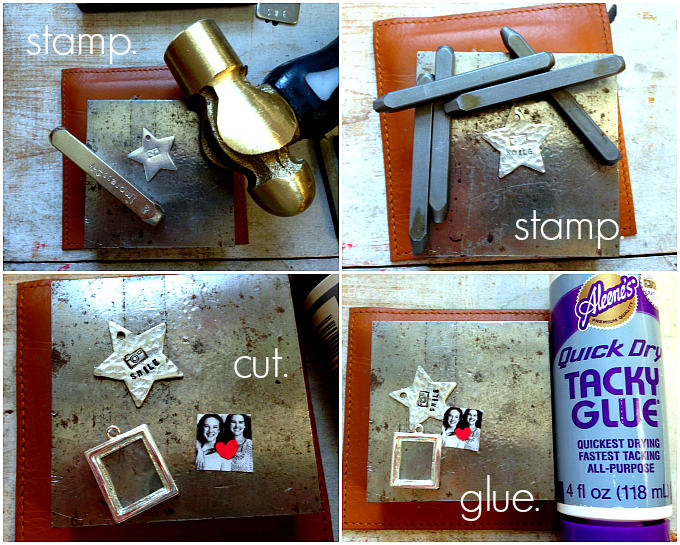
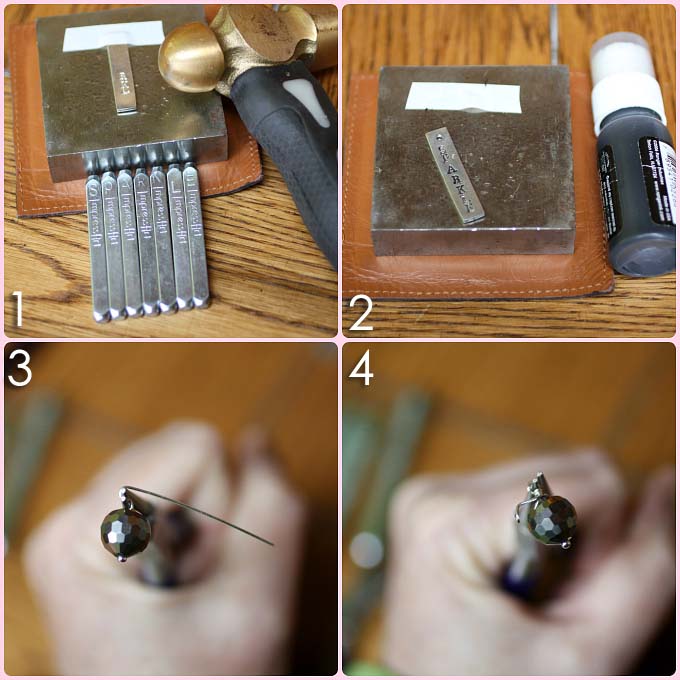
    Step one: Hammer horseshoe blank with round end of chasing hammer. Step two: Stamp the word L U C K Y, leaving a space between each letter as shown (at the 2, 4, 6, 8 and 10 o’clock positions.) Start with the letter C in the center and move up each side. Step three: The blank may bend as your stamping, after you finish use the nylon hammer to flatten it back out. Step four: Use the awl or period stamp to add a dot in the center between each letter and at the top above the first and last letters as shown.

    5-8

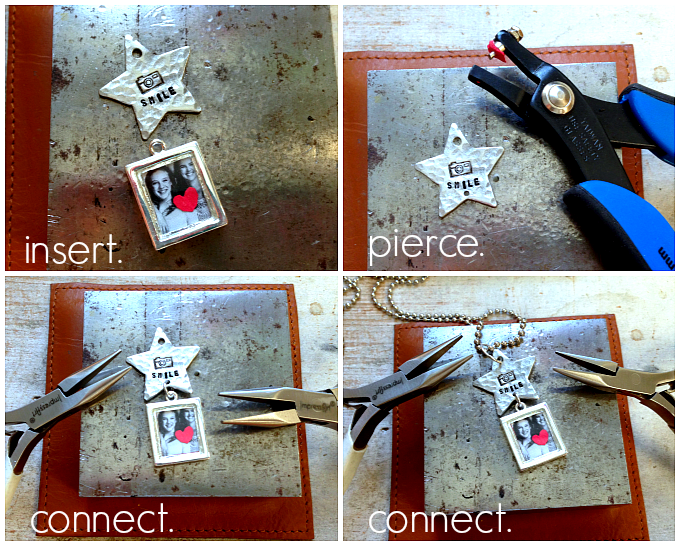
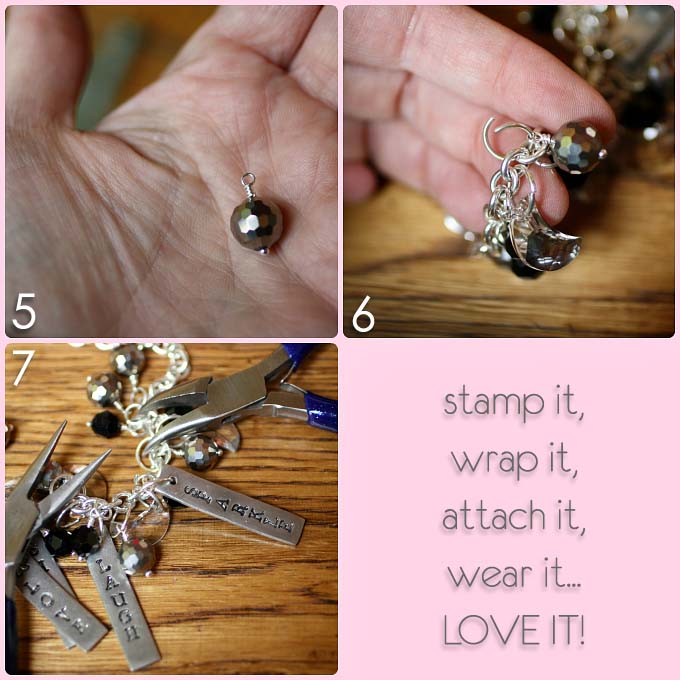
    Step five: Hammer smaller blank with round end of chasing hammer. Step six: Stamp the word “girl” and add a period. Step seven: Use dapping block and tool to curve the smaller blank as shown. Step eight: Mark and punch holes at top center on both sides and on the bottom left side as shown.

    9-12

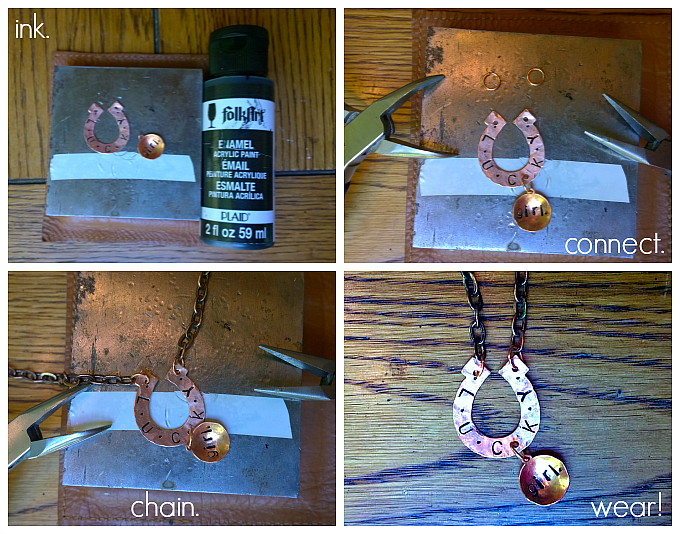
    Step nine: Use the cotton swab to swipe black enamel paint over stamped areas on both blanks. Wipe off excess with paper towels. Step ten: use jump rings to connect smaller blank to horseshoe. Step eleven: attach chains to top jump rings on horseshoe. Step twelve: Wear your new creation, lucky girl!

    Lucky Girl Hand Stamped Necklace Final

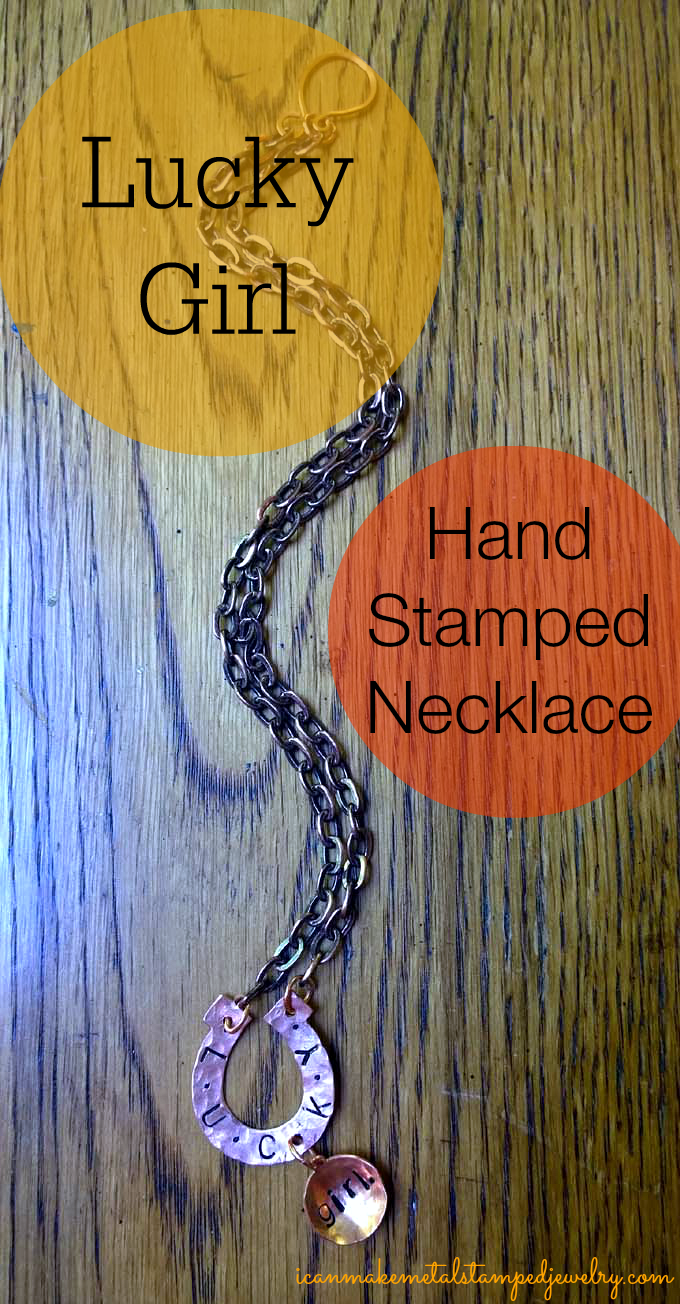
    That’s all there is to it! Enjoy your Lucky Girl Hand Stamped Necklace and when the compliments pour in, tell ’em you made it yourself.

    Cheers,
    Margot and Avalon

    *FTC DISCLOSURE: This post contains affiliate links. If you click on a link and make a purchase, we get a small percentage of the sale.

    *DIY Project Policy: Our tutorials are meant for your creative inspiration. Feel free to make and gift or wear these designs. Please make sure that you give credit to us as the designer if you make and share these designs on your blog or social sites. Please do not make and sell copies of our designs or sell them as kits. Please do not teach these designs as classes for profit. This is how we make our living and we ask that you respect our creativity and the time it takes to design, photograph and write these free tutorials. You may use a single photograph from each project online in blog round-ups or blog posts ONLY if you include a direct link back to our tutorial. Any use of these designs for retail sale for profit online in places like Etsy or eBay or in retail bricks and mortar, flea markets or outdoor fairs is not permitted. Thank you!

  • Metal Stamped Positive Affirmations Necklace

    Positive Affirmations Necklace Yellow Text

    Staying on the sunny side, seeing the glass half full, focusing on the blessings, choosing joy, however you want to frame it, positive affirmations really do work. We get that upon which we focus, so focus on the joy and let the rest fall away. Here’s a lovely metal stamped necklace you can wear to remind yourself of the good stuff. These rectangle blanks make it easy for the beginner to be successful stamping, no worrying about lining the letters up horizontally! Just start in the center and work your way up and down. Just one swift tap of your hammer and you’re good to go. Add some faceted glass and SWAROVSKI ELEMENTS beads to add sparkle and you’re sure to garner tons of compliments. I wore this design to a trade show and everyone loved it. Here’s how you can make a Metal Stamped Positive Affirmations Necklace (and some matching Yes, This earrings) of your own!

    You will need:
    9 ImpressArt, Pewter Stamping Blanks, Rectangle (7 for necklace, 2 for earrings)
    11 Preciosa Czech Fire 8mm Polished Glass Bead, Faceted Round, Half Coating Silver, 100-Pack
    12 Swarovski Crystal 5000 6mm Jet Faceted Round Beads
    8 SWAROVSKI ELEMENTS Crystal Moon Pendant #6722 20mm Crystal AB
    4 SWAROVSKI ELEMENTS Crystal #5000 4mm Round Beads Jet
    2 4mm Freshwater Pearl Beads
    43 Beadalon 10-MM Jump Rings Silver Plated
    18″ Beadalon Chain Rolo Large Silver Plated
    Beadalon Lobster Clasp Swivel
    2 Beadalon Dapped and Spring Ear Wire
    Beadalon Ball Tipped Head Pin
    ImpressArt- Basic Newsprint Uppercase Font Set
    ImpressArt Design Stamps, 6mm, Daisy
    Folk Art Enamel Acrylic Paint, Licorice
    Paper towel
    Ergo-Angle Metal Stamping Hammer
    ImpressArt 2 by 2-Inch Steel Block
    Beadalon Leather Pad For Block and Anvil
    ImpressArt Stamp Straight Tape
    ImpressArt Chain Nose Pliers
    ImpressArt Bent Nose Pliers
    Beadalon Round Nose Pliers

    Positive Affirmations 1-4

    1. Stamp words on blanks. Tape top of blanks to keep them stable and start in center working up and down blank. Stamp necklace blanks: create, sparkle, smile, give, love, create.  I added a daisy to the center ‘love’ blank for fun.  Stamp earring blanks: yes, this. 2. Use black paint or a Sharpie marker to ink letters.  Wipe clean.  3.  Make coiled top dangles with your beads.  Slide bead on wire, grasp top of wire with round nose pliers and bend wire flush to the top of bead as shown. 4. Move pliers 1/2 turn.  Use chain nose pliers or your fingers to coil wire tail tightly around core wire as in photo.  Cut off excess wire with flush cutters and tuck the little extra wire into the bottom of the coil with chain nose pliers.  (Here’s a link to my video that shows you how to make wrapped head pin beads if you’ve never done this before!)

    Positive Affirmations 5-7

    5.  This is how your coiled beads should look when finished! 6. Open jump rings to attach the beads and pendants starting at the center and moving side to side.  (Here’s a link to my video on how to open and close jump rings below in case you’ve never done this before!)  7. Attach the final beads.  Attach the clasp to once side of the chain and a jump ring to the other. To make matching earrings, coil the smaller beads and attach them along with the stamped pendants to your ear wires using jump rings.

    Positive Affirmations Necklace Pink

    Wear your Metal Stamped Positive Affirmations Necklace with pride because, you made it yourself!  Yes, this.

    Cheers,
    Margot and Avalon

    *DIY Project Policy: Our tutorials are meant for your creative inspiration. Feel free to make and gift or wear these designs. Please make sure that you give credit to us as the designer if you make and share these designs on your blog or social sites. Please do not make and sell copies of our designs or sell them as kits. Please do not teach these designs as classes for profit. This is how we make our living and we ask that you respect our creativity and the time it takes to design, photograph and write these free tutorials. You may use a single photograph from each project online in blog round-ups or blog posts if you include a direct link back to our tutorial. Any use of these designs for retail sale for profit online in places like Etsy or eBay or in retail bricks and mortar, flea markets or outdoor fairs is not permitted. Thank you!

    (This blog uses affiliates links, if you click on them and make a purchase, we get a small percentage of the sale.  That’s how we keep the lights on, folks!)