(Disclosure: This post contains affiliate links, if you click on a link and make a purchase, we get a small percentage of the sale.)
Metal stamping 1 2 3, it’s really that easy. Here’s what you need to get started!
Brass Stamping Hammer
(I prefer a brass hammer to steel, brass is softer and disperses or transfers the energy of the hit into the blank preventing skipping or ghost impressions)
Metal Stamps
Steel Block
Stamp Straight Tape
Acrylic Enamel Paint
Metal Stamping Blanks (Try aluminum when you start out, it’s softer and easier to stamp than base metal and it’s less expensive.)
And here are the basic steps:
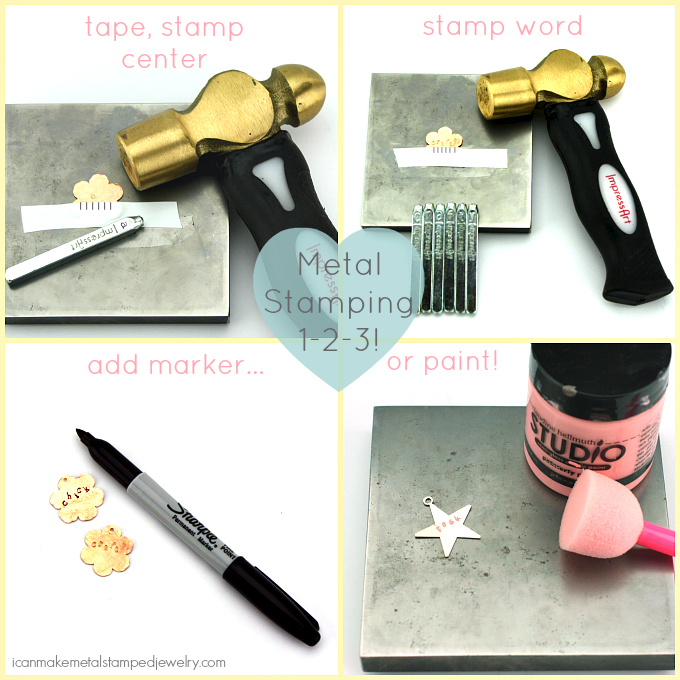
Step One:
Plan out your word, line up your stamps and make sure that the word will fit on the blank. Tape the blank to the bench block and start in the center working out from there.
Step Two:
Hold your stamp so it is in full contact with the surface of the blank. Make sure it’s straight, not tilted! Keep your fingers away from the top of the stamp. Give your stamp one good hit, don’t stamp more than once to avoid skipping or double impressions. Stamp your word, keep the stamps lined up to the top of the tape. You can angle the alignment of your stamps for a more whimsical effect. If you are worried about spacing, draw marks on the tape to line up your letters or even mark directly on your metal blank with a pencil.
Step Three:
Add color with a permanent marker, wipe clean with a dry cloth before the marker sets.
OR
Use acrylic paint instead, giving it a few seconds to set before wiping the surface.
And that’s Metal Stamping 1 2 3. You got this!
Follow us on Bloglovin’:


Leave a Reply