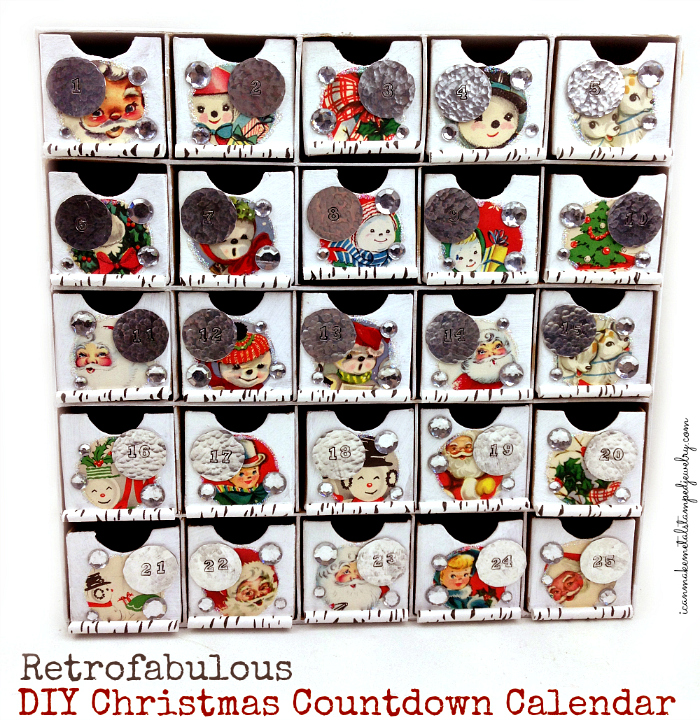
I LOVE crafting during the holidays, give me a theme and I am all over it! I broke out my stacks of vintage Christmas cards, metal stamps and a few simple craft supplies and got to work. Any excuse to eat chocolate every day and we are all in here at Casa de potter. Get the tutorial for our Retrofabulous DIY Christmas Countdown Calendar below!
You will need:
Karen Foster 3D Countdown Calendar, 25 Drawers
Upcycled Vintage or New Christmas Cards (you can score vintage ones on eBay)
25 ImpressArt, Circle, 7/8″, Aluminum Stamping Blanks- 24 pc.
Clear Faux Crystal Round Rhinestones Flatback Mixed Sizes
Kikkerland Biodegradable Paper Straws, Birch, Box of 144
Deco Art Americana Chalky Finish Paint, 8-Ounce, Everlasting
Ranger Ink Stickles Glitter Glue – Star Dust
I Love To Create Aleene’s Always Ready Turbo “Tacky” Glue, 4-Ounce
Aleene’s Tacky Sticker Sheets, 12-Pack
Folk Art Enamel Acrylic Paint, Licorice
Fiskars Round’n Round Squeeze Punch, Medium
Jeweler’s Files or Sand Paper
ImpressArt 2 by 2-Inch Steel Block
Ergo-Angle Metal Stamping Hammer
ImpressArt- Varsity Number Metal Stamps
Fiskars Crafts Duck Edition Scissors
Cotton Swab
Paper Towel
Before you start, paint the entire box and every drawer with a layer of Chalky Finish Paint in everlasting. This gives the perfect vintage finish, like the old Putz houses. Trust me, it’s worth the effort!
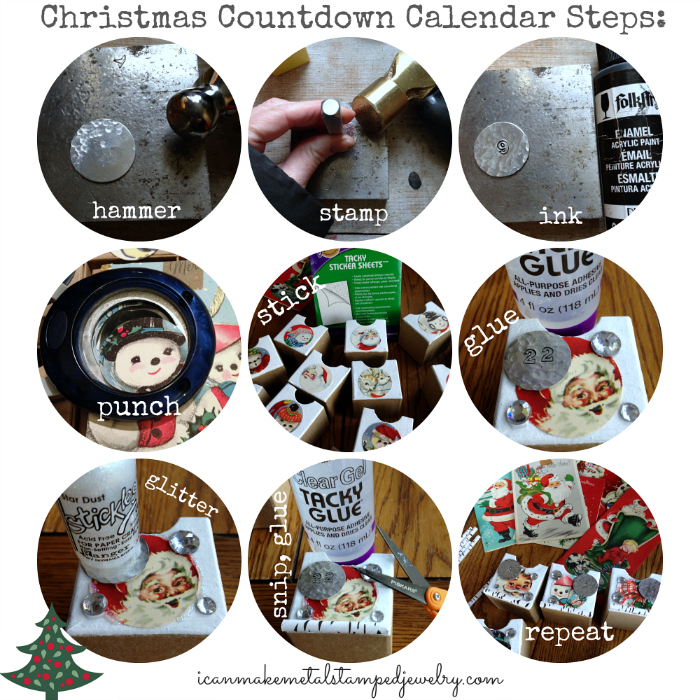
Step One: Make your stamped blanks first. Begin by using the round end of a ball peen hammer to texture the blanks. Don’t be afraid, just go at it like one of Santa’s elves.
Step Two: Hold the stamp firmly between your thumb and forefinger as in picture with your hand slid down and resting on the bench block. Give it one firm hit with the brass hammer. Don’t move your hand or you may end up with a funky number.
Step Three: Remove stamp, use a cotton swab to apply paint. Let paint sit for 30 seconds, wipe clean with a paper towel. Make numbers 1-25.
Step Four: Cut the cards to make it easy to reach the images you need. Insert and punch. You will need 25 images.
Step Five: Use sticker sheets to apply the punched images to the front of each box. (NOTE: You can opt to decoupage, but I am impatient and this makes quick work of attaching the images. I LOVE sticker sheets. LOVE. THEM. You can seal them if you like with a spray sealer, or not. Entirely up to you, my dear.)
Step Six: Rough up the back of your stamped blanks with a jeweler’s file or sand paper to help them adhere better. Glue numbers and rhinestones around images, varying shapes and placement.
Step Seven: Carefully squeeze a thin bead of Stickles around edges of images. Snip the straws to fit the bottom front of the boxes and CAREFULLY glue to box so you don’t smear your glitter. You could let the glitter dry if you’re patient, I am not. Have I mentioned that?
Step Eight: Repeat for all 25 of your boxes.
But wait…there’s more!
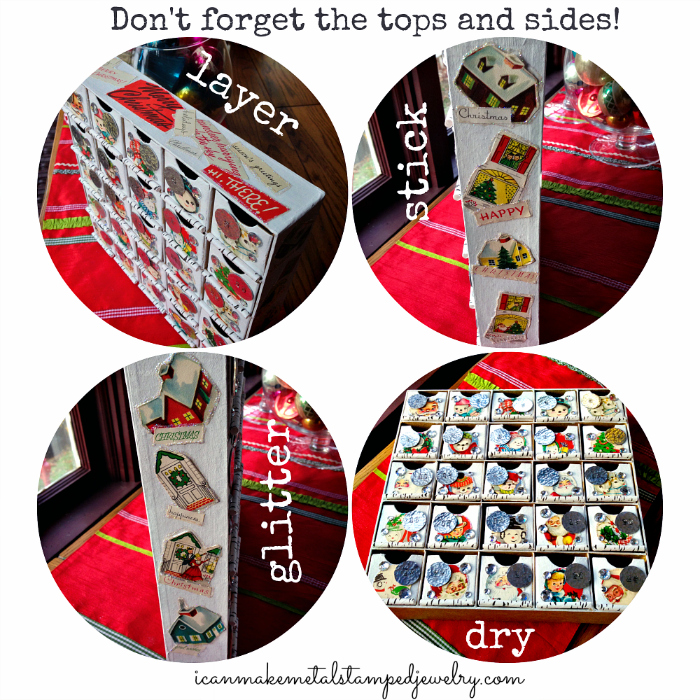
Step Nine: After I finished the boxes and had decimated carefully cut up a small pile of vintage greeting cards, I realized the top and sides looked a little…meh. So I cut up some fun words and images from the cards and attached them with the sticker sheets.
Step Ten: Then I edged everything with more Stickles, because there is never enough sparkle, people. Never. Enough. Sparkle.
Step Eleven: Then I stepped away and let the whole thing DRY OVERNIGHT.

How cute is this? These vintage images are just so much fun!
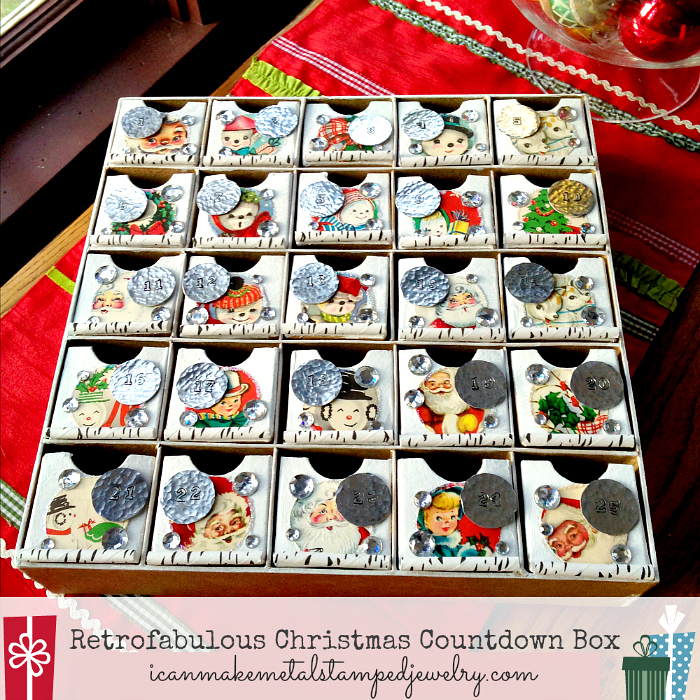
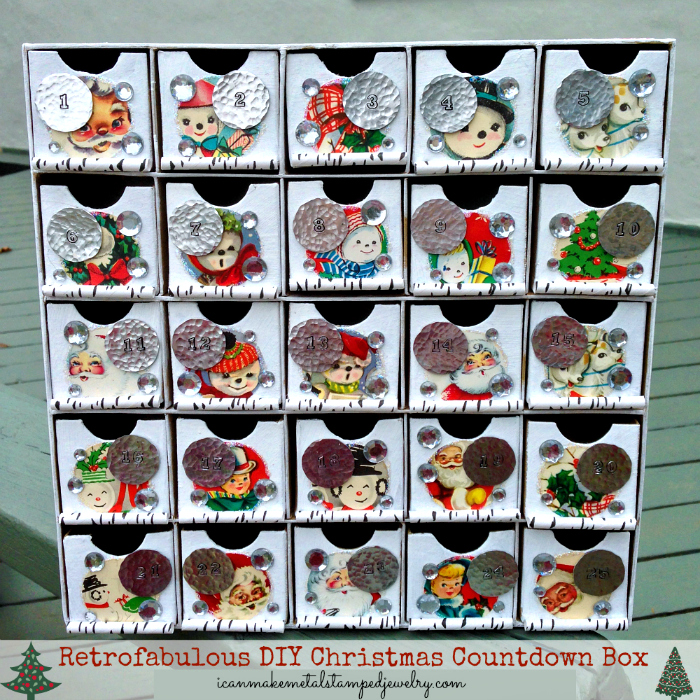
Make it uniquely yours using whatever images you like. Try wrapping paper, new cards, magazine images…whatever rings your bell. It’s a great way to use up those Christmas cards you may have saved from last year. If you make one, we would LOVE to see it, so be sure to share in the comments.
Happy Stamping!
Margot and Avalon