
I work part time as the Creative and PR Director for ImpressArt. They are the world’s leading manufacturer of supplies for metal stamped jewelry making. Of course, having access to so much super awesome metal stamping stuff is a blast for a jewelry designer like myself. I consult with them sometimes on new products and I kept nagging them about doing a banner blank. I’m a writer, I liked the idea of a banner that you could use to write a story with metal stamped elements. I LOVE these blanks and I’m seriously smitten with this necklace. After all, who doesn’t want to live happily ever after?
*Here’s what you need to make a DIY Happily Ever After Necklace of your own (FYI-the following links are affiliate links):
3 ImpressArt SoftStrike Pewter Banner Blanks
4 10-MM Jump Ring Silver Plated
2 6-MM Jump Ring Silver Plated
Chain Small Silver Plated
Toggle Clasp Small Silver Plated
ImpressArt Juniper Lowercase Alphabet Metal Stamps Set
ImpressArt Uppercase Stamp Set Newsprint
ImpressArt Lowercase Stamp Set Jeanie
Impressart 1/2 Lb Brass Metal Stamping Hammer, Protects Your Steel Stamps and Other Tools, Great for Stamping Blanks, Lighter Version
ImpressArt Steel Stamping Block
Impress Art Stamp Straight Tape
Chain Nose Pliers (2 pairs or one pair and one pair Bent Chain Nose Pliers)
Semi-Flush Cutter
Cotton Swab
Paper Towel
Amazon.com Widgets
Amazon.com Widgets
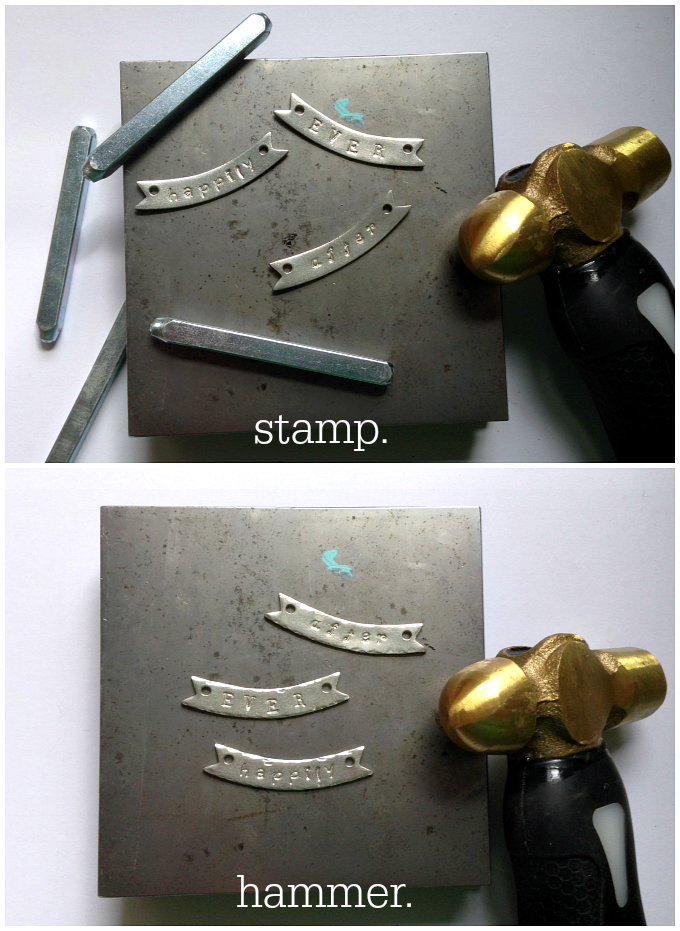
Step one: Using the three fonts, stamp the words happily, ever and after on the three blanks. I used Juniper for happily, Newsprint for ever and Jeanie for after. Step two: Use the round end of your hammer to gently tap around the edges of your blanks adding texture.
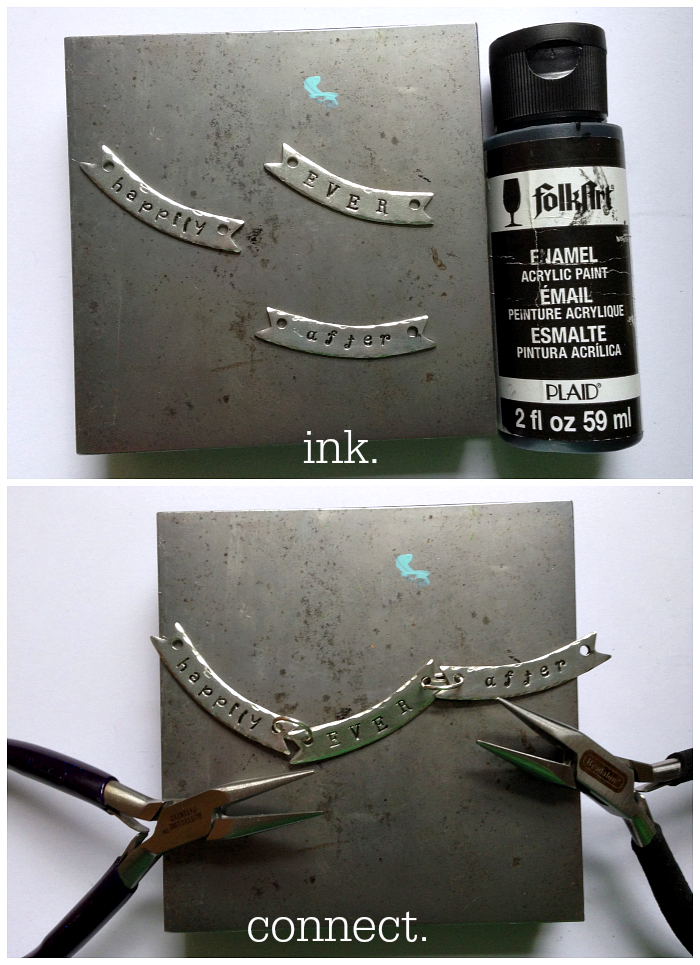
Step three: Apply a thin layer of paint to the surface of each stamp using a cotton swab. Let this sit for 30 seconds. Wipe off with a paper towel. Step four: Use your chain nose pliers to connect the blanks together with the large jump rings.
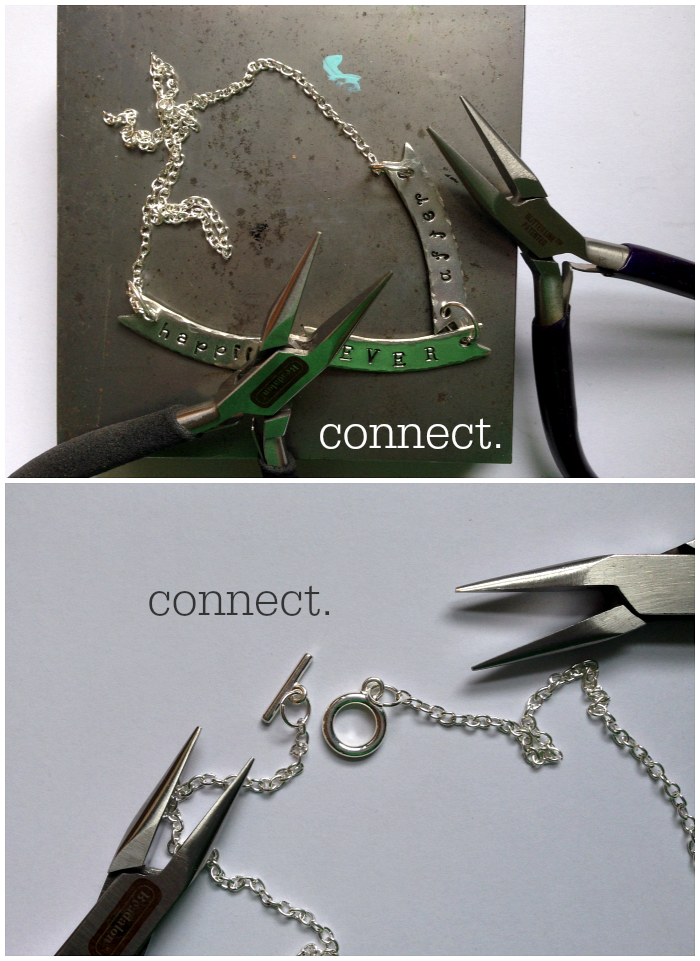
Step five: Connect the banners to the chain on both sides using the larger jump rings and your chain nose pliers. Step six: Attach the clasp to the other end of your chains using the smaller jump rings.
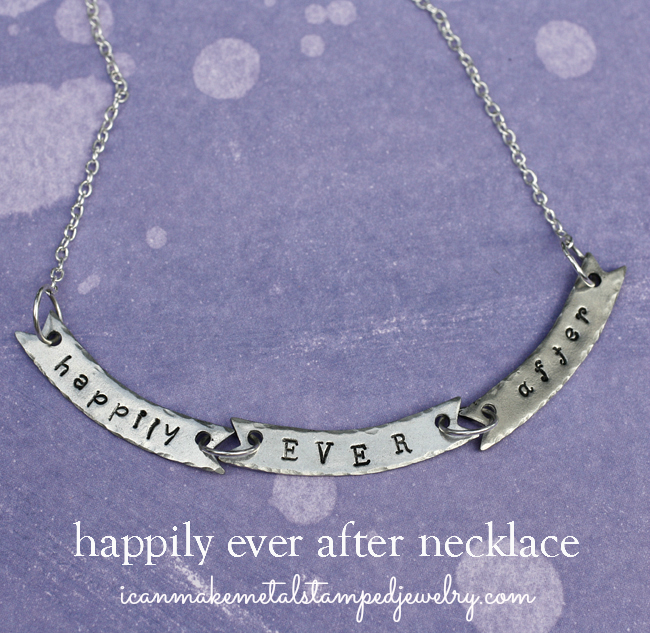
That’s it! Stamp it up and enjoy your DIY Happily Ever After Necklace. Simple and simply charming, yes? You can use these banners to make all sorts of wonderful story book themed jewelry. What would you do with these? Let us know in the comments!
Cheers,
Margot and Avalon
(FTC DISCLOSURE: *This post contains affiliate links, if you click on a link and make a purchase we get a small percentage of the sale. The blogger is employed by ImpressArt, but this is her personal blog. All opinions are 100% her own!)