If you are thinking about what it takes to get started metal stamping, there are a handful of essential tools. Here’s a list of our ‘must haves’ for success. You don’t have to buy all of these items, but we think having good tools is the best way to ensure good results. Nothing can turn you off faster than the frustration that comes from using bad tools and making big messes. We’ve talked about the technique basics before, but this is an in depth look at the tools and materials.
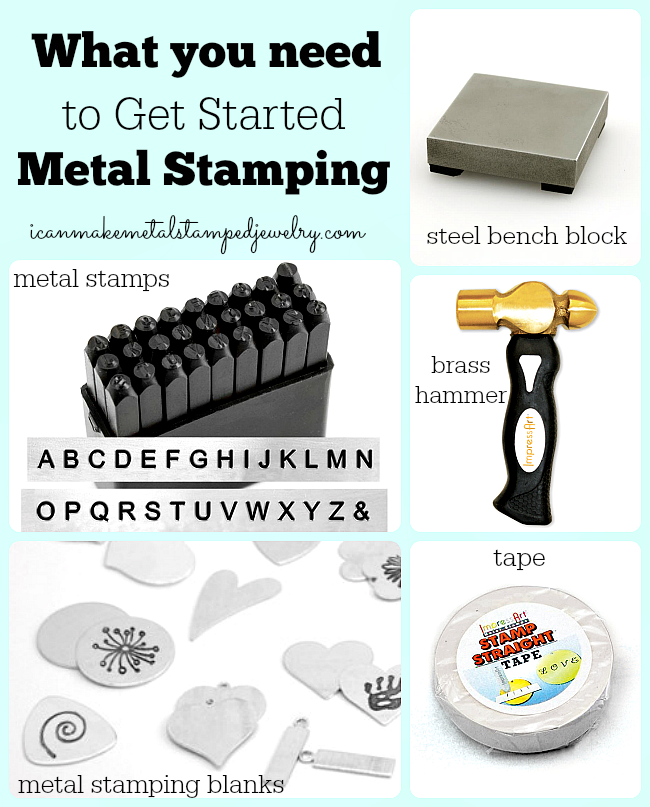
Metal Letter Stamps
Yes, it seems rather obvious that you’ll need metal stamps to get started metal stamping, but there are so many different metal stamps on the market that knowing which ones to buy can be confusing. If you’re just starting out and you aren’t ready to make a big investment, a good set of quality economy stamps with an easy to read font in 3mm size is a great place to start. I like to have lower case, upper case and numbers at hand. If you think metal stamping is something you’re going to really love, I’d suggest plated stamps that are also rated higher on the Rockwell Scale. This scale measures the indentation hardness of a metal, meaning this will tell you how deep the impressions will be from your metal stamp. This all depends on the surface you’re stamping and the force with which you stamp. It’s important that you know if you’re stamping into a softer metal like aluminum (a great place to start) or something very hard like stainless steel (this material can wear down your metal stamps over time, so you need stamps designed to handle it.) We published a metal stamping blank hardness chart last week. In the carousel below you’ll find links to a variety of stamps from economy to branded to premium. The prices are significantly different, so if your budget is tight, start with economy stamps and see where they take you. If you really get into stamping, you can also explore Design Stamps, something we’ll talk about in a future post.
Steel Bench Block
We highly suggest that you purchase a steel bench block for metal stamping. Yes, you can stamp on concrete or wood, but you’re not going to get the same quality results. Concrete will scratch and mar the back of your blanks and wood is too soft. You need something hard, smooth, sturdy and flat, a steel block fits the bill! They come in an array of sizes, but a small 2″x2″ block will work fine when you’re starting out. I highly recommend getting a pad to put under your bench block, not a towel. A rubber mat or leather bench pad will work best. You want to be sure the surface stays flat so you get even impressions. The pad will also help keep the noise down, as you can imagine, metal stamping is very, very loud. Our doggies do not like it at all.
Brass Hammer
Yes, you can use a steel hammer, but the problem with steel is that the energy of your hits will transfer back into the hammer. This can cause the hammer to bounce back when you strike and create skipped or ghost impressions. Brass is softer than steel, it will take the impact of the hit and transfer the energy into the blank, helping you make deeper impressions. We love the ImpressArt Brass 1 Pound Hammer, not just because we work with ImpressArt, but because it’s a brilliant design. The short, stubby, grip friendly handle makes it easy to swing and keeps the momentum where it belongs, in the hammer head.
Metal Stamping Blanks
When you’re first starting out, metal stamping blanks are the best place to hone your technique. Eventually if you really get into stamping, you will probably start looking for other things to stamp like pennies, silverware, tin cans…or whatever else you think will make for great metal stamped jewelry or decor. Metal stamping blanks come in a wide array of sizes, shapes and metals. For the novice, we think aluminum is your best starting point. It’s very easy to stamp and very inexpensive. As your stamping improves you can move up to pewter, copper, brass and nickel silver. If you want to take things to another level you can try sterling silver or alkeme (a less expensive sterling alternative.) You can buy sheets of metal for practice if you want to just get a feel for the swing of the hammer and the force you need to make impact. We suggest starting with basic shapes like circles, ovals, sticks and squares and then working your way to washers and other shapes.
Tape
One of the biggest challenges in metal stamping is planning and aligning your words and letters. We have found that using masking or white plastic tape is a huge help in getting things lined up properly and securing your blanks to prevent them from slipping when you hit them. You can use a marker and a ruler to plan placement of your letters. You can also use the top of the tape to keep the letters in your words all at the same level. Try Stamp Straight Tape from ImpressArt, we love it!
There are lots of other fun tools and materials you can add to your arsenal if you get deeper into metal stamping, but this is the best place to get started metal stamping. We’ve included image and text links to products you can buy. Just an FYI, we use affiliate marketing on our site so if you click on a link and make a purchase you get a small percentage of the sale. This is how we can afford to give away our tutorials and articles for free. Within the next few months, we’ll have products and kits you can buy from us directly, stay tuned. We’re excited and we hope you are too!
Happy Stamping,
Margot and Avalon