
I may not be Wonder Woman, but there are days when I feel like I could surely use some super powers. How about you? If you’re standing strong in the face of adversity or just navigating the challenges of day to day life, a little bit of super hero inspiration may be just the thing you need to stay the course. In this case, I was inspired to whip up some Wonder Woman cuffs I can use to deflect whatever life tosses my way. Now if I can whip up a golden lasso of truth, saucy bustier and an invisible plane, we’ll really be talking!
Here’s what you need to make some Wonder Woman Cuffs of your own! Kapow!
Materials
2 1.5″x6″ aluminum cuff bracelet blanks
2 dimensional metal star charms
2 silver tone 1/8 Inch Hollow Rivets 1/16 Inch Diameter
ImpressArt- 3mm Fun Star Design Stamp
ImpressArt 1lb. brass stamping hammer
ImpressArt metal stamping block
Folk Art enamel acrylic paint licorice
Beadsmith EZ-Rivet 1/16″ Piercing and Setting Tool
Bracelet bender
Ruler
Beadalon flush cutter
Cotton swab
Paper towel or soft cloth
Amazon.com Widgets
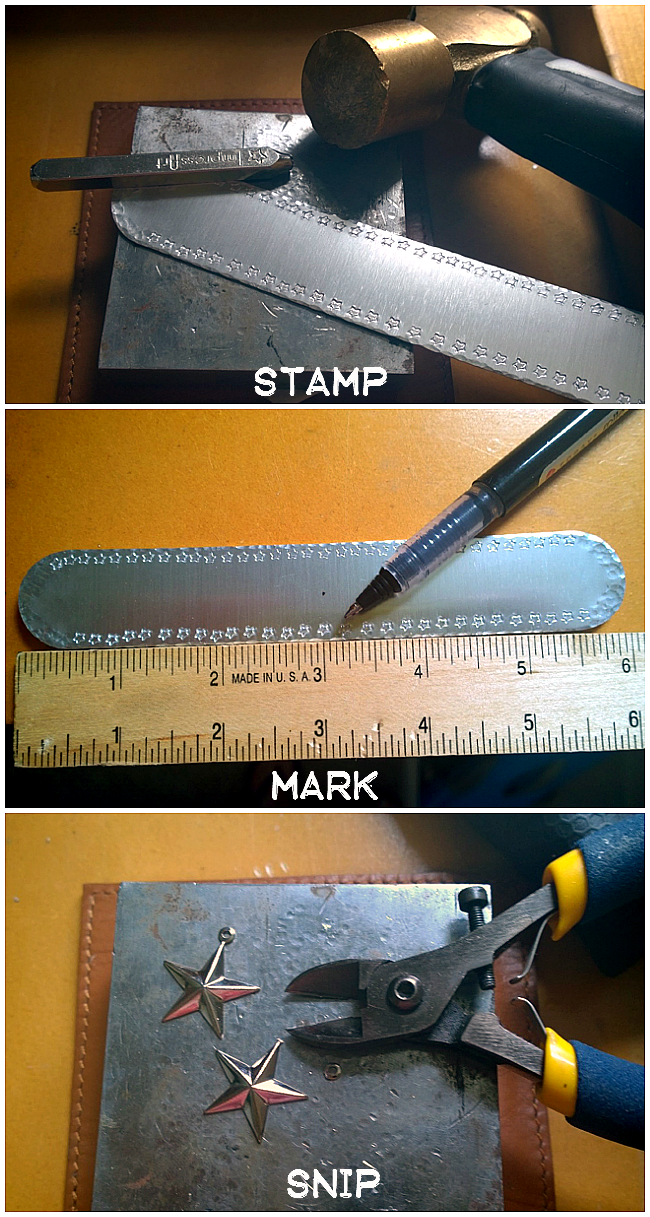
Step one: Use the star stamp to stamp stars around the edges of the bracelet blank. Use the round end of your brass hammer to add texture to the edges as shown. Step two: Use a ruler to mark the center point of your blank. Step three: Snip the tops off of the star charms with flush cutters. (You can sand these edges with a heavy grit sand paper or jeweler’s file if you like.)
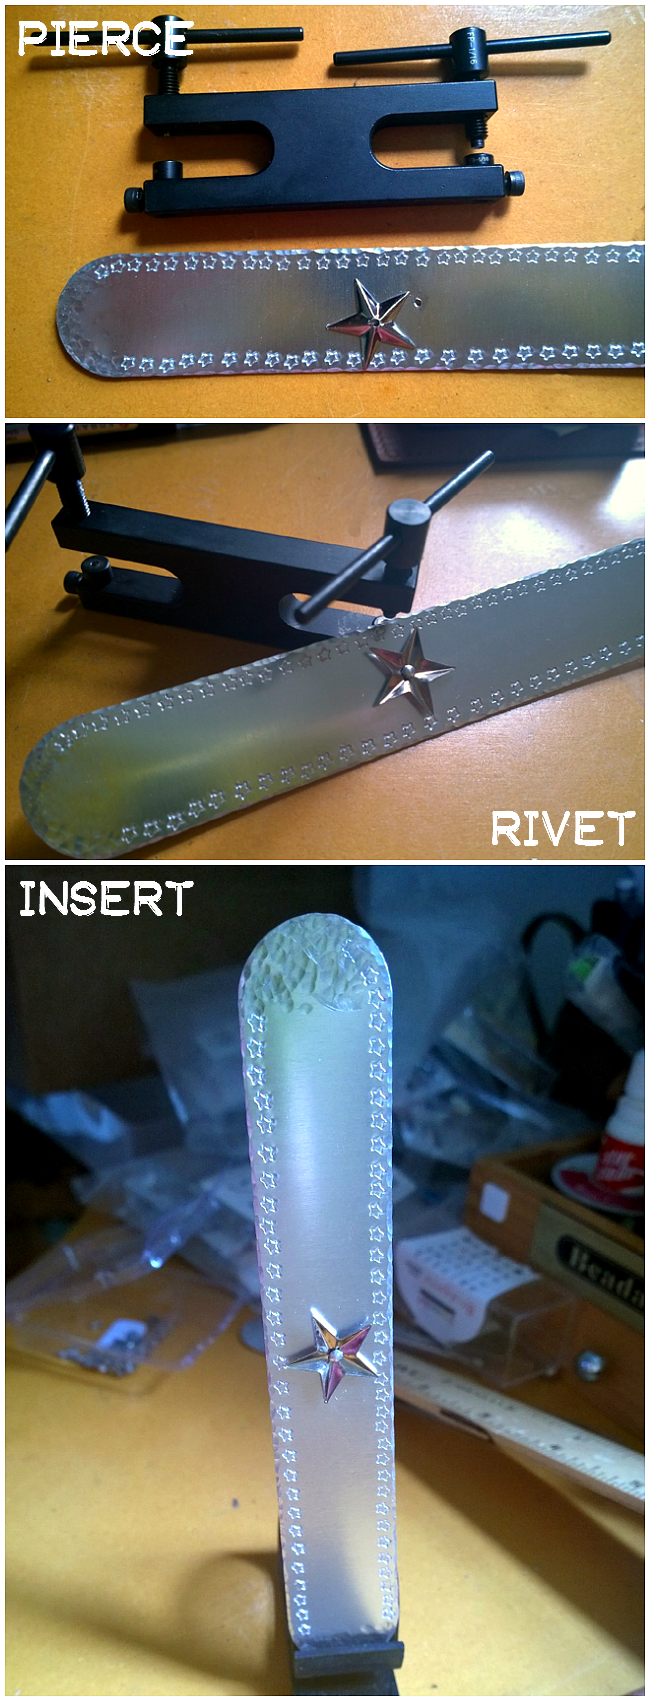
Step four: Use the piercing side of the riveting tool to make a hole in the marked center of your bracelet blanks and your star charms. Step five: Place rivet into the holes on the star and the blank, the rounded side faces up, the star should be facing with the raised areas towards the bracelet. Use the riveting side of the riveting tool to screw the rivet down securing the star and blank together. Step six: Insert one side of your bracelet into the bracelet bending pliers as shown.
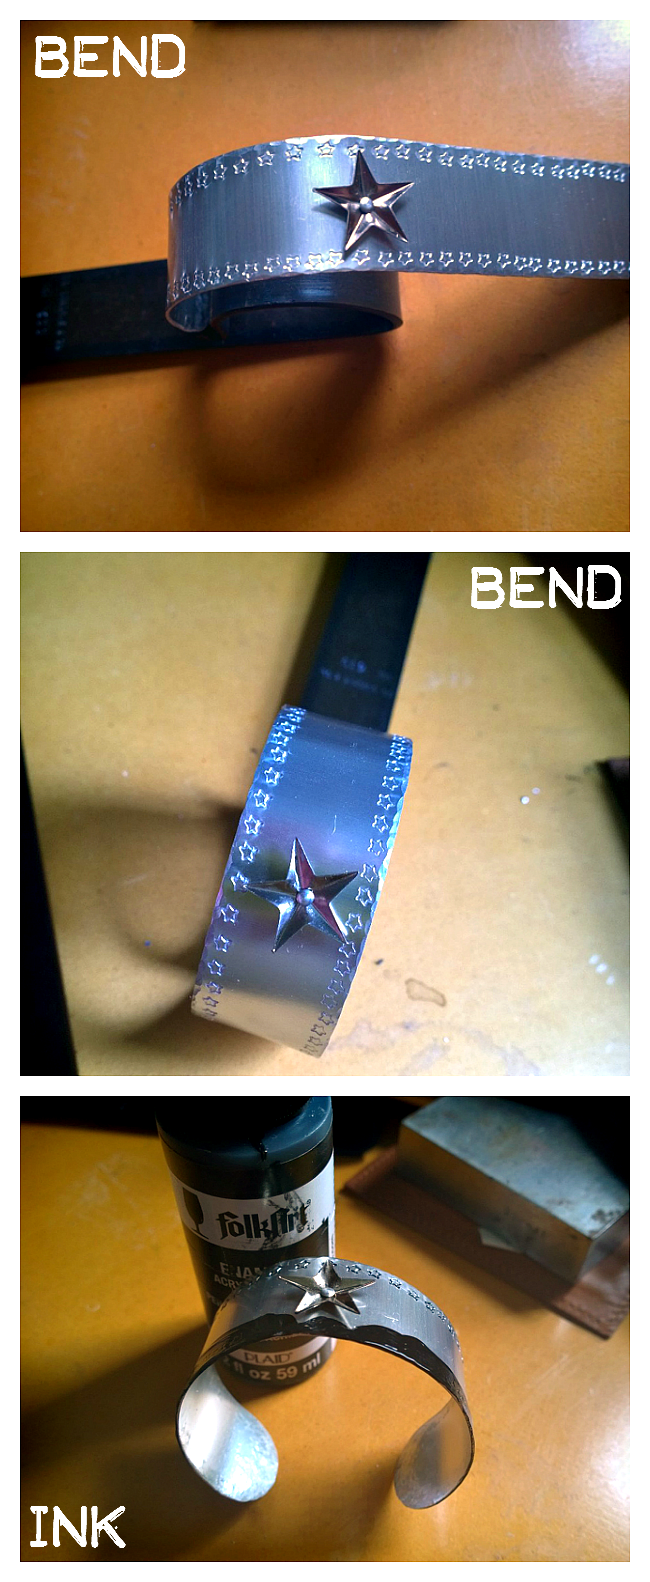
Step seven: Bend the bracelet over the arch of the bracelet bending pliers as shown, this will bend one half of your bracelet. Step eight: Flip the bracelet over and repeat. Now you have a bracelet! Step nine: Dab the enamel paint into the stamped stars with a cotton swab or your finger tips. Let this sit for about 30 seconds, then wipe the ink from the surface, leaving some in the stars to help define them.
That’s it! You’re a crafty super hero! Aw, yiss.
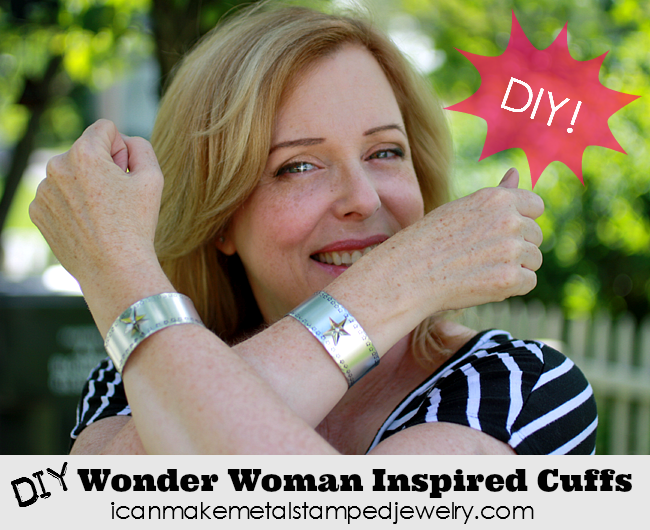
These Wonder Woman Cuffs make me feel like I can take on the world. How about you, wonder woman?
Cheers,
Margot and Avalon
*DIY Project Policy: Our tutorials are meant for your creative inspiration. Feel free to make and gift or wear these designs. Please make sure that you give credit to us as the designer if you make and share these designs on your blog or social sites. Please do not make and sell copies of our designs or sell them as kits. Please do not teach these designs as classes for profit. This is how we make our living and we ask that you respect our creativity and the time it takes to design, photograph and write these free tutorials. You may use a single photograph from each project online in blog round-ups or blog posts ONLY if you include a direct link back to our tutorial. Any use of these designs for retail sale for profit online in places like Etsy or eBay or in retail bricks and mortar, flea markets or outdoor fairs is not permitted. Thank you!
(FTC DISCLOSURE: *This post contains affiliate links, if you click on a link and make a purchase we get a small percentage of the sale. The blogger is employed by ImpressArt, but this is her personal blog. All opinions are 100% her own!)