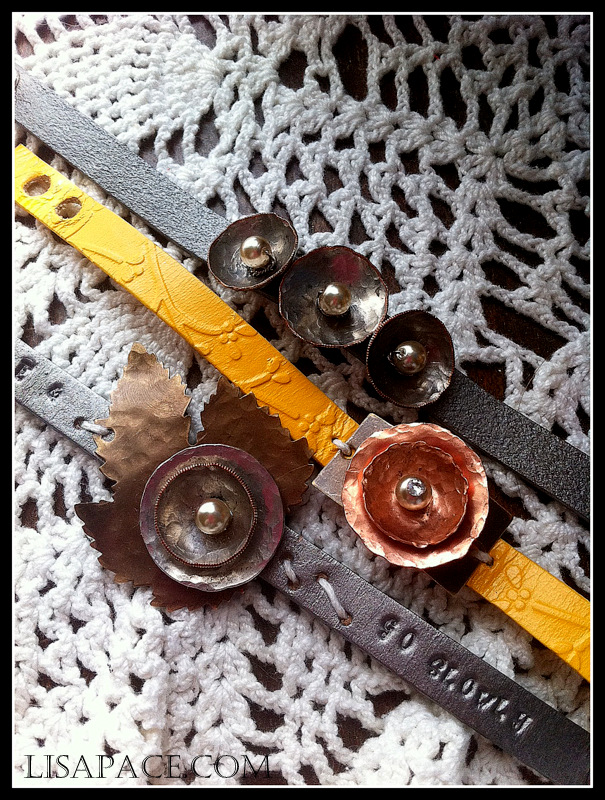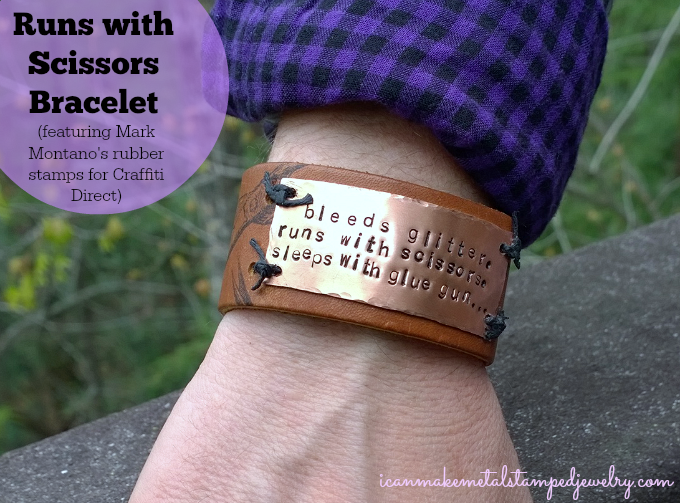
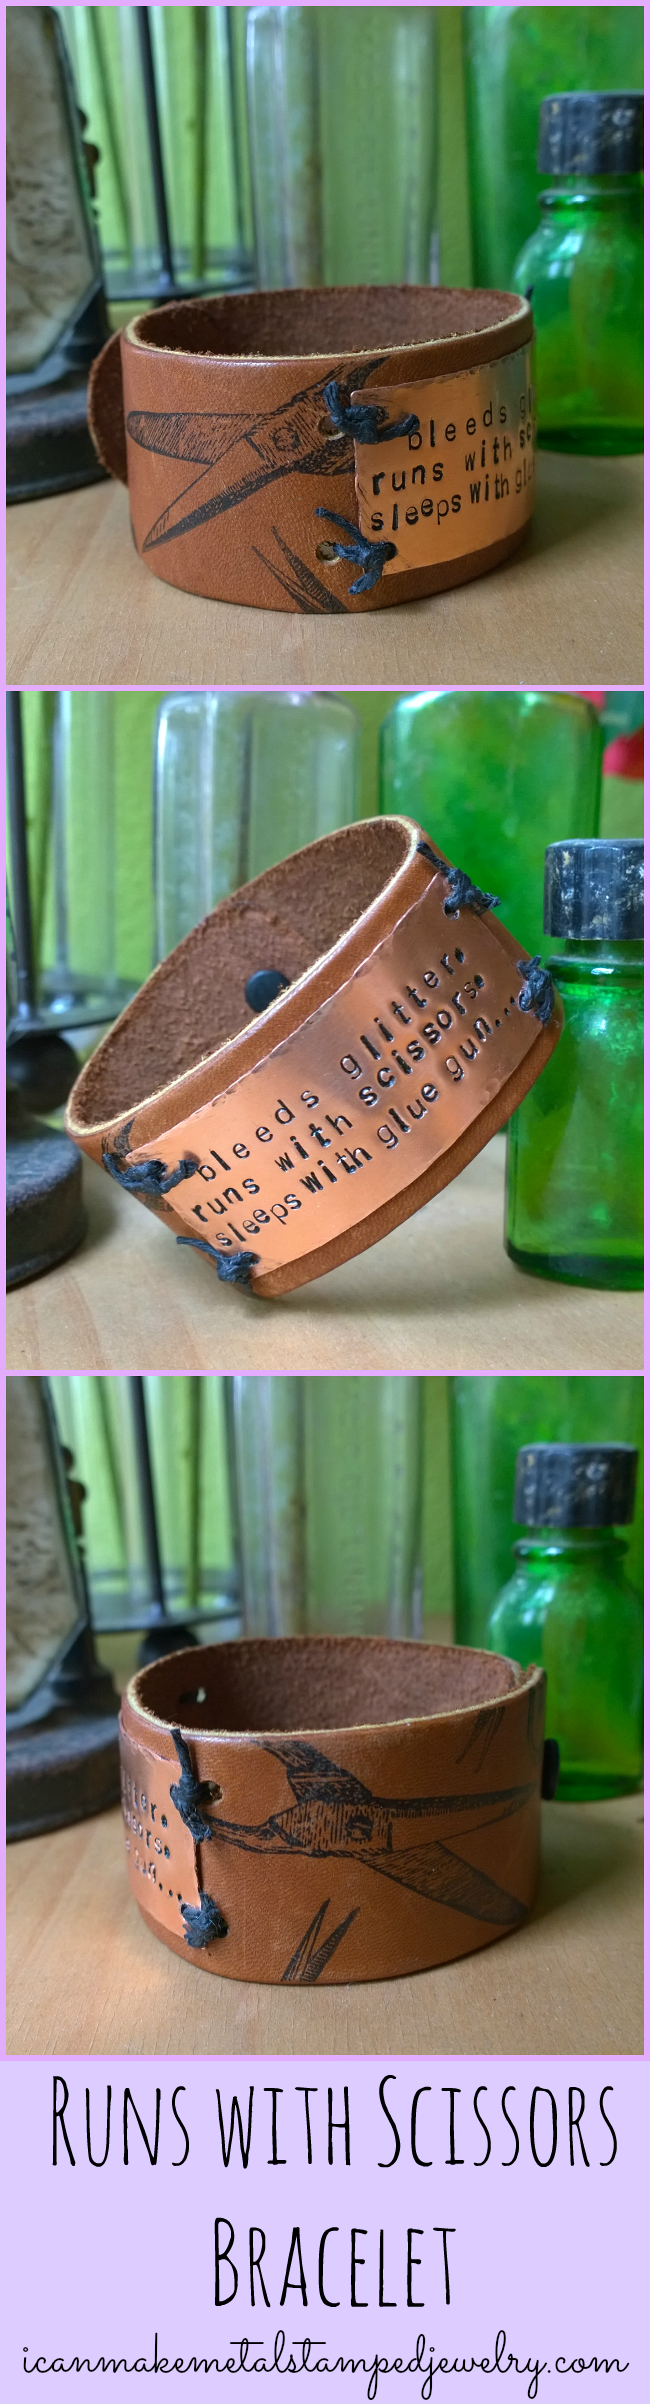
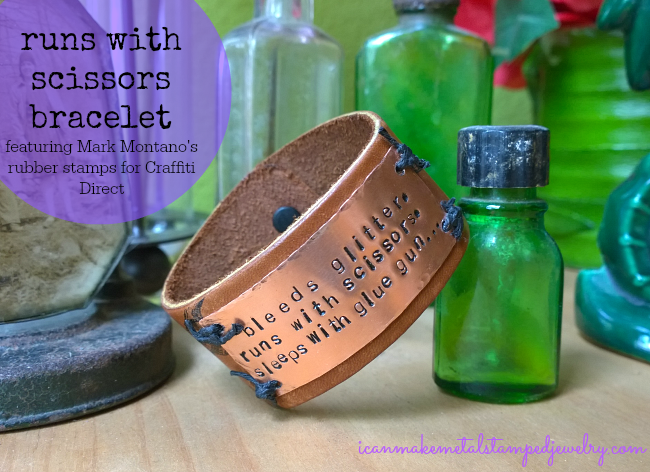
We had so much fun making this Runs with Scissors Bracelet with Mark Montano’s stunning new rubber stamps line for Craffiti Direct. Mark is one of our favorite people on the planet and he’s an amazing designer. Mark and Craffiti Direct *sent us two sets of vintage scissor stamps and we immediately knew what we wanted to do with them. The graphics are so rich and detailed that they looked fabulous on the tobacco brown leather wrist band. Plus clear stamps are so much easier to use because you can see where you’re placing the images before you stamp. This is a uni-sex idea, you can change up the text to reflect the person for whom you’re making this. We wanted a rustic, funky vibe, so this is not perfectly stamped. Feel free to stamp more perfectly if that’s your thang. It’s your thang, do whatcha wanna do.
Just a few caveats before we get started: You need to be sure to use a permanent ink like Ranger Archival or Staz-On. Make sure you that you file or sand the edges of your metal thoroughly if you cut it yourself. These shears are designed for use with 20 gauge or thinner sheet metal. They won’t work on thicker metal. Be very careful if you decide to use them as they’re sharp enough to cut through metal so they’re definitely sharp enough to do some damage to you. Being craftastrophe prone, I take my time when working with tools like these. We also provided links below to metal parts that are pre-cut so you can get right to stamping!
Level: Intermediate
Skills: rubber stamping, metal stamping, meta
You will need:
leather wristband with snaps(to make it deeper brown use leather dye)
24 Gauge Copper Sheet OR Copper Tag with Holes
Vintage Scissors Stamps
Waxed Linen Cord Black
Ranger Archival Ink Black
Folk Art Enamel Acrylic Paint, Licorice
Impressart 3mm Lowercase Economy Metal Stamp Set
ImpressArt Metal Shears
ImpressArt Nylon Jaw Bracelet Bending Plier
ImpressArt 2-Hole Punch
Leather Hole Punch or Crop-A-Dile
ImpressArt Metal Stamping Hammer
Chasing Hammer
ImpressArt Steel Stamping Block
Impress Art Stamp Straight Tape
Black marker
Ruler
Cotton swab
Paper towel
Amazon.com Widgets
Amazon.com Widgets
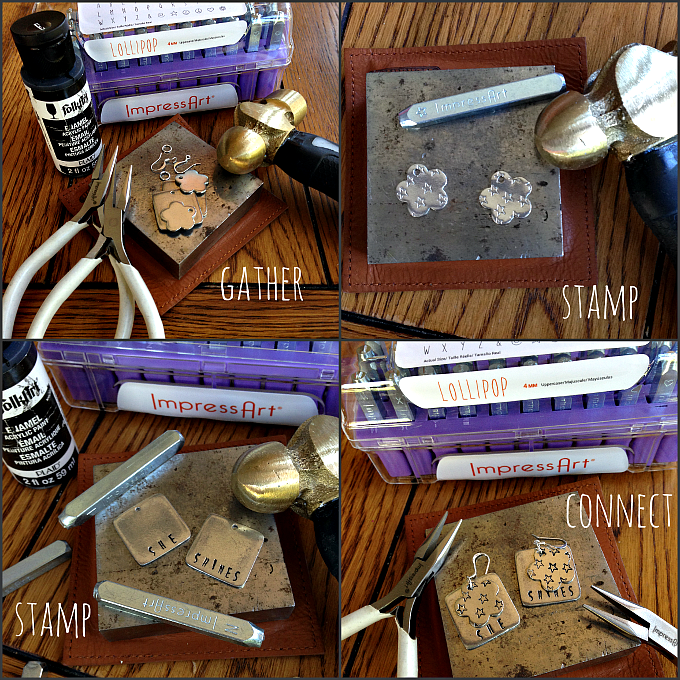
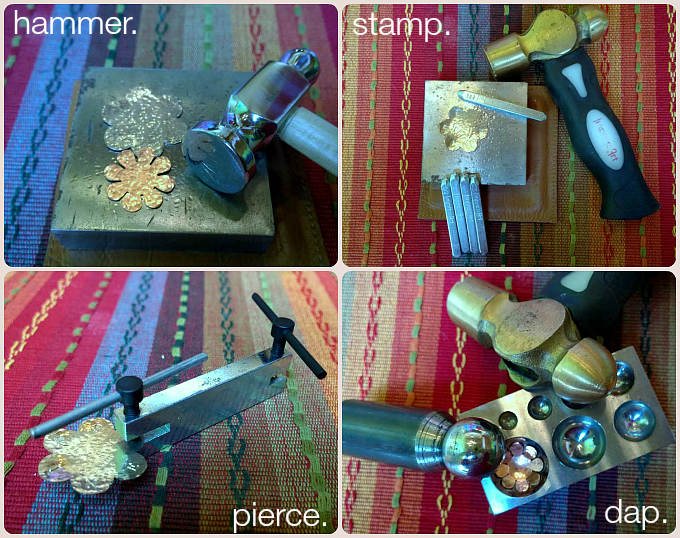
Step one: If you are cutting your own piece from sheet metal or a strip, measure and mark a 1″x2 1/4″ piece. Step two: Cut carefully using the metal shears. IMPORTANT: USE A METAL FILE OR HEAVY GRIT SAND PAPER TO SAND EDGES! Step three: Mark and punch holes in all four corners with 2-hole punch. Step four: Hammer around the edges with the ball end of your chasing hammer.
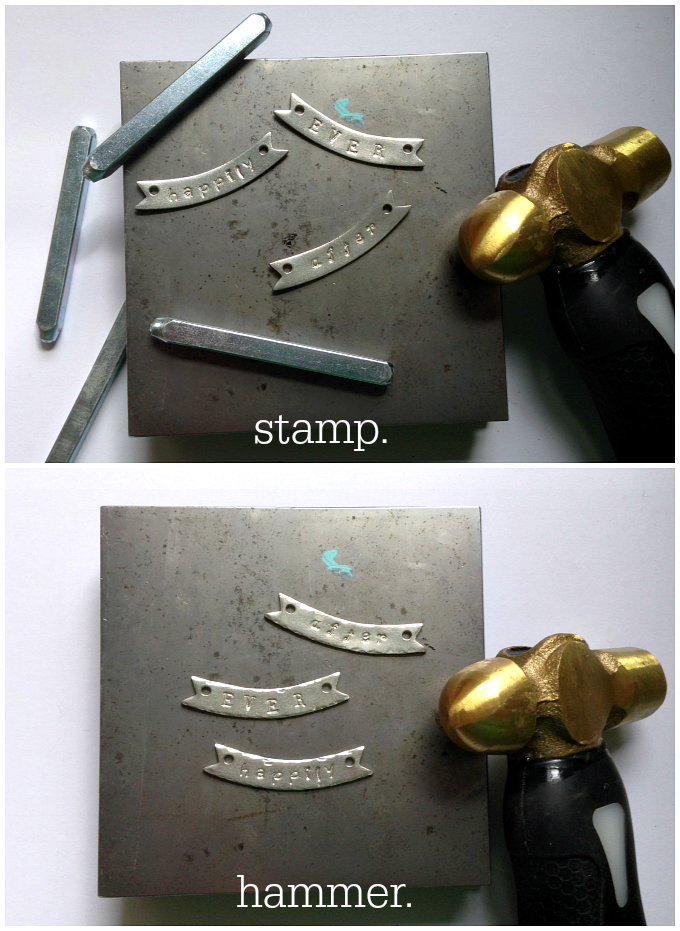
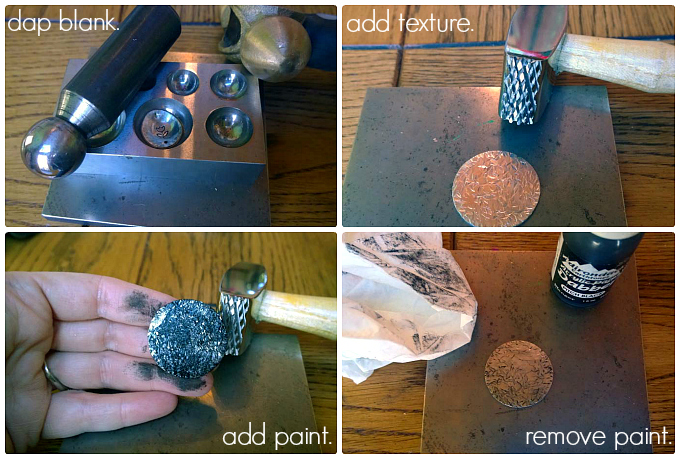
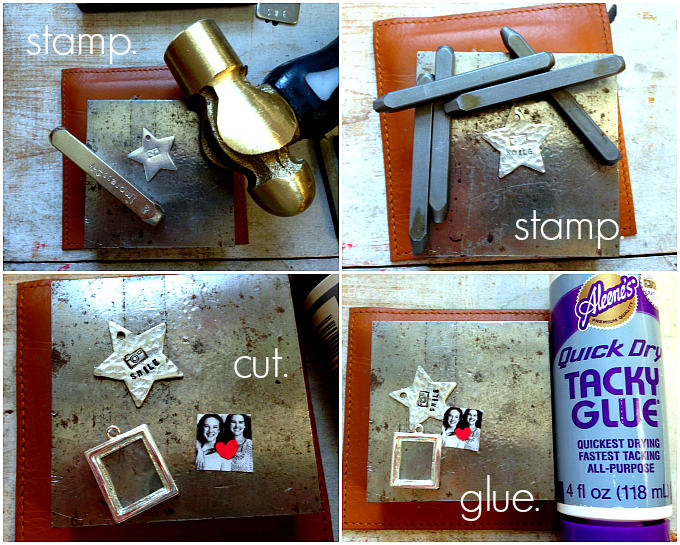
Step five: Use the holes in your cut metal piece to mark the placement of the first set of holes in your leather. Punch 1/16″ holes using an awl, leather punch or Crop-a-dile. Step six: Use permanent ink and small scissors stamps to stamp handles and blades of scissors on your leather as shown. Step seven: You are stamping three lines into the blank using 16mm stamps. I started with the top and shortest line, counting the number of letters and spaces to find the center. Then I work out from there. This first line has a space in the center. The next two lines have A LOT of letters, so I started at the far left and worked my way over. You will need two pieces of tape to secure the blank. The lines are: bleeds glitter, runs with scissors, sleeps with glue gun… I used punctuation stamps to add commas and the ellipses. Step eight: Swipe across letters with black enamel paint on a cotton swab. Let the paint sit for 30-60 seconds. Wipe off excess with a paper towel.
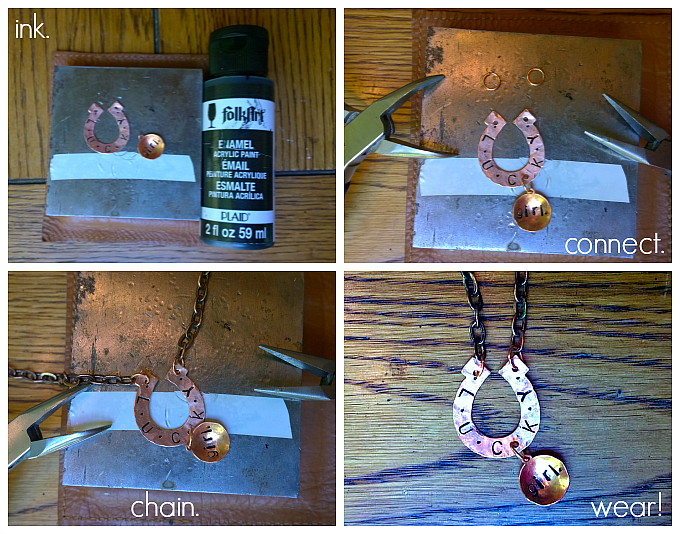
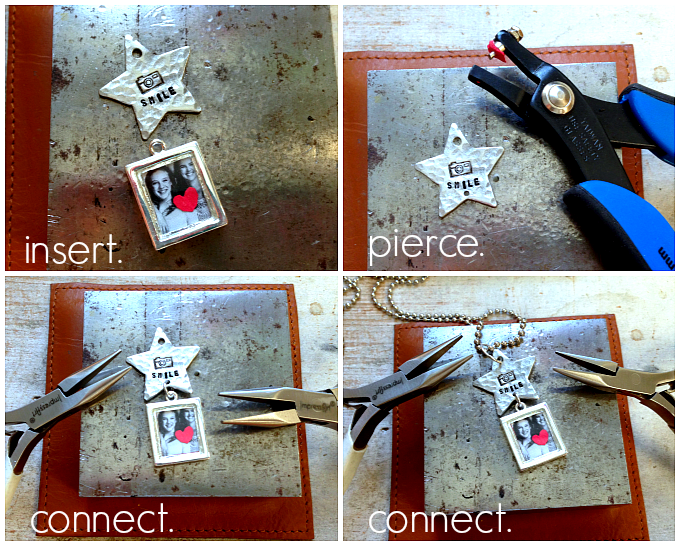
Step nine: Use the bracelet bending pliers to create a slight arc in your stamped metal tag. Step ten: Mark the placement of your second set of holes so that you can lace the tag to the front of the bracelet. Use a leather punch, awl or Crop-a-dile to punch 1/16″ holes. Step eleven: Lace tag to front of bracelet with waxed linen as shown. Thread linen cord ends through the top of the bracelet. One goes into the tag hole and leather and the other through the leather. Then cross the threads underneath and thread each one through the hole on the opposite side. Don’t tighten then down. Do this for all four sides. Step twelve: Knot each one securely. Cut off ends leaving a little bit of excess as in photo.
Phew! You did it!
We hope you love this DIY Runs with Scissors Bracelet as much as we do. Check out Mark’s YouTube Channel, he dishes up TWO divine DIY videos every week. Tell ’em Madge sent ya.
Happy Stamping,
Margot and Avalon
*DIY Project Policy: Our tutorials are meant for your creative inspiration. Feel free to make and gift or wear these designs. Please make sure that you give credit to us as the designer if you make and share these designs on your blog or social sites. Please do not make and sell copies of our designs or sell them as kits. Please do not teach these designs as classes for profit. This is how we make our living and we ask that you respect our creativity and the time it takes to design, photograph and write these free tutorials. You may use a single photograph from each project online if you include a direct link back to our tutorial. Any use of these designs for retail sale for profit online in places like Etsy or eBay or in retail bricks and mortar, flea markets or outdoor fairs is not permitted. Thank you!
(Disclosure: Blogger was provided product for post, all opinions 100% her own. Post contains affiliate links, if you click on a link and make a purchase, we get a small percentage of the sale.)

*DIY Project Policy: Our tutorials are meant for your creative inspiration. Feel free to make and gift or wear these designs. Please make sure that you give credit to us as the designer if you make and share these designs on your blog or social sites. Please do not make and sell copies of our designs or sell them as kits. Please do not teach these designs as classes for profit. This is how we make our living and we ask that you respect our creativity and the time it takes to design, photograph and write these free tutorials. You may use a single photograph from each project online in blog round-ups or blog posts ONLY if you include a direct link back to our tutorial. Any use of these designs for retail sale for profit online in places like Etsy or eBay or in retail bricks and mortar, flea markets or outdoor fairs is not permitted. Thank you!