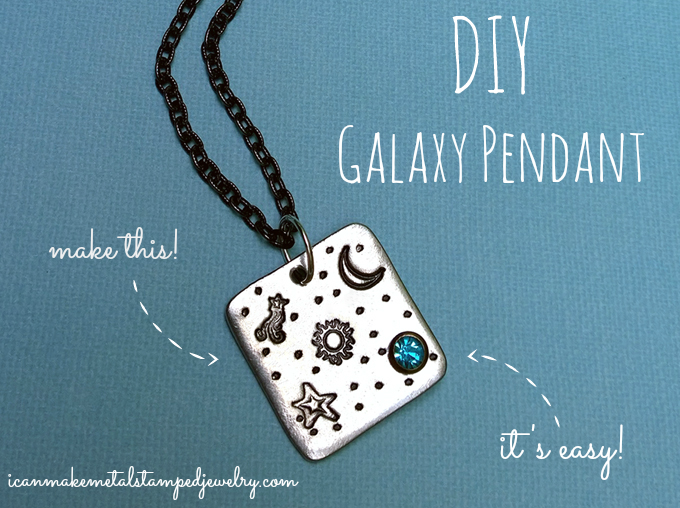
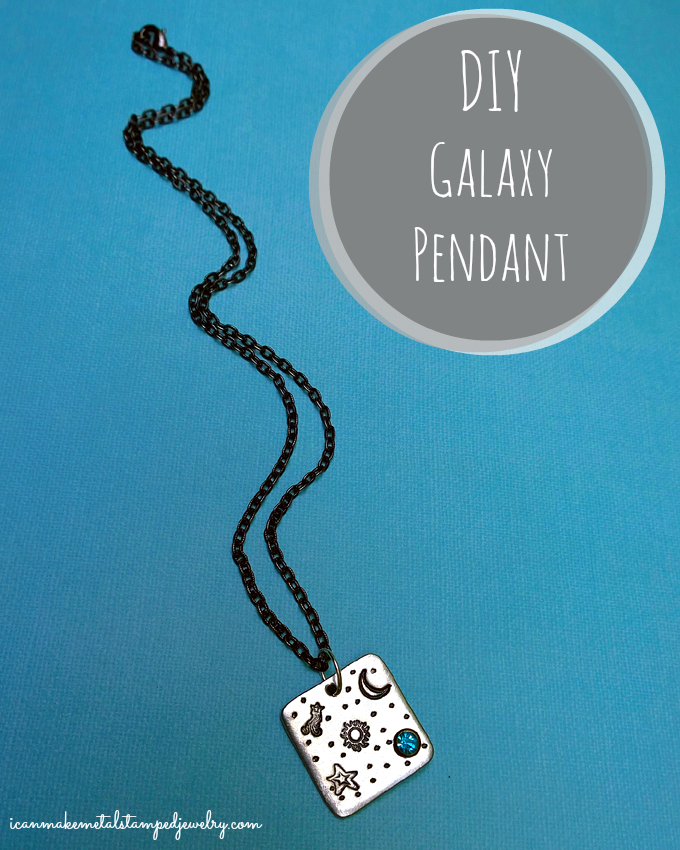
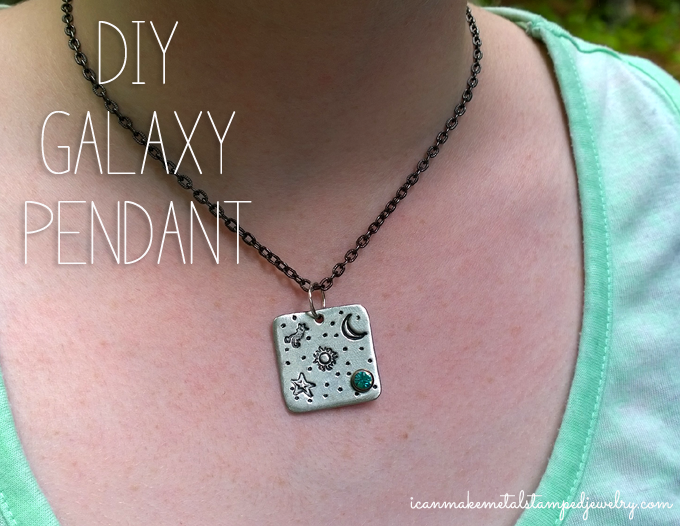
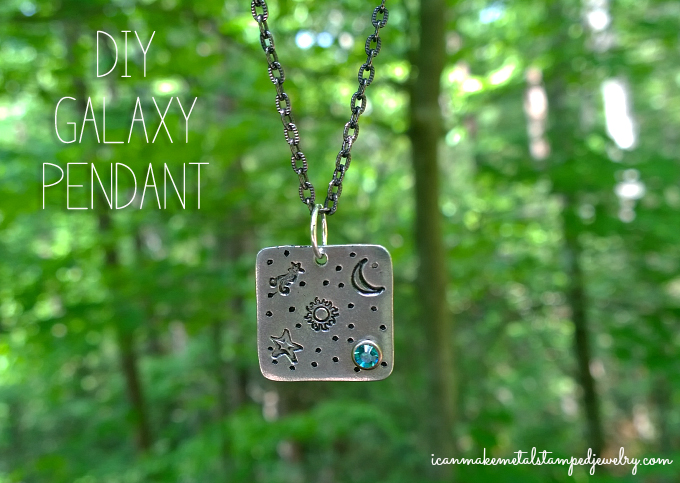
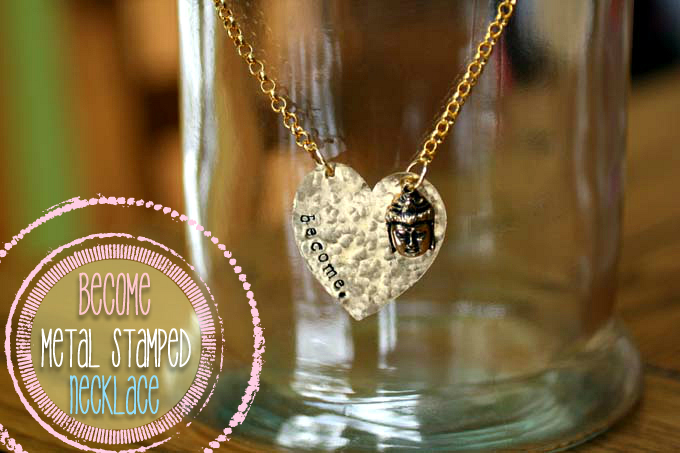
Galaxy crafts are everywhere lately so we decided to design a metal stamped version of the concept. This DIY Galaxy Pendant is perfect for summertime with a peasant blouse or a maxi dress. Add a floral headband and a wrist full of stamped and stacked bracelets and you’ll look like you stepped out of Coachella. Plus, you can say you made it yourself, how cool is that? Oh, and if that’s not enough to tickle your fancy, you can make this necklace in about 15 minutes too. Sweet!
*You will need:
ImpressArt Pewter Stamping Blank Square
Czech Crystal Snap Rivet, Teal
Folk Art Enamel Acrylic Paint, Licorice
10-MM Jump Ring, Silver Plated
Gun Metal Plated Chain Necklace With Clasp
ImpressArt Star , Moon, Shooting Star and Sun Stamps
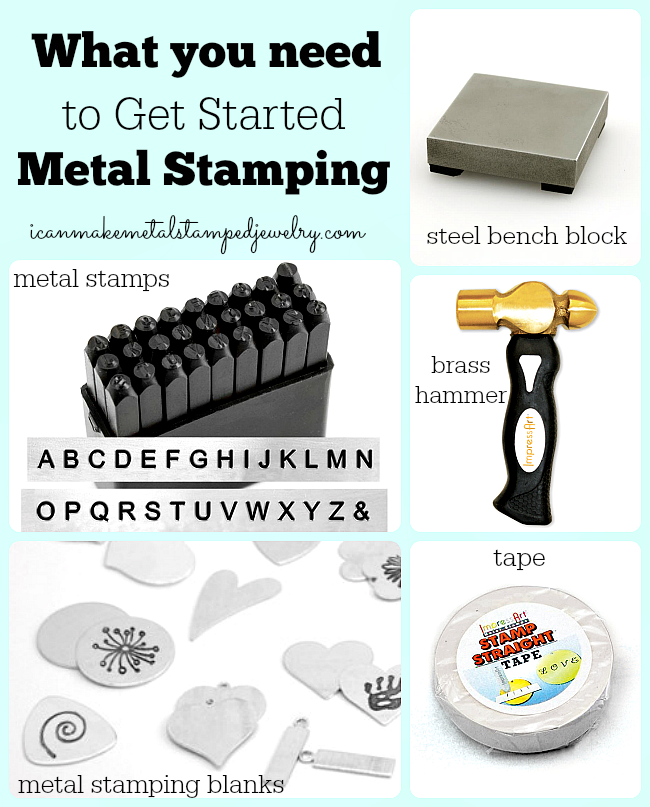
Wood Handle Scratch Awl
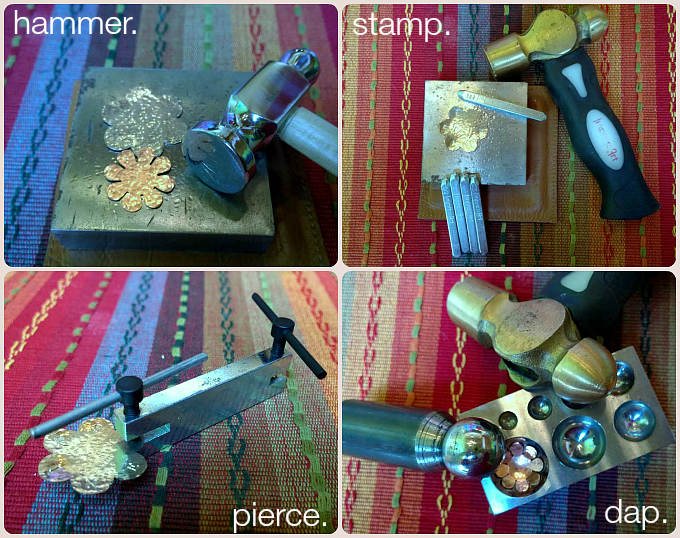
Ergo-Angle Metal Stamping Hammer
ImpressArt 2 by 2-Inch Steel Block
ImpressArt Crystal Rivet Setting Kit
ImpressArt 2-Hole Punch, Large
2 pairs ImpressArt Chain Nose Pliers
ImpressArt Stamp Straight Tape
Cotton Swab
Paper Towel
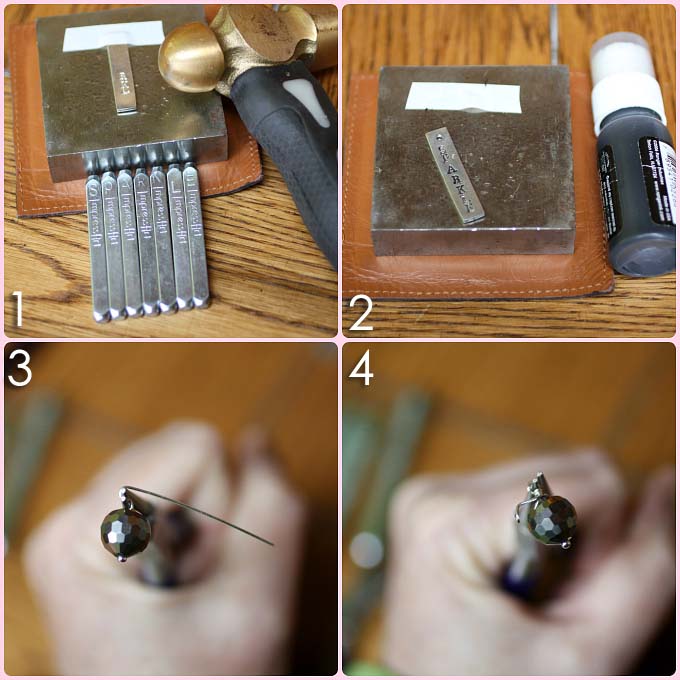
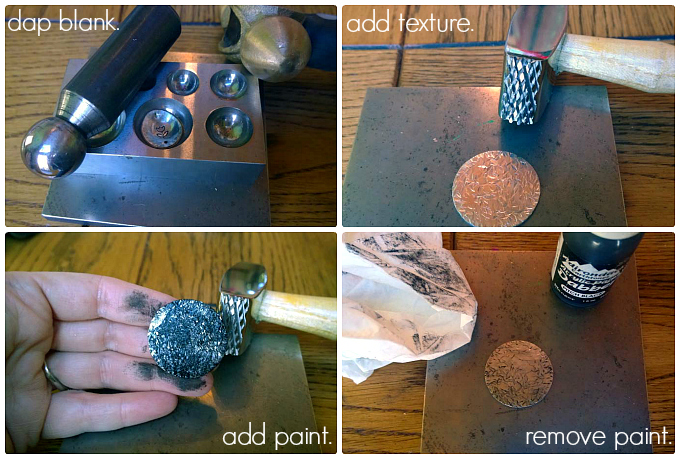
Step one: Stamp the middle, top right and left and bottom left corners of your blank with the sun, moon, star and shooting star from ImpressArt’s Space and Beyond pack. Leave the right bottom corner blank. Step two: Use an awl to stamp tiny stars across the open areas of the blank.

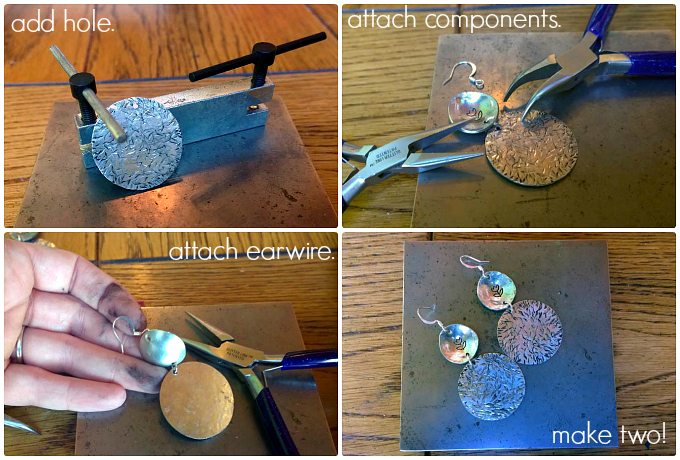
Step three: Use a cotton swab to swipe enamel paint across the surface of your blank, digging it into the recessed areas. Wipe off excess with a paper towel or soft cloth. Step four: Use the smaller (5/8″) side of the ImpressArt large 2-hole punch to pierce a hole in the right bottom corner of the blank.

Step six: Use ImpressArt’s rivet setting tool, mat and the brass hammer to set the rivet into the pierced corner of the blank. Thread the crystal side into the front and the snap side over the back. Turn pendant over and place tool over back of snap. Strike top of tool with hammer. Don’t overdo this, you don’t want to chip or crack your crystal. Make sure it’s secured, you may have to it it a few times. Step seven: Use chain nose pliers to secure a large jump ring to the pendant and thread it on a chain.
There you have it folks, a super simple DIY Galaxy Pendant. Not into the cosmic theme? No worries! You can take this idea in so many directions using ImpressArt Design Stamps. Try Zodiac Stamps, Holiday Stamps or Floral Stamps! Whatever you do, metal stamping lets you tell your story with style.
Cheers,
Margot and Avalon
(Post contains affiliate links. If you click on a link and make a purchase, we get a small percentage of the sale.)
*DIY Project Policy: Our tutorials are meant for your creative inspiration. Feel free to make and gift or wear these designs. Please make sure that you give credit to us as the designer if you make and share these designs on your blog or social sites. Please do not make and sell copies of our designs or sell them as kits. Please do not teach these designs as classes for profit. This is how we make our living and we ask that you respect our creativity and the time it takes to design, photograph and write these free tutorials. You may use a single photograph from each project online in blog round-ups or blog posts ONLY if you include a direct link back to our tutorial. Any use of these designs for retail sale for profit online in places like Etsy or eBay or in retail bricks and mortar, flea markets or outdoor fairs is not permitted. Thank you!


)