
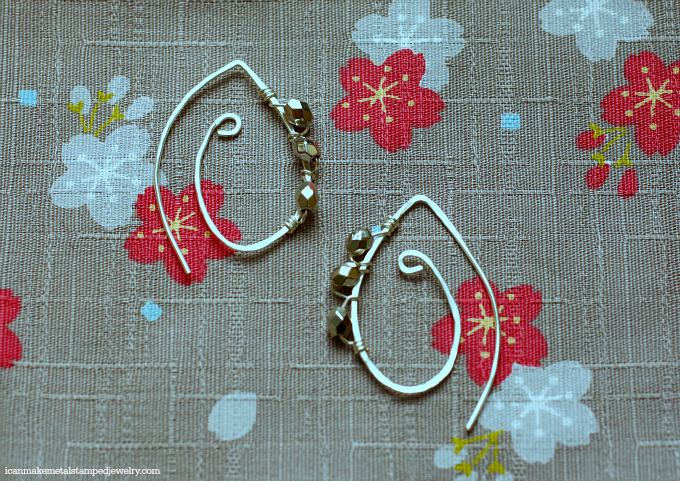
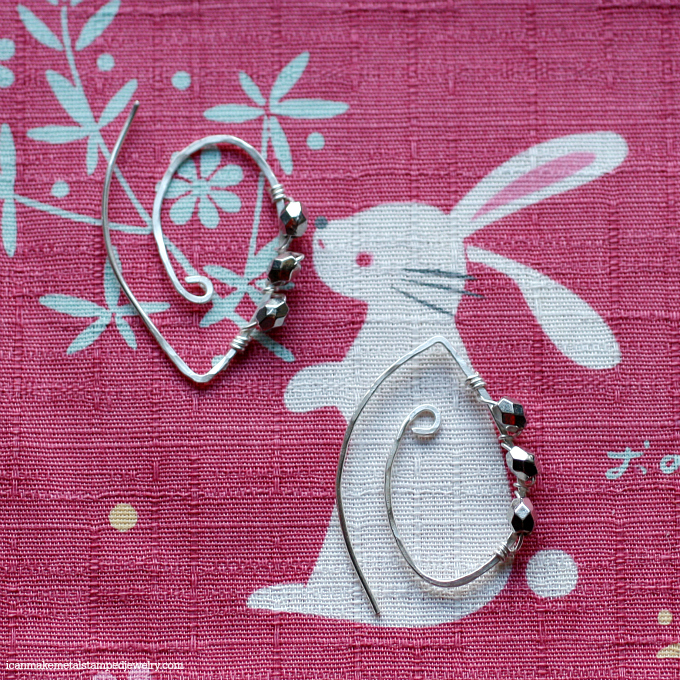
This week, we’re having more fun with wire making a pretty pair of Anatomical Wire Heart Earrings using 20 and 24 gauge Beadalon German Style Wire. Valentine’s Day is just around the corner, and these will look beautiful under candlelight or anytime you want to shine. We love working with this wire because it’s not dead soft like aluminum and copper, so it holds a shape more readily and work hardens very easily. Plus you can’t beat the high shine of the silver plating on this wire.
I’ve been having a creative dialog with my friend Kathy Cano Murillo, check out her stunning soldered hammered heart necklace that inspired me to make these earrings!
Watch the video and then grab the materials and step by step instructions below!
Materials (These are affiliate links, if you click on a link and make a purchase we get a small percentage of the sale.)
2 4″ lengths Beadalon German Style Wire, Round, Silver Plated, 20 gauge
2 5″ lengths German Style Wire, Round, Silver Plated, 24 gauge
6 Czech Fire-Polished Faceted Glass Beads Round 3mm Silver Metallic
Beadalon Steel Bench Block
1″ diameter dowel
Beadalon Nylon Jaw Pliers
Beadalon Chain Nose Pliers, Round Nose Pliers, Flush Cutter, Flat Nose Pliers (You can find them all in this Beadalon 5-Piece Tool Kit
Ruler
Wire Heart Earrings Instructions
1. Cut two 4″ lengths of 20 gauge wire. Be sure to cut to the flush or flat end of the flush cutters. Go back and cut both ends, you may have to nip off the pointy side on one end to make both ends flush.
2. Measure to the 1.5″ mark and use flat nose pliers to make a sharp angled bend in the wire.
3. Form the shorter wire end around your dowel to make an arc. Repeat with the opposite end.
4. Grasp the longer end of your wire with the end of your round nose pliers. Turn a small loop working in the direction of the arc.
5. Use the dowel and your fingers to bend the end into the heart shape, see photo above.
6. Use the flat end of your chasing hammer to flatten the wire hearts. You need to make a left and a right earring, so hammer on the opposite side of each heart shape. Work only on the longer side of the wire and at the top of the wire that will slide into your ear.
7. Use the round end of your chasing hammer to add some texture.
8. Cut a 5″ length of 24 gauge wire. Wrap tightly around the outer upper edge of the heart shape three times.
9. Slide a bead on the wire, wrap once. Repeat two more times for a total of three beads.
10. Use flat nose pliers to tighten up the top and bottom wraps.
11. Cut off excess wires at top and bottom.
12. Use chain nose pliers to tuck wires under.
13. Repeat for second earring. Make a left and a right earring, wrapping the beads to the front of each hammered heart, so they will be facing forward in the ear when worn. See photo!
14. BONUS TIP! Insert wire ends into a Bur Cup Wire Rounder tool to round them and make them less sharp. This makes it easier to slide them into your piercings.
That’s it, you made your own pair of Anatomical Wire Heart Earrings! Fun, fast, and fabulous! And you can say you made it yourself. If you enjoy our videos and tutorials, we’d LOVE it if you subscribe to our YouTube Channel
and come back soon!
Cheers,
Margot and Avalon